Open topic with navigation
Creating Event Processors
When creating an event processor, consider the following common setup:
- Go to System Setup > Right-click the Event Processors setup group.

- Select New Event Processor, and the Event Processor Wizard will display step '1. Identify Event Processor.'
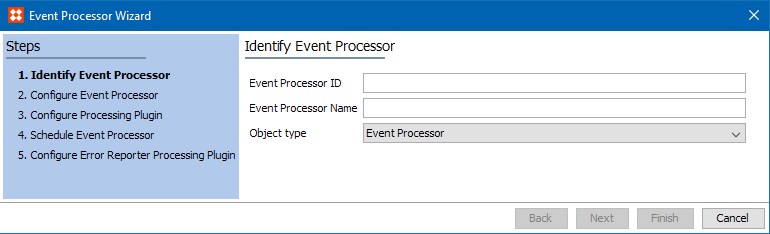
- Enter an ID.
- Enter a Name.
- Confirm the object type parameter is set to the default Event Processor.
- Click Next, and the Event Processor Wizard will display step '2. Configure Event Processor.'
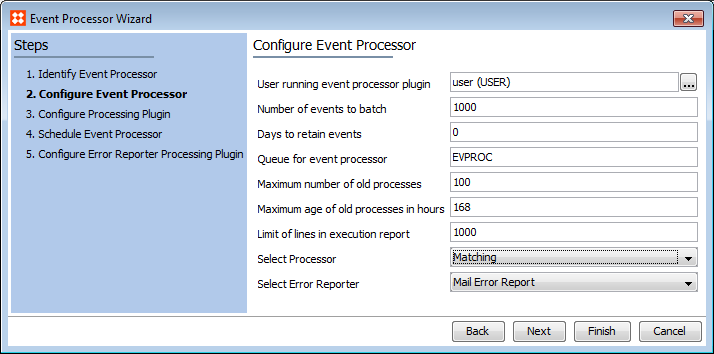
- Configure the new event processor by entering the information detailed below. Common setup is to use the default settings unless there is a valid reason to change them.
- User running event processor plugin: To search or browse for a user, click the ellipsis button (…). The privileges of the user selected must include the objects being processed since the selected user's privileges are applied to the event processor. Common setup is to create a separate user for each event processor to allow tracking of actions taken by each process.
- Number of events to batch: Specify the batch size. This allows multiple events to be transmitted in a single batch. Setting this number too low can result in slower processing as more background processes will be required.
- Days to retain events: Specify the number of days to keep events once processed. Common setup is to leave this at 0 since this option is not valid for an event processor; it is available for reprocessing events via an OIEP.
- Queue for event processor: Enter the name of a queue to process data from the event processor. The queue is automatically created if it does not already exist.
- Maximum number of old processes: Specify the number of ended processes the system will keep. Succeeded and ended processes are deleted when the number exceeds the specified limit. The oldest processes are deleted first. Setting this number too high may eventually degrade performance.
- Maximum age of old processes in hours: Specify the maximum age of ended processes that the system will keep. Ended processes are deleted when the maximum age is exceeded. Setting this number too high may eventually degrade performance.
- Limit of lines in execution report: Specify the maximum number of lines to store from the execution report in the log. This setting impacts storage used.
- Select Processor: Choose from the available options. Below are details for configuring each of the standard core processors:
- Expand LOV Value Changes allows the event processor to react on all LOV value update events (only for LOVs that use Value IDs) including those made manually from workbench or Web UI, via LOV value merge, via import, etc. Note that the processor handles LOV value updates only, not additions or deletions. An OIEP can be configured to listen for changes to LOV values and generate events for objects using the modified values.
- Image Cache allows the event processor to generate images for required conversions asynchronously and saves the resulting files to the image cache. Common setup is for all STEP systems to use this event processor as a means of optimizing asset export time to external systems. Only image conversion configurations with the 'Cache generated images' option checked are handled by this event processor. It is recommended that all systems using image conversions have imaging caching processors set up. For more information, see the Image Conversion Configurations section of the Export Manager documentation here.
- Matching allows for the generation / updating of match code values, as well as the option to run matching algorithms, whenever an event is processed on the objects acted on by the algorithm. Note that the configuration requires selection of a matching algorithm, and that match codes are only updated for objects acted on by the algorithm and only when events are passed for those objects.
- Revision Management allows automatic purging of object revisions to limit the total number of revisions retained. Multiple revision management event processors can be configured, which enables the number of revisions to differ based on the object type. It is strongly recommended that all STEP systems have this event processor set up as a means of managing the STEP database size.
- Select Error Reporter: Choose either Do nothing or Mail Error Report. If error reporting is selected, additional information must be supplied in step 5 of the wizard.
- Once any required changes are made, click Next, and the Event Processor Wizard will display step '3. Configure Processing Plugin.'
Important: The options displayed within the Event Processor Wizard step '3. Configure Processing Plugin' will vary depending on the processor selected in step '2. Configure Event Processor.'
- Configure the processing plugin if required.
Below are details for configuring each of the standard core processors:
- For the Expand LOV Value Changes processor, no further configuration is required. However, considerations for the event triggering definitions are provided in the Expand LOV Value Changes Processor Parameters and Triggers section here.
- For the Image Cache processor, see information in the Image Cache Processor Parameters and Triggers section here.
- For the Matching processor, see information in the Matching Processor Parameters and Triggers section here.
- For the Revision Management processor, see information in the Revision Management Processor Parameters and Triggers section here.
- Once any required configurations are made, click Next, and the Event Processor Wizard will display step '4. Schedule Event Processor.'
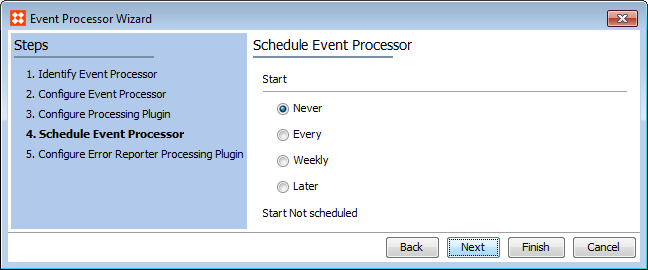
- Schedule the event processor by selecting a start option.
Options include:
- Never: Only start the event processor manually, no schedule is applied.
- Every: Interval in number of minutes that the event processor will run. One (1) minute is the shortest interval allowed and is closest to real time.
- Weekly: Specific weekday and time that the event processor will run and also the start and end dates for the schedule.
- Later: A specific time and date that the process will run only once.
- Once any required configurations are made, click Next, and the Event Processor Wizard will display step '5. Configure Error Reporter Processing Plugin.'
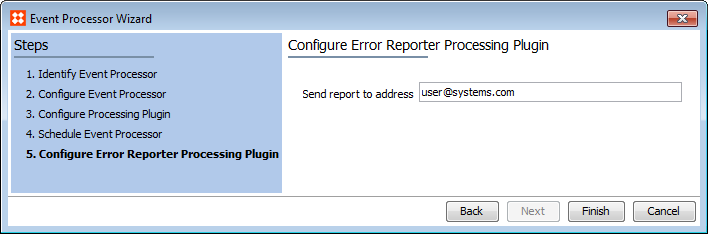
- Optionally enter an email address to send error reports to, otherwise click Finish to complete the wizard.
Important: During step 2. Configure Event Processor, if the 'Select Error Reporter' option was set to 'Mail Error Report', then the 'Send report to address' option will display.
- Next, use the event processor editor to update the Queue Status, if necessary.
- By default, events are discarded.
- This is useful when testing a processor without modifying data.
- Click the Queue Status field and select Read Events if you are ready for the processor to apply the actions based on the events processed.

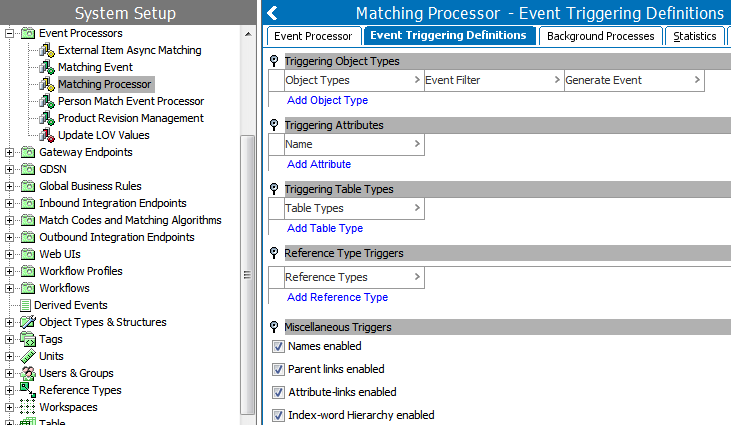
- Finally, use the event processor editor to configure Event Triggering Definitions.
- All event processors require trigger definitions in order to identify objects, attributes, table types, reference types, and/or miscellaneous elements that will generate an event.
- The options available on the Event Triggering Definitions tab of the Event Processor are the same as those in an OIEP. For details about the options, see the OIEP - Event-Based - Event Triggering Definitions Tab documentation here.
For information on common triggering definitions setups for the core event processors, see the following sections:
- Expand LOV Value Changes Processor Parameters and Triggers here
- Image Cache Processor Parameters and Triggers here
- Matching Processor Parameters and Triggers here
- Revision Management Processor Parameters and Triggers here
2017, Stibo Systems