File Menu
The file menu contains actions that are related to maintaining the workbench from a performance level, such as cleaning the recycle bin, purging old revisions, scheduling bulk updates, as well as defining imports and exports.

Each of the options on the File menu are defined below.
Translate
The Translate menu allows users to translate products, classifications, and names of images and documents, product values, index words, LOVs (List of Values), units, attribute names, free text cells in tables in the workbench, and to import translations.
![]()
- By selecting 'Data Objects' or 'Setup Objects,' the Request Translation wizard will display. This process results in the creation of a translation file that will include either data objects (objects that contain usable customer data) or setup objects (objects that help organize the data objects). See the Structured XML Translation topic (here) for data object translations and Structured Translation for Setup Objects (here) in the Translations documentation for more information.
- The 'Manual Excel Translation Export' is best used for a specific set of use cases, namely when there is not much content to translate, the translator does not have access to STEP, or the objects to be translated are setup objects. For more information on performing a manual Excel translation, see the Starting a Manual Excel Translation Export topic in the Translations documentation here.
- The 'Import Translation' allows users to select an external translation file.
- The 'Change Translation' allows users to change configurations.
For more information on the translate functionality, see the Translations documentation here.
Import
The Import menu contains actions for bringing data into STEP.
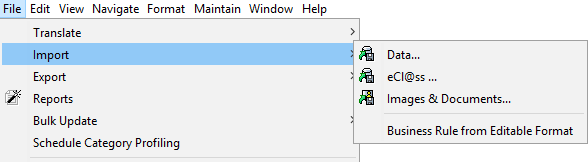
- The 'Data...' option loads the Import Manager. For more information, see the Import Manager topic in the Data Exchange documentation here.
- The 'eCl@ss' option launches the eCl@ss Classification import wizard. eCl@ss is used to group materials, products, and services. For information on how to best use eCl@ss and its importer, see the eCl@ss Format topic (here) and the eCl@ss Classification Import topic (here) in the Data Exchange documentation.
- The 'Images & Documents...' option, while on a Tree node that contains assets (images and documents), will load the Import Images and Document wizard. For more information, see the Import Images and Document Wizard topic in the Digital Assets documentation here.
- The Business Rule from Editable Format allows users to manually import business rule definitions in the editable format described in the Version Control System Integration documentation here.
Export
The Export menu contains actions for getting data out of STEP for external management.

- The 'Data...' option loads the Export Manager. For more information, see the Export Manager topic of the Data Exchange documentation here.
- The 'Schedule Data Export...' allows you to create a data export that executes at a specific time or repeatedly. This option starts the Schedule Data Export wizard. For more information, see the Scheduling a Data Export topic in the Data Exchange documentation here.
- The 'Images & Documents...' option, while on a Tree node that contains assets (images and documents), loads the Export Images and Document wizard. For more information, see the Export Images and Documents Wizard topic in the Digital Assets documentation here.
- The 'Compare System Setup Exports' option enables you to migrate systems and allows users to determine which items should not be added to the new system. This option will compare two STEP XML files that are exported from two STEP systems, such as a production system being compared with a development system.
Reports
Selecting 'Reports' option will load the Reports wizard.
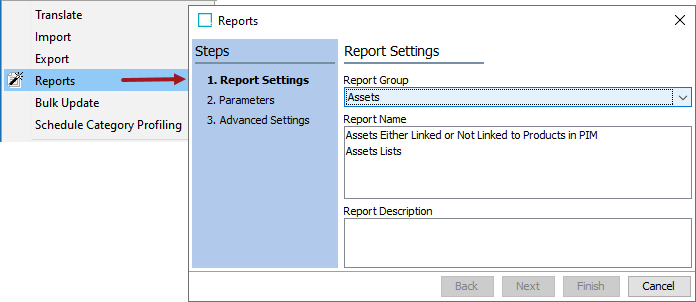
For more information on the reports wizard, see the Reporter documentation here.
Bulk Update
Bulk updates allow you to perform one or more actions on multiple objects at the same time.
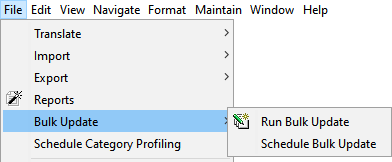
- The 'Run Bulk Update' option will start the Bulk Update wizard.
- The 'Schedule Bulk Update' option will allow users to create repeatable bulk updates.
For more information, see the Creating a Bulk Update topic (here) and the Scheduling Bulk Updates for Collections topic (here) in the Bulk Updates documentation.
Schedule Category Profiling
Category profiles (also called data profiles) are used to take a snapshot of data that would be displayed in the category profile tab. This snapshot does not update as new changes are made. With this action, the 'Schedule Category Profiling' wizard will display and users may schedule the updates of existing profiles and the ability to copy profiles as well. For more information, see Generating, Updating, and Scheduling a Data Profile topic in the Data Profiling documentation here.
Business Module Manager
A business module is a functional configuration which handles use cases based on common practices observed in the industry. The Business Module Manager allows an administrator to install a pre-configured data model for a business purpose, such as the 'sell side' of the product enrichment process, or the 'buy side' for the vendor data onboarding process. Business module installation can include the creation of product objects types, classification objects, lists of values types, etc. The 'Business Module Manager' option displays on the File menu for all users. The install functionality is available for users who are assigned the 'Install Business Modules' setup action privilege.
![]()
For more information, see the Business Module Manager topic in the System Setup / Super User Guide here.
Save
While saving in STEP Workbench is automatic, the Save option allows users to force a save without leaving a field.
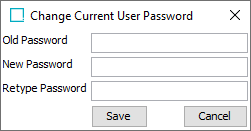
Change Password
During any session, any user may change their own password. Enter your current password in the 'Old Password' field, then enter the new password twice in the 'New Password' and 'Retype Password' parameters. Click 'Save' to complete the update or 'Cancel' to leave the password unchanged.
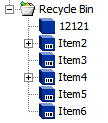
Empty Recycle Bin
This action purges the 'Not In Use' objects in the Tree Recycle Bin. For more information, see the In Use and Not In Use Objects section in the Approval of Objects topic of this guide here.
Select the 'Empty Recycle Bin' option to display the Confirm Purge dialog. The number of items that will be removed is displayed. Click 'Purge' to permanently delete the items, or 'Cancel' to leave the Recycle Bin unchanged.
![]()
This action is also available via by right-clicking on the recycle bin.
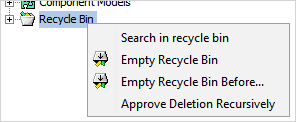
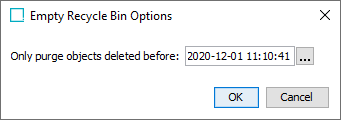
Empty Recycle Bin Before
This action allows users to purge the recycle bin of anything created before a specified date.
This action is also available via right-clicking on the recycle bin.
Purge Old Revisions
This is a global purge of revisions contained within a specified workspace. A further description of this functionality is available in the Revisions section of the System Setup / Super User Guide documentation
Check integrity of external assets...
Assets can be stored in a file system on the STEP application server rather than in the STEP database itself. This can reduce the size of the database significantly, and for DTP tools depending on having the referenced high-resolution images directly available on the file system, replication from DB to file system of these images can be avoided.
This option is disabled by default. To enable it, follow the steps defined in the Initial Setup for an External File Structure topic of the Digital Assets documentation here.
The 'Check integrity of external assets...' option is enabled on systems set up to store images in a file system and not in the STEP database. If a Classification is selected, the user can click this menu item to see if all images in the selected classification have been successfully migrated from the database to the file system.
The integrity of the file system for storing digital assets can be double-checked by selecting one or more classifications and then select 'Check integrity of external assets' in the File menu. This starts a background process reporting if any assets are missing or have been changed against expectations.
When errors are found, the assets with wrong or missing content are added to a collection and the URL of this collection is referenced directly from the execution report of the background process.
A check of approximately 10,000 asset files on standard hardware can complete after one minute. Thus, expect that the integrity check might take some time on systems with many assets.
Pre-generate Thumbnail Cache...
This option will generate thumbnail cache of images and documents manually. This action allows any selected image or images in a classification folder to display as thumbnails without having to wait for them to generate.
For example, on the Image and Documents tab of a classification folder, if the image thumbnails are delayed in displaying, then Pre-generate Thumbnail Cache from File menu can be run to generate them in a background process.
For more information, see the Image Cache Processing Plugin Parameters and Triggers topic in the System Setup / Super User Guide documentation here.
This option is disabled by default. To enable it, ask an authorized user (one with the Setup Action = Maintain System) to perform the following steps.
Note: Although this automates the loading process, there will be delays during upload.
- Under 'System Setup' tab, navigate to 'Users & Groups.'
- Select 'System Settings' tab.
- Go to 'Image & Document Settings' flipper.
- Set 'Pre-generate thumbnail cache on upload' = Yes. On upload of image or document, the thumbnail will be generated automatically.
For more information, see the 'Pre-generate Thumbnail cache on upload' section of the Images and Documents Settings topic in the System Setup / Super User Guide documentation here.
Close Window
This option closes the active workbench window.
Exit STEPworkbench
This will exit the STEP Workbench completely by closing all active windows.