Use the DaaS Easy Setup Wizard to create the required elements necessary for publishing to DaaS. After data has been published to DaaS, use the Create DaaS Service Wizard (discussed in this topic) to define how consumers can access the published data.
Note: Once a DaaS Service exists, running the wizard using an existing Service Name overwrites the existing schema.
Refer to the DaaS Service Configuration topic for additional details and manual configuration of the steps of this wizard.
Prerequisites
To successfully complete the Create DaaS Service Wizard:
-
Verify your DaaS is version 1.18.2 or later. Contact Stibo Systems Support for assistance.
-
Verify a DaaS gateway integration endpoint exists, passes the connectivity check, and is enabled. Refer to the DaaS Data Publishing topic for details.
-
Verify a DaaS event processor exists with the DaaS Provider parameter set as the DaaS event processor, is enabled, and running. Refer to the DaaS Data Publishing topic for details.
-
If desired, create or identify a metadata attribute that will be included in the service schema. The value of this attribute will assist AI agents in understanding what data is available and how to query the data efficiently. To configure a metadata attribute valid for an attribute, refer to the Attribute Metadata on an Attribute Definition topic and the Attribute Metadata on Reference and Link Type Definitions topic in System Setup documentation.
Configuration
Follow these steps for the Create DaaS Service Wizard:
-
In workbench, switch to the Approved workspace.
-
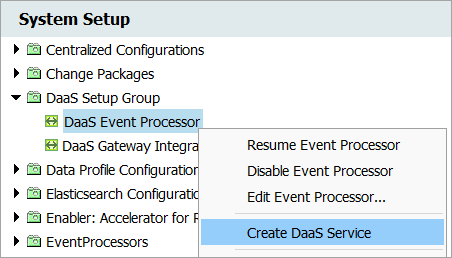
On System Setup, right-click the DaaS Event Processor and click Create DaaS Service.
-
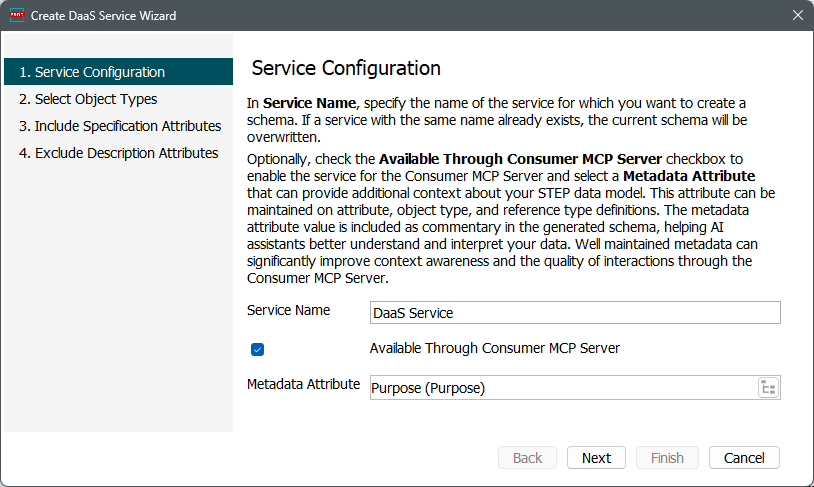
On the Service Configuration step:
-
Add a 'Service Name' for the schema. If the name already exists, completing the wizard will overwrite the schema.
-
Check the 'Available Through Consumer MCP Server' checkbox if the data should be accessible from the Consumer MCP.
-
Select a 'Metadata Attribute' to be added to as comments in the service schema. Refer to the Prerequisites for more on configuring this metadata attribute.
-
Click the 'Next' button.
-
If the Confirm Service Name dialog displays, click to 'Continue' or to 'Cancel'.

-
-
On the Select Object Types step, use Browse or Search to select up to 20 object types and click the right arrow button (
 ) to move them to the right panel. These object types will be included in the service schema as query and schema types. Click the 'Next' button.
-
On the Include Specification Attributes step, by default, no specification attributes are included in the service schema. If specification attributes that are valid for the previously selected object types are required, use Browse or Search to select them and click the right arrow button (
) to move them to the right panel. Click the 'Next' button.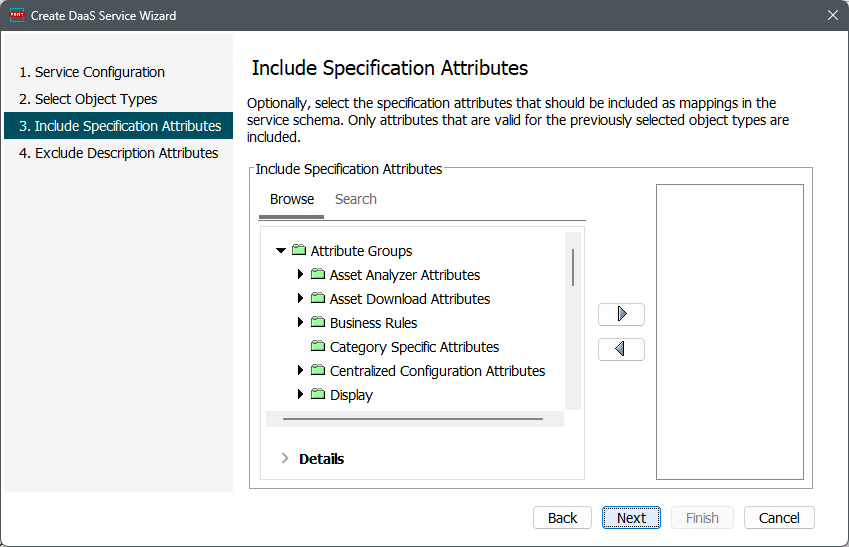
-
On the Exclude Description Attributes step, if description attributes that are valid for the previously selected object types should not be included in the schema, use Browse or Search to select them and click the right arrow button (
) to move them to the right panel. By default, all valid description attributes are included in the service schema.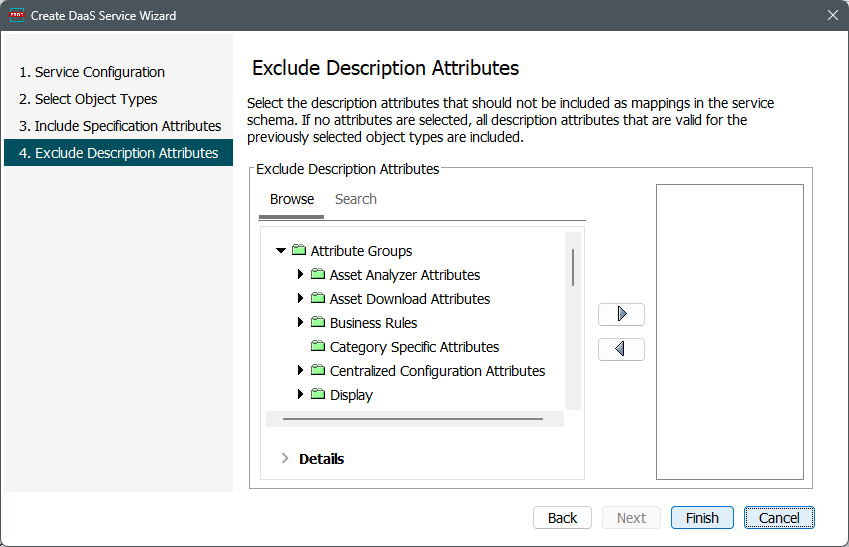
-
Click the 'Finish' button to create a new service or update an existing service schema.
-
Navigate to the DaaS Management API to review the schema, finalize the configuration, and test the service.