Configuring Matching Algorithms
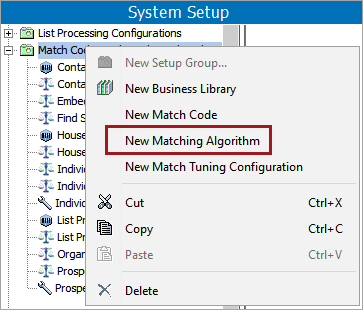
- In System Setup, right-click the node configured to house matching algorithms and select New Matching Algorithm.
- In the Create Matching Algorithm dialog, define an ID and Name for the matching algorithm.
-
Check the Embed Match Codes checkbox so the match codes are embedded in the algorithms.
-
If the Embed Match Codes checkbox is not checked (legacy functionality), you must manually create a match code and link it to the matching algorithm. For more information, see the Match Codes topic in this documentation here.

-
Click Create to display the Matching Algorithm object:
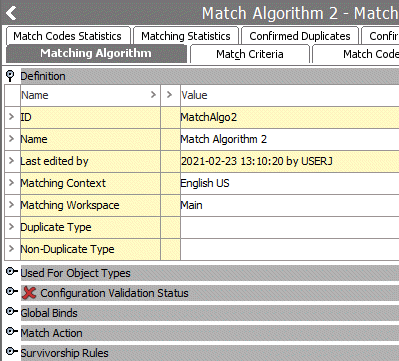
Note: The Configuration Validation Status flipper displays a red 'X' (shown above) when the configuration is invalid. Open the flipper to view the errors that must be addressed. Correct any errors shown before running the matching algorithm. When the matching algorithm has a valid configuration, a green checkmark is displayed.
-
In the Definition flipper, for the Matching Context parameter, specify the context to run the matching algorithm. By default, the current context is set.
- For the Matching Workspace parameter, specify the workspace to run the matching algorithm. By default, the Main workspace is selected.
- For the Duplicate Type parameter, click the ellipsis button (
 ). In the 'Select a Duplicate Reference Type' dialog, select the appropriate reference type as defined in the component model. For more information, see the Match Criteria Configuration topic here.
 - For the Non-Duplicate Type parameter, click the ellipsis button (). In the 'Select a Duplicate Reference Type' dialog, select the appropriate reference type as defined in the component model.
For more information, see the Match Criteria Configuration topic here.
- In the Global Binds flipper, potentially improve the performance by creating global binds to obtain all attribute values used in the decision table comparison.
The matching process can strain performance. When processing large sets of data, there is potentially a significant performance gain if the matching functionality can fetch the values for matching before the matching process begins. This fetching of data is possible via global binds configured on the matching algorithm, where the matching algorithm logic uses attributes that are bound to specific variable names. The system fetches the values for the attributes before the match criteria logic is applied and can be referenced from both JavaScript and STEP functions.
Important: Global binds are not optimized for use with In-Memory.
-
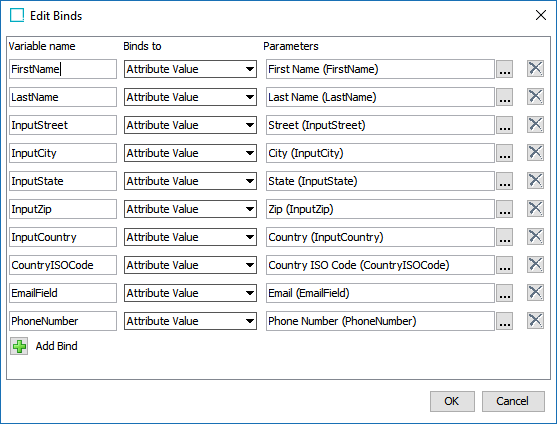
Click the Edit Global Binds link to open the 'Edit Binds' dialog shown below.
-
Click the Add Bind button to create a new bind.
-
For Variable name, specify a variable name for the bind.
-
For Binds to, select a bind from the dropdown (some binds are displayed within a group).
-
For Parameters, when available, click the ellipsis button (
) to specify an object to bind. -
Click OK to close the dialog and return to the Matching Algorithm object.
- If the Match Criteria flipper is displayed (only for legacy algorithms where match codes are not embedded and must be created manually), configure the following. For more information, see the Match Criteria topic in this documentation here.
- Click the Add Criterion link to display the 'Select Match Criterion' dialog.
- Specify a Name.
- Choose a match criterion from the Select Match Criterion dropdown.
- Click the Add button.
- Click into the Criterion field and then click the ellipsis button () to open the editor.
- Create the matching criterion and click OK.
- Click into the Weight field and specify a weight for the criterion.

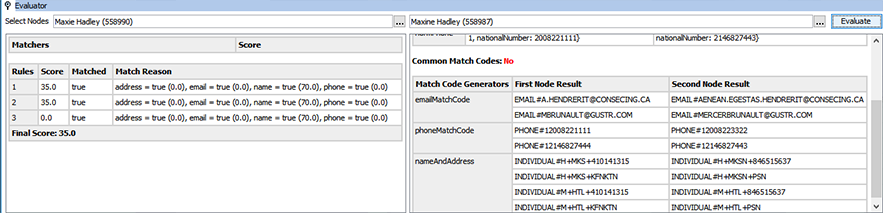
- Open the Evaluator flipper, select two objects to test the selected criteria on a data set.
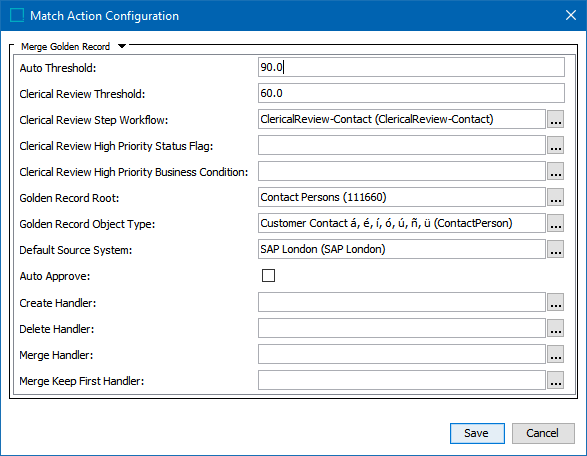
- Set up the match action as needed. For more information, see the Match Actions topic in this documentation here.