The 'SFTP access control' tab allows users to manage the SFTP accounts associated with the STEP environment.
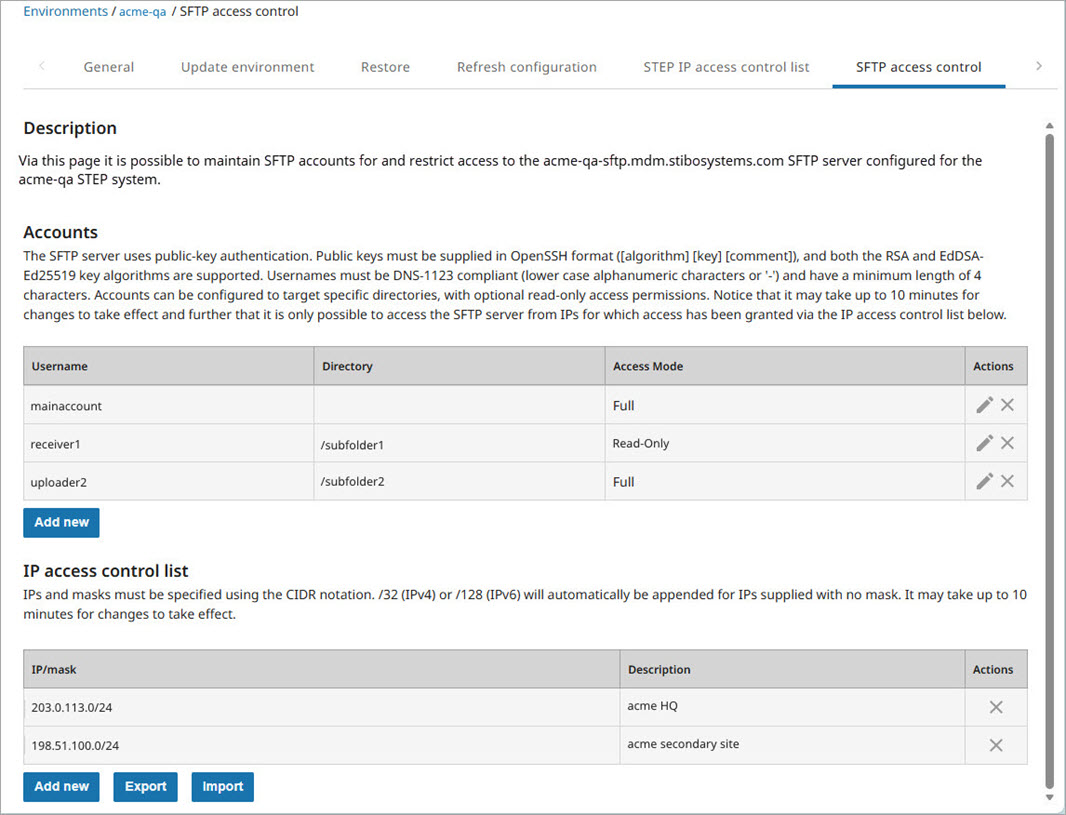
Accounts
This table allows users to maintain accounts as well as their associated public keys that enable authentication on the SFTP server.
Important: Public keys must be supplied in OpenSSH format ([algorithm] [key] [comment]). Both the EdDSA-Ed25519 and RSA key algorithms are supported, however, the Ed25519 algorithm is often preferred for its speed and strong security properties. Public / private key pairs can be generated with utilities such as PuTTYgen or ssh-keygen (steps for both methods are included in the configuration sections below).
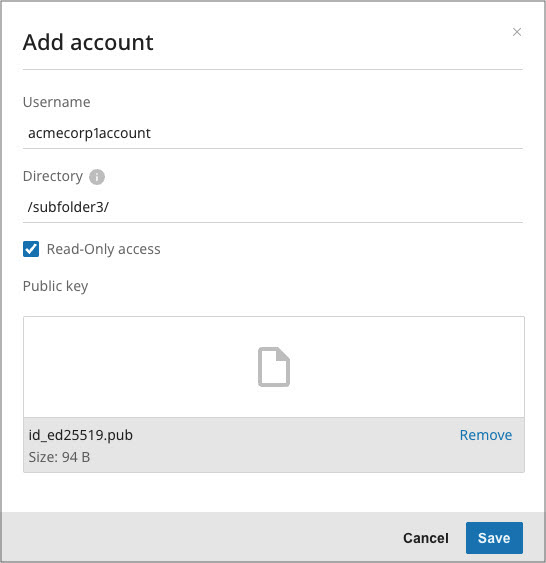
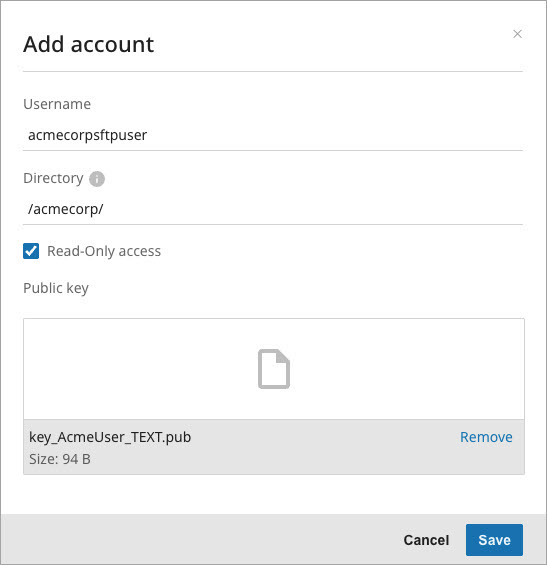
To create a new SFTP account, click the 'Add new' button. On the 'Add account' dialog, enter a username that meets the following requirements:
-
Minimum length of 4 characters.
-
Maximum length of 32 characters.
-
Only lower-case alphanumeric characters or '-' (hyphen).
-
The first character must be a lowercase letter.
-
The final character must be a lowercase alphanumeric character.
To restrict the account to:
-
a specific directory and its contents, set a valid 'Directory' path. For unrestricted access, leave the 'Directory' value blank.
-
only allow reading the contents of the associated 'Directory', check the 'Read-Only access' checkbox. For full read and write access, leave the checkbox unchecked.
Note: Ensure that the Directory specified for an account refers to an existing folder and that this folder is not removed afterwards. If the directory does not exist, the account becomes unusable since it will only connect to a nonfunctional 'ghost' location. Because directory paths are case-sensitive, verify that the Directory value — including its full path — exactly matches the name and structure of the folder that was previously created.
Drag and drop a file or click the 'upload to cloud' button to select the public key file to use for the account. Click the 'Save' button.
Note: It may take some time for the new SFTP account to display in the list.
To update an account, click the pencil button ( ) in the Actions column. When updating an existing account to add or remove the 'Directory' and/or the 'Read-Only' restrictions, you may need to refresh the folder listing in the sFTP client. Client-side caching is commonly used and can prevent effective changes from displaying.
PUTTYGEN Configuration
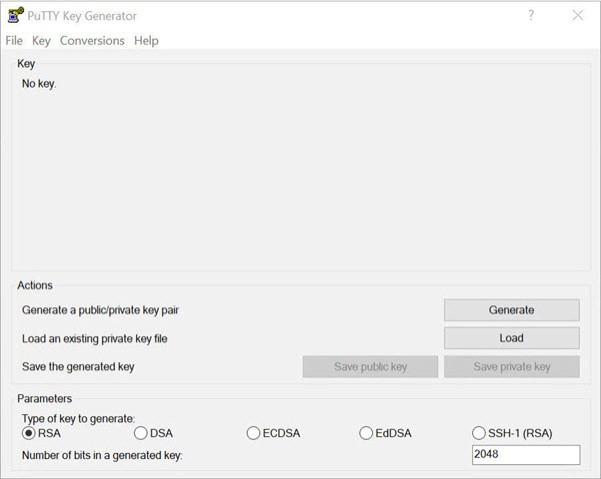
To create a public key in PuTTYgen using the required format and add an account, follow the steps described below:
-
Install the open-source software PuTTY on your machine. PuTTYgen is included in the installation and is used to generate the key.
-
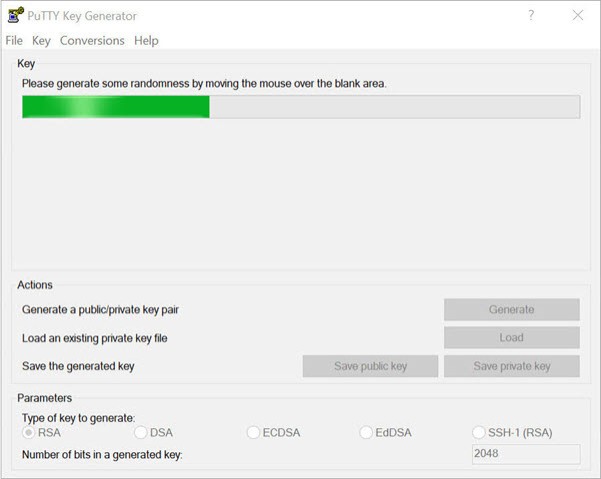
Open PuTTYgen. A window displays like the screenshot below.
-
Under 'Parameters', select the 'EdDSA' (with the 'Ed25519' curve) radio button or the 'RSA' radio button. Click the 'Generate' button in the 'Actions' section of the window.
-
Key generation will begin. The progress bar in the 'Key' section of the window will display the key generation progress. Move your mouse in the blank area beneath the progress bar to generate a random key.
-
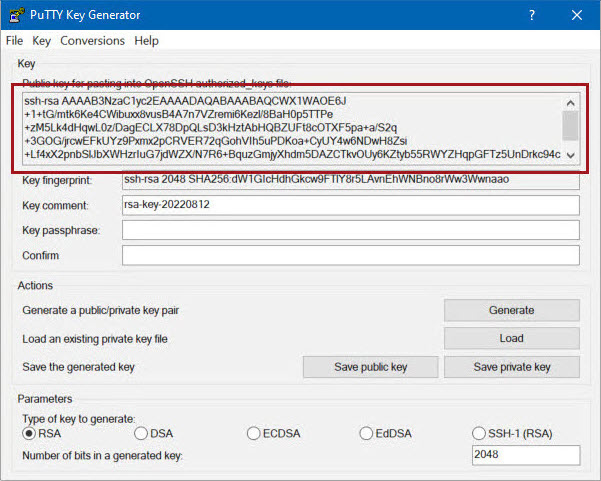
When complete, the previously blank space will be populated with the text comprising the public key.
-
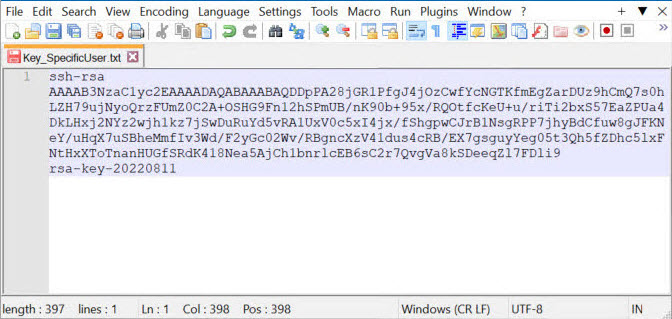
Copy the text from this field and paste it into a text editor program like Notepad++.
-
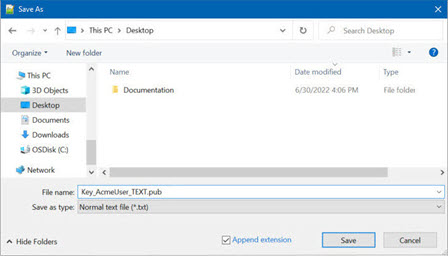
Save the file to your local machine.
-
In the SSUI, on the SFTP access control tab, under 'Accounts' click the 'Add new' button. Enter a username that is compliant with the guidelines (minimum length of 4 characters, maximum length of 32 characters, only lower-case alphanumeric characters or hyphens, starting and ending with a lowercase alphanumeric character), navigate to the location of the saved file, and select it. Click the 'Save' button.
SSH-KEYGEN Configuration
To create a public key in ssh-keygen using the required format and add an account, follow the steps described below:
-
Choose an appropriate method to open a terminal:
-
In macOS, use the built-in Terminal.
-
In Linux, use your default terminal emulator.
-
In Windows, ensure OpenSSH is installed, and then use Git Bash, PowerShell, or Command Prompt.
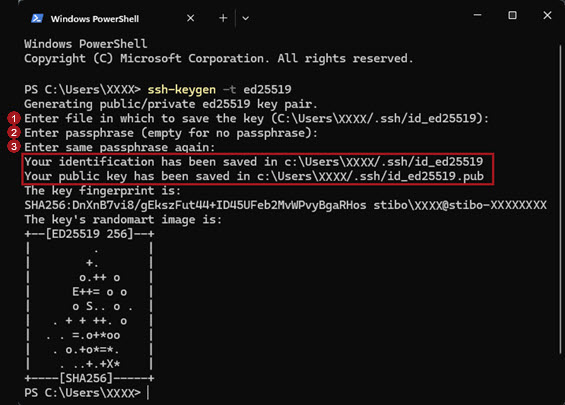
All commands and responses are shown in the following image.
-
-
To generate a SSH key pair using the desired key algorithm (either 'ed25519' or 'rsa'), enter this ssh-keygen command and press 'Enter':
ssh-keygen -t [key_algorithm]
'Generating public/private ed25519 key pair.' is displayed.
-
Answer the following prompts (numbered 1, 2, and 3 in the image above):
-
Prompt 1: Notice the path displayed in the prompt. If a key file already exists at the specified path (e.g., ~/.ssh/id_ed25519), you are prompted to overwrite that key file. Unless there is a backup of the key file, answering 'Y' may cause access to the systems using that key to be lost.
Press 'Enter' to save the default location or type a custom path with the filename and press 'Enter'.
-
Prompt 2: Optionally, for added protection, enter a secure passphrase and press 'Enter', or to skip the passphrase, press 'Enter'.
-
Prompt 3: Optionally, enter the passphrase again and press 'Enter', or to skip the passphrase, press 'Enter'.
-
-
Two confirmation messages are displayed (in the red box of the image above):
-
'Your identification has been saved in ...'. The id_ed25519 is your private key. Do not share this file.
-
'Your public key has been saved in...'. The id_ed25519.pub is your public key. Share this file with the system where you need access.
-
-
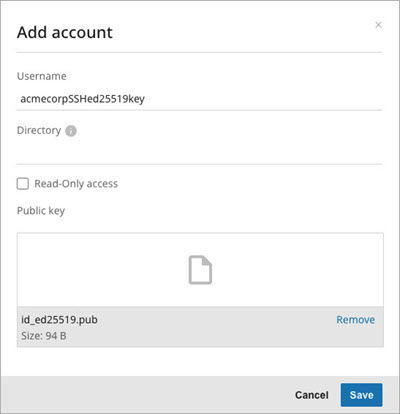
In the SSUI, on the SFTP access control tab, under 'Accounts' click the 'Add new' button. Enter a username that is compliant with the guidelines (minimum length of 4 characters, maximum length of 32 characters, only lower-case alphanumeric characters or hyphens, starting and ending with a lowercase alphanumeric character), navigate to the location of the saved file, and select it. Click the 'Save' button.
IP access control list
This table allows users to define which IPs / IP ranges should have access to the SFTP server using CIDR notation. Use [IP]/32 to allow access from a single IP address. For more information about constructing the appropriate CIDR value, review the tools available at https://www.ipaddressguide.com/cidr. An optional description can be supplied for each ACL entry. The list is limited to 100 entries. Attempting to add more than 100 either individually or by import, returns the error: Resulting access list exceeds maximum number of items.
The IPs granted web access to the SFTP server are listed in the table. Private IP addresses are not allowed.
-
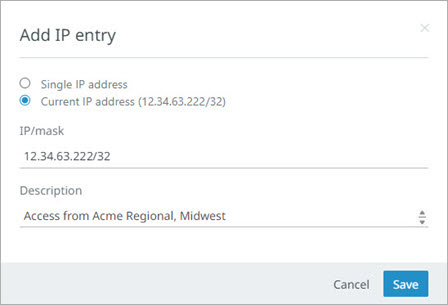
Add new - Add new IPs that may access the SFTP server. The 'Import access list' dialog displays.
-
'Single IP address' - allows manual entry of an 'IP/mask' and description. In the 'IP/mask' field, enter the desired IP and mask using CIDR notation. If an IP is provided without a mask, the system automatically appends '/32' to the IP, which means only the IP submitted in this field will be allowed. Check with your networking team for the full list of IP ranges for your network.
-
'Current IP address' - automatically fills the 'IP/mask' field for the current IP. Duplicate entries are not allowed.
-
In the 'Description' field, add instructive text about the IP or IP ranges. For example, information about where the IPs originate. Click the 'Save' button to update the list.
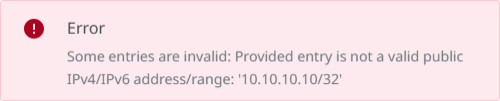
The following error displays when an invalid public IP address or a private IP address is used:
-
-
Export - Entries in the table are output as JSON, for example:
[
    {
        "ip": "87.37.147.157/32",
        "description": "Access from VPN"
    },
    {
        "ip": "104.60.0.0/16",
        "description": "Access from Acme Corp, Springfield"
    }
 ]
For the downloaded file, choose to open the file or save it.
-
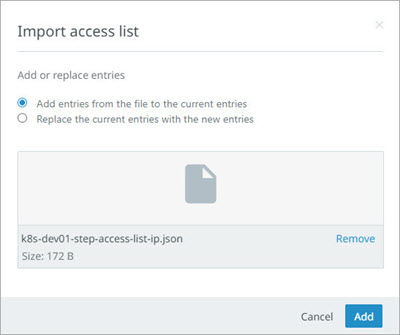
Import - Upload a JSON file that includes IP/mask and optional description text as shown in the previous Export example.
On the 'Import access list' dialog, choose to add entries to the current list or replace the current entries. Select the JSON file by drag-and-drop or click to display a file selection window and click Add.
Invalid entries are not allowed, are reported as errors on the 'Import access list' dialog and must be removed from the file before the import can succeed. Duplicate IP/mask entries only update the description text column.