The ‘Control Service API’ screen lets you create and manage machine-to-machine accounts used to access the Control Service API, which provides programmatic access to the STEP platform.
Access management
Each account is identified by an ID using the prefix ‘control-service-’ followed by a suffix you choose. For naming rules, refer to the Add an account section below. For each account, you specify whether it may access Production environments, Non-Production environments, or both.
For security reasons, key values are shown only once, immediately after generation or renewal. Before closing the confirmation dialog, copy the key and store it in a secure location.
Note: Keys expire automatically after one year. Renew keys before they expire to avoid disruption to integrations.
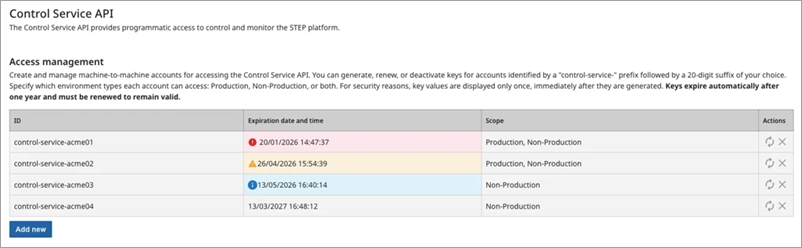
The table lists your Control Service API accounts. Columns include:
-
ID — Full client ID (‘control-service-’, plus your suffix).
-
Expiration date and time — The key is valid until the date and time displayed. The styling of the expiration information indicates the status of the key’s expiration and the urgency of renewal:
-
 Gray standard styling is the default presentation and means the key will expire in more than one month.
 -
 Blue information styling means the key will expire in less than a month. You should make plans to renew it to avoid disruption.
 -
 Yellow warning styling means the key will expire in less than a week. You must renew it to maintain access.
 -
 Red error styling means the key has expired. You must renew it to restore access for existing integrations.
-
-
Scope — Production, Non-Production, or Production, Non-Production (both) displays based on what was selected for the account.
-
Actions — Click the renew button (
 ) to regenerate the key or the delete button (
 ) to remove the key.
Add an account
To create a new account:
-
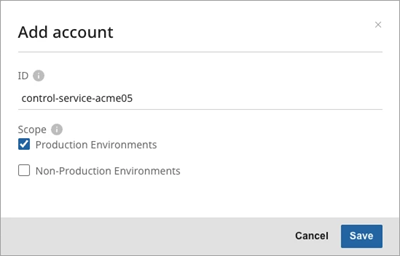
Click 'Add new' to display the 'Add account' dialog:
-
In the ID field, enter a unique suffix; 'control-service-' is fixed text that is added by default. The suffix must include only lower-case letters, digits, or hyphens (-), and must be within the 20-character maximum length defined in the product. Account ID cannot exceed 36 characters. If the suffix is already in use, the UI shows an error near ID and does not save until you enter a unique value.
-
In the Scope field, select Production Environments and/or Non-Production Environments. At least one must be selected before you can save.
-
Click the Save button. When the account is successfully created, the 'Account added' dialog displays. The 'Account added' dialog can have a 'Warning' message or an 'Info' message, both are shown below:
Account added - Warning 'Copy the generated key' message
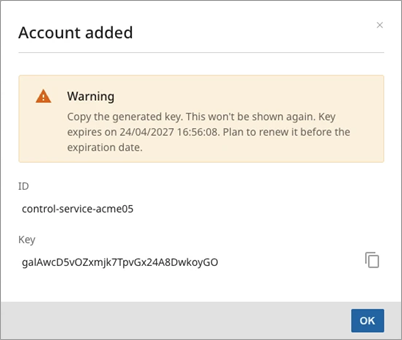
Important: Copy the generated key before closing this dialog since it will not be shown again until the key expires. Plan to renew the key before it expires.
-
Click the Copy button (
 ) next to the Key field or manually select the key and copy it manually.
 -
Paste the key in a password manager, vault, or in your integration's secret store.
-
Once the key is securely stored, click the OK button. When the account is successfully created, the newly added client information displays in the 'Access management' list.
Account added - Info 'Key copied to clipboard' message
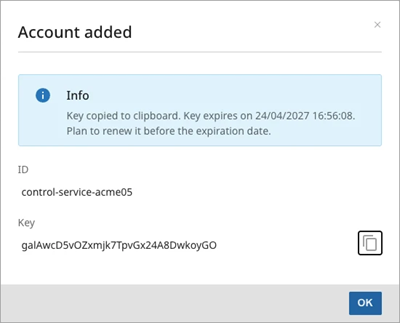
The dialog may show an Info message ('Key copied to clipboard') that also shows the expiration reminder.
Renew an account
Renewing replaces the current key. Any integration that still uses the old key will fail until it is updated.
To renew an account:
-
In the Actions column, click Renew (
 ).
). -
Read the Confirm renewal message carefully.
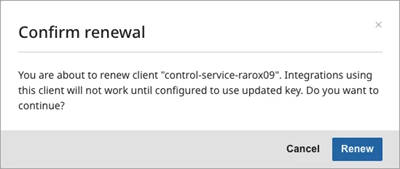
Note: Integrations using this client will not work until they are configured with the new key.
-
Click Renew to confirm or Cancel to keep the existing key.
After confirmation, the Account renewed dialog appears with either a Warning or Info message, following the same pattern as new accounts. Regardless of the type of message, notice the expiration date and time and plan the next renewal.
For example, the 'Account renewed - Warning 'Copy the generated key' message' dialog is shown below:
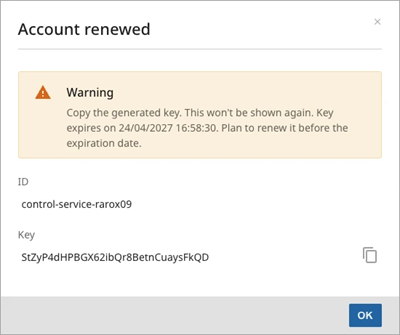
Important: Copy the generated key before closing this dialog since it will not be shown again until the key expires. Plan to renew the key before it expires.
-
Click the Copy button (
) next to the Key field or manually select the key and copy manually. -
Paste the key in a password manager, vault, or in your integration's secret store.
-
Once the key is securely stored, click the OK button. When the account is successfully renewed, the updated client information displays in the 'Access management' list.
Deactivate or remove an account
To remove an account you no longer need:
-
In the Actions column, click Delete (
 ).
). -
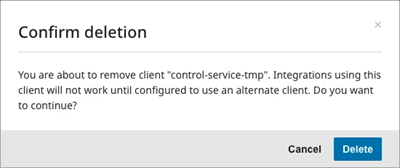
Click Delete to confirm or click Cancel to keep the existing key.
Important: The confirmation dialog explains that integrations using this client will stop working until pointed at a different client. Click the delete button only after updating or decommissioning dependent systems.
Known Limitation: audit log entries for Control Service API activity all record the same UUID as the user (e.g., 0ce3e82f-…), so individual entries cannot be linked to a specific control-service-{suffix} account. This is the case both in the 'User Activity Log' in self-service and when retrieving logs via the GET /platform/audit-logs endpoint using the Control Service API.