Important: This Legacy Asset Importer Processing Engine is outdated and lacks current functionality. Instead, use the recommended IIEP - Configure Asset Importer Processing Engine, which consolidates all parameters in a single Asset Importer Configuration rather than requiring individual configuration as in the legacy option.

Prerequisites
When using this Legacy Asset Importer processing engine, on the Choose Receiver step, the 'Hotfolder with Metadata' receiver option must be selected as defined in the IIEP - Choose Receiver topic.
Important: Hotfolder Receiver Using Meta Files is the recommended receiver option since it includes updates to the functionality available in the legacy 'Hotfolder with Metadata' receiver.
Configuration
-
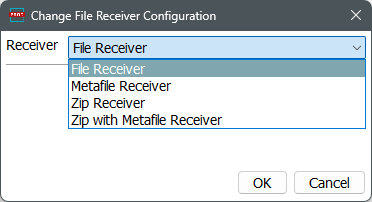
In the Receiver parameter, click the 'Change File Receiver Configuration' button and select an option and any required additional options. Click OK.
-
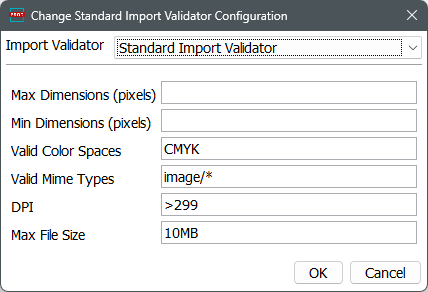
In the Import Validator parameter, click the 'Change Standard Import Validator Configuration' button and set the applicable options. Click OK.
For more information, refer to the Import Validator topic in the Asset Importer section.
-
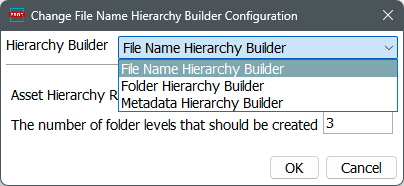
In the Hierarchy Builder parameter, click the 'Change File Name Hierarchy Builder Configuration' button and set the applicable options. Click OK.
For more information, refer to the Hierarchy Builder topic in the Asset Importer section.
-
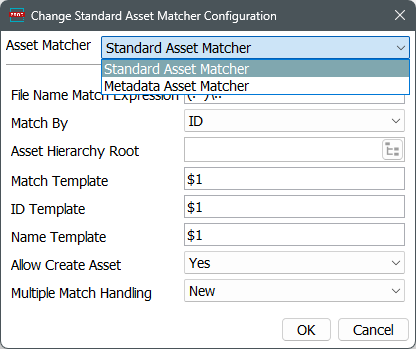
In the Asset Matcher parameter, click the 'Change Standard Asset Matcher Configuration' button and set the applicable options. Click OK.
For more information, refer to the Asset Matcher topic in the Asset Importer section.
-
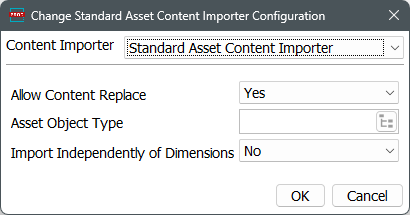
In the Content Importer parameter, click the 'Change Standard Asset Content Importer Configuration' button and set the applicable options. Click OK.
For more information, refer to the Content Importer topic in the Asset Importer section.
-
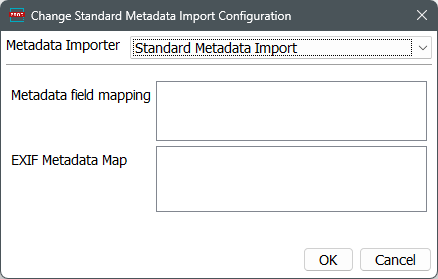
In the Metadata Importer parameter, click the 'Change Standard Metadata Import Configuration' button and set the applicable options. Click OK.
For more information, refer to the Metadata Importer topic in the Asset Importer section.
-
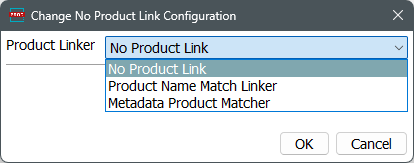
In the Product Linker parameter, click the 'Change No Product Link Configuration' button and set the applicable options. Click OK.
For more information, refer to the Product Linker topic in the Asset Importer section.
-
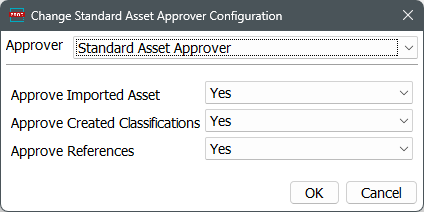
In the Approver parameter, click the 'Change Standard Asset Approver Configuration' button and set the applicable options. Click OK.
For more information, refer to the Approver topic in the Asset Importer section.
-
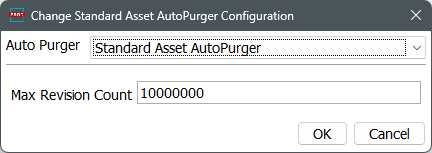
In the Auto Purger parameter, click the 'Change Standard Asset AutoPurger Configuration' button and set the applicable options. Click OK.
For more information, refer to the Auto Purger topic in the Asset Importer section.
-
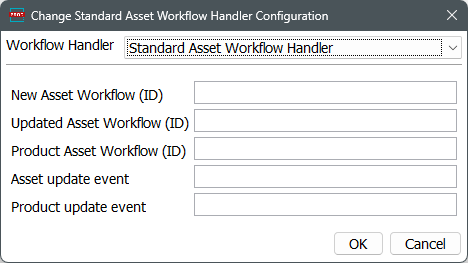
In the Workflow Handler parameter, click the 'Change Standard Asset Workflow Handler Configuration' button and set the applicable options. Click OK.
For more information, refer to the Workflow Handler topic in the Asset Importer section.
-
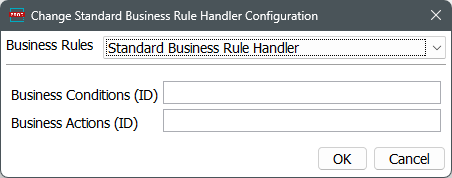
In the Business Rules parameter, click the 'Change Standard Business Rule Handler Configuration' button and set the applicable options. Click OK.
For more information, refer to the Business Rules topic in the Asset Importer section.
-
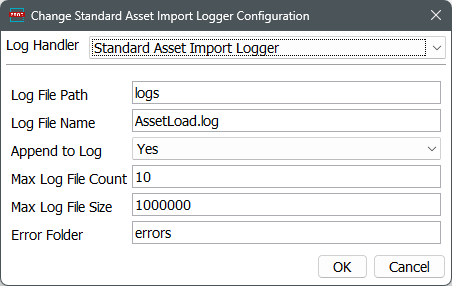
In the Log Handler parameter, click the 'Change Standard Asset Import Logger Configuration' button and set the applicable options. Click OK.
-
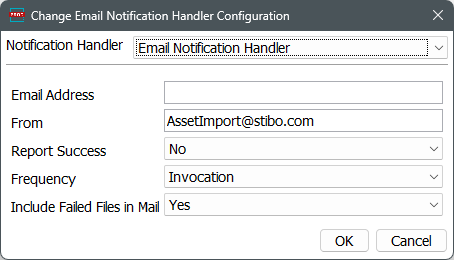
In the Notification Handler parameter, click the 'Change Email Notification Handler Configuration' button and set the applicable options. Click OK.
-
In the SubFolder Override parameter, click the 'Change Folder Overrides' button, and click the 'Add Folder Override' button to display additional parameters. Set the applicable options as needed. Click OK.

-
Click the Next button to display IIEP - Schedule Endpoint.