Formatting transformations enable you to apply transformations to attribute values, rows, column, tabs, and cells. The following formatting transformations are available and are defined in the sections below:
![]()
The instructions in the following subsections assume that you have already added the specified transformations to your table by following the instructions in the Add a Transformation to a Table or Table Type subsection of the Table Transformations topic here.
The Attribute Formatting transformation allows you to apply an attribute transformation to any selected attribute in the table. These transformations perform tasks on an attribute such as calculating or replacing a value, or applying a prefix or a suffix.
Example
The below column samples show how attribute values look before applying the transformation (left) and how they look after (right). The applied attribute transformation inserts the text 'Made of' before the attribute values for 'Material.'
![]()
Steps
 ). The Attribute Formatting dialog displays.

The list of transformations is identical to those that are available when creating an attribute transformation in System Setup. For more information on the attribute transformations and what they do, see the Transformations topic in the Resource Materials online help here.
Three transformations to perform cell-level text transformations are also available within the list of transformations: 'Sort values within cells,' 'Range consolidation within cells,' and 'Remove duplicate values within cells.' For more information on these transformations, see the Cell Text Formatting Transformations topic in his guide here.
![]()
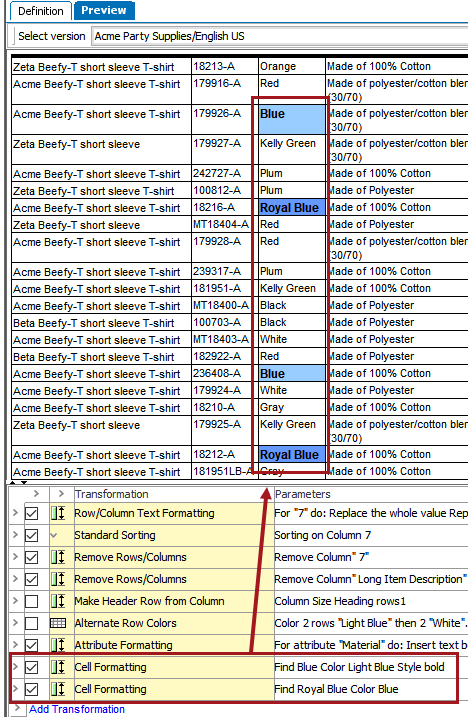
The Cell Formatting transformation allows you to narrow down formatting to individual cells in a table.
Example
This example uses two Cell Formatting transformations—one to change cells containing the word 'Blue' to have a light blue background and bold text, and the second to change cells containing the text 'Royal Blue' to a darker blue color, retaining the bold text applied in the first Cell Formatting transformation.
Steps
). The Cell Formatting dialog displays.

For more information on regular expression and practical examples, see the Regular Expression topic in the Resource Materials online help here.
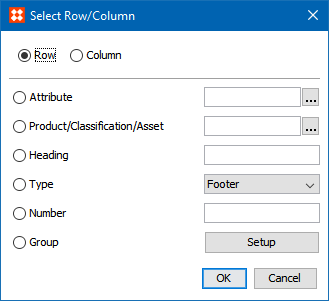
) to launch the Select Row/Column dialog. The options available in this dialog have already been explained in this topic in the Row/Column Text Formatting section above; refer to that section for more information.
The Row/Column Text Formatting transformation enables you to transform data in specific columns or rows. You can calculate or replace values or apply prefixes and suffixes to values in entire columns and rows in one operation. Where the Attribute Formatting transformation is applied to a specific attribute, the Row/Column Text Formatting transformation enables you to transform data in columns and tables of your own choice.
). The RowColumn Text Formatting dialog displays.

) to launch the Select Row/Column dialog.
) to search or browse for the relevant attribute.) to search or browse for the relevant object.The list of transformations is identical to those that are available when creating an attribute transformation in System Setup. For more information on the attribute transformations and what they do, see the Transformations topic in the Resource Materials online help here.
Three transformations to perform cell-level text transformations are also available within the list of transformations: 'Sort values within cells,' 'Range consolidation within cells,' and 'Remove duplicate values within cells.' For more information on these transformations, see the Cell Text Formatting Transformations topic in his guide here.
![]()
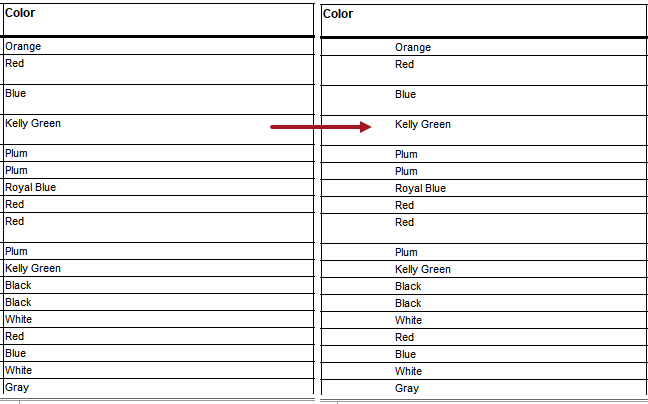
The Tab Formatting transformation inserts a tabulator in a row or column, which indents the text in the row or column with a tab.
Example
The below screenshot shows how a column looks before (left) and after (right) applying the transformation, which in this example inserts a tab before the values in the 'Color' column.
Steps
). The Tab Formatting dialog displays.

) to launch the Select Row/Column dialog. The options available in this dialog have already been explained in this topic in the Row/Column Text Formatting section above; refer to that section for more information.
2019, Stibo Systems – Confidential