Open topic with navigation
Horizontal Wrap Table
The Horizontal Wrap Table transformation is used to 'wrap' wide tables that contain a large number of columns into a taller, vertically oriented table. Users may have a need for the Horizontal Wrap Table transformation if the table is so wide that it either cannot fit within a single InDesign page column or page, or if a vertical layout is desired.
This transformation works similarly to the 'Horizontal Fold Table' transformation (documented in the Table Transformation: Horizontal Fold Table topic here), as both facilitate the ability to 'fold' a wide table into multiple table sections ('folds' or 'wraps') that stack on top of one another. However, unlike the Horizontal Fold Table transformation, a table folded using the Horizontal Wrap Table transformation is not folded based on a designated number of folds, but rather on particular column types, providing control over where these particular column types land within the folds.
Though there are many combinations of configurations that can be applied within the transformation, the following two screenshots show a sample 'before' and 'after' of a table (as previewed within the workbench) after applying the Horizontal Wrap Table transformation.
Before:

After (preview only pictured):

Preconditions
In order to take full advantage of this transformation, the table should meet these conditions:
Required:
- The table has a minimum of three columns
- The table uses the same column type in at least two places within the table. This is the column type on which the table will be wrapped and must be a column type of 'Normal Row.'
Optional:
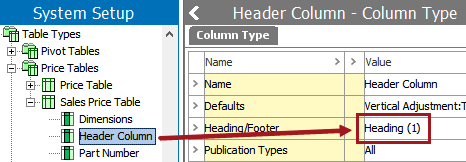
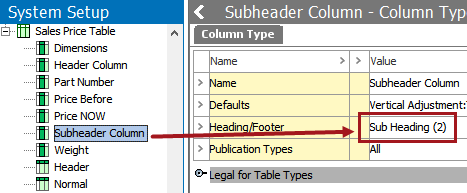
- Though not required to use the transformation, tables using the Horizontal Wrap Table transformation typically use at least one column type of Heading (1) and/or Sub Heading (2).
This topic assumes the following:
- You have already built the table to which you will be applying the Horizontal Wrap Table transformation. Instructions on how to build the table itself are not provided in this topic; see the Creating Tables documentation here for more information.
- You have already designated which columns should be used as the header(s) and/or subheader(s). This topic does not describe how to designate columns as such; for information, see the Creating Column Types topic here.
Applying and Configuring the Horizontal Wrap Table Transformation
For this topic, the example table has eight columns, which includes the repeating column type of 'Dimensions.' The Dimensions column is a 'Normal Row' column. (Even though the setting is Normal 'Row,' this setting applies to both rows and columns and simply means that the column / row is not used as a header, a subheader, or a footnote column / row.)

The 'Dimensions' column type is used in three places in the table. The attributes used for the 'Dimensions' column are Size, Product Width, and Product Height.

Before applying the transformation, the table looks like this in the Preview view (Dimensions columns types are outlined):

To apply the Horizontal Wrap Table transformation:
- In the Tree, navigate to the product, classification, or product-override object that contains the table to which you would like to apply the transformation, then click the Tables tab.
- Select the table type to which you would like to apply the transformation, then click the Preview tab.
- Beneath the table preview, click 'Add Transformation' to display the Select Transformation dialog.
- Select the Horizontal Wrap Table transformation, then click OK to apply the transformation.

- Next, the transformation itself must be configured. Click the ellipsis button (…) on the transformation to launch the Horizontal Wrap Table configuration dialog.

- The options on the Horizontal Wrap Table and their functions are as follows. The options are described in the logical order in which they are typically applied.
- Wrap on column type: Select the column type on which the table should be wrapped.
This is a dropdown list that contains all column types used in the table. For the example table in this topic, the Dimensions column type is used.
- Repeats: Enter the number of times the chosen 'wrap on' column type should appear in each wrap (fold) of the table. If (1) is entered, one 'Dimensions' column will appear on each table wrap:

If (2) is entered, there will be two Dimensions columns on each 'wrap.' (Only one Dimensions column appears on the second wrap in this example since there are only three Dimensions columns in the table.)

- Repeat All Heading 1's at left.: Check this box to repeat all Heading (1) columns at the beginning of each wrap. The below example shows how this table looks with the settings configured as follows:


- Repeat Last Heading 2: Check this box to repeat the last subheader column at the beginning of each wrap. A typical setup includes only one header and one subheader column. The below example shows how this table looks with the settings configured as follows:


2018, Stibo Systems