The Bulk Update wizard guides a user through the bulk update process, and ensures all necessary settings and data is provided to run the bulk update.
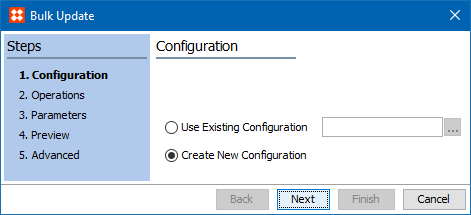
In step 1, specify whether an existing configuration should be run for the bulk update, or if a new configuration should be created.
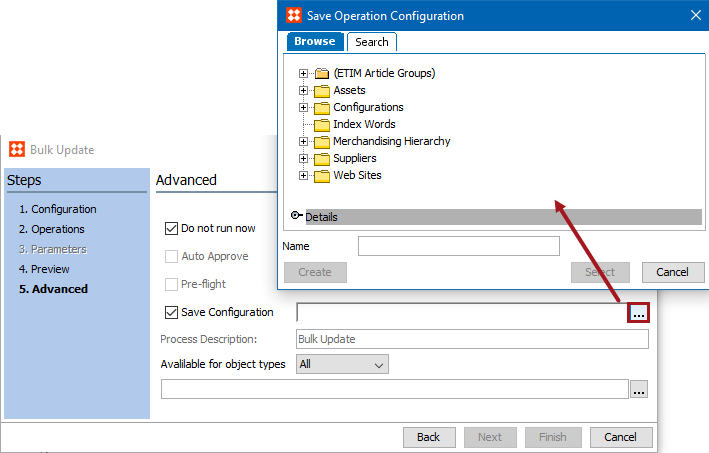
If a user has a saved bulk update configuration they can click the ellipsis button (…) to select the relevant configuration. Otherwise, select Create New Configuration, and click Next.
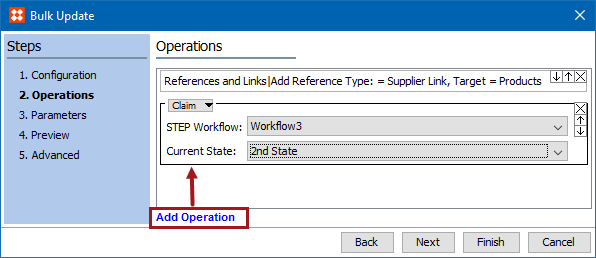
In step 2, specify the operations needed for the bulk update to perform. If an existing configuration was selected, all operations are listed in the order they are carried out.
If an operation is not already present, select from the dropdown menu the operations that should be applied to the set of objects.

The selected operation dictates what elements need to be filled out. The required elements vary from operation to operation. For a detailed description of the operations, see the Bulk Update Operations topic within the Bulk Update documentation
More than one operation can be applied to a bulk update by selecting 'Add Operation'. To change the order of the operations applied to the update, use the up and down arrows  . An operation can be deleted by clicking the
  .
.
Important: Ensure that the operations are listed in the order that they are needed to perform. Operations are performed from the top down. This means that operations further down the list overwrite operations further up. This includes when more than one operation is specified. The operations still are applied in the listed order. If one operation fails for an object (ex: due to validation base type mismatch), all changes to the object will be rolled back and the object will be left as if was prior to applying the Bulk Update.
This screen shows examples of the results of the update. It displays a maximum of 10 objects. For each object the existing data and how the data will look after the update is applied displays.
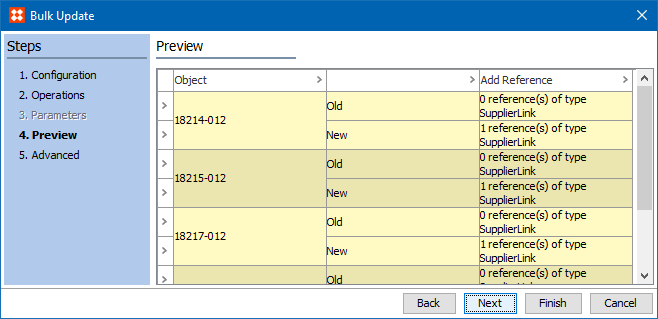
The preview also displays warnings and errors if an operation that a user has chosen is not applicable. If a user hovers the cursor over the icons, they can see the error or warning text.

Click the Back button to change an operation or parameter. When satisfied with the preview, click Next to continue.
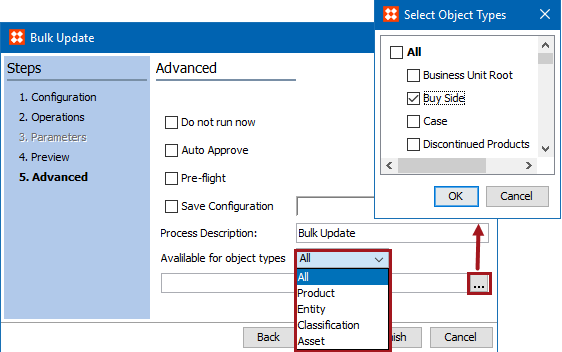
In the final step, select one or more options, some of which can be selected simultaneously.
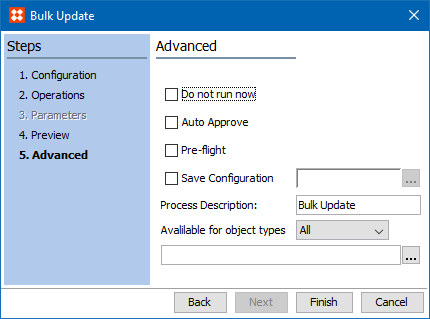
Note: It is recommended to always run a Pre-flight test or to try applying operations to a small set of objects before large quantities of objects are updated, as there is no 'undo' functionality for bulk updates.
For more on monitoring bulk updates through a background process, see the Monitoring Bulk Updates topic in this documentation
2018, Stibo Systems