There are various background process queues that are standard with the STEP system. Queues help organize the various STEP activities for easy access and monitoring, and hold information on scheduled processes, active processes, and ended processes.
This section describes how to create new queues for background processes such as import and export processes, how to assign specific background processes to specific queues, and how to determine the number of processes that can be executed simultaneously on one queue.
It is expected that anyone dealing with background process queues is first familiar with the Background Processes Tab topic in the Getting Started / User Guide documentation here.
Additionally, the following terms are used throughout STEP documentation:
For Outbound and Matching the ‘Parallel’ property can be used to set a maximum of threads / BGPs inside the initial BGP. The Parallel property cannot be used for the import queue (IN-queue).
In the default configuration, the following queues are used:
The IN, OUT, and SCHEDULE queues are set up to execute one process at a time. The MISC queue is set up to execute two processes simultaneously.
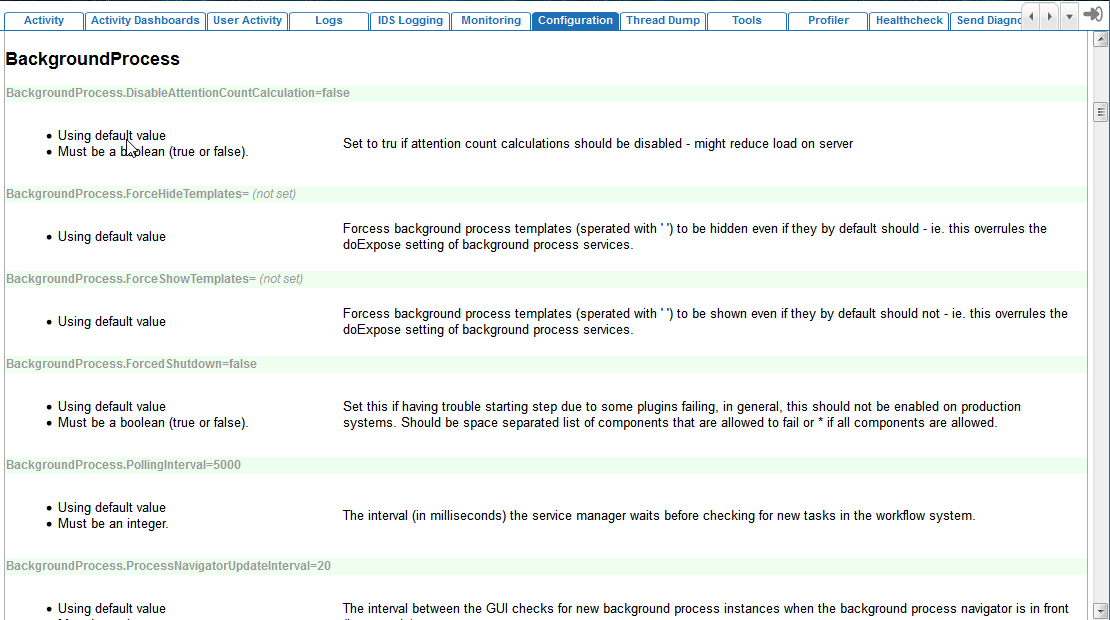
Below is an example of the default configuration. The default configuration is an integrated part of the STEP code and therefore cannot be found in a separate file. However, most entries can be verified by accessing the admin portal. If the user has the necessary privileges to access the admin portal, the list of properties that dictate the behavior of background processes can be found there under the Configuration tab. For more information on reviewing system information found in the admin portal, see the Accessing the Admin Portal documentation
Below are the STEP background processes properties:
The default configuration can be change by following the steps below. In the example below, the default configuration is changed to allow for the export and web publisher processes to be run on separate queues. Each queue will be configured to run two processes simultaneously.
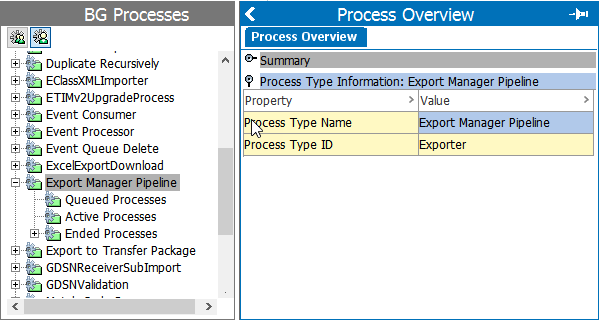
Click Export Manager Pipeline, and a Process Overview dialog will display.
Note: If you run a clustered setup, you will typically have a configuration file that is shared between the application servers. Queue configurations for the entire cluster can be made in this shared properties file. Alternatively, the config.properties file on each individual application server can be changed.
BackgroundProcess.Queue.[Name].Size=[Size]
BackgroundProcess.Queue.EXPO.Size=2
BackgroundProcess.Queue.WEBP.Size=2
In this example, we have named the new Export process queue EXPO, and the new Web Publisher queue WEBP. Each queue can run two concurrent processes.
BackgroundProcess.ProcessType.[Process Type ID].Queue=[Queue]
BackgroundProcess.ProcessType.Exporter.Queue=EXPO
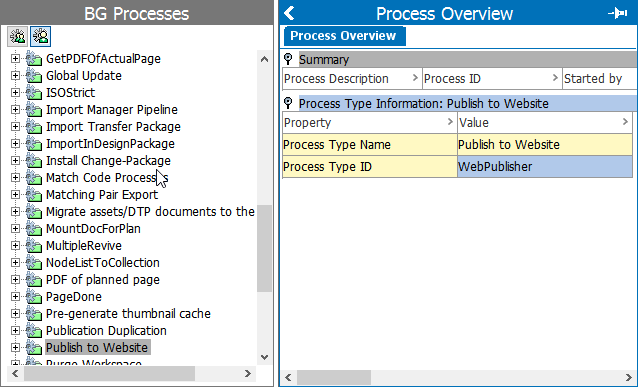
BackgroundProcess.ProcessType.WebPublisher.Queue=WEBP
The [Process Type ID] has been replaced by the values described.
Note: If you run a clustered setup, and you have made the amendments in the shared file, the settings regarding the size will be applicable for each application server. Hence, if you have edited the shared configuration file as described in the example above on a cluster with two application servers, you would be able to run four exports and four web publisher processes simultaneously on the cluster, i.e. two exports and two web publisher processes on each application server.
Also part of a default STEP configuration are properties that enable STEP's auto-deletion function for background processes that have ended in the 'Aborted', 'CompletedWithErrors', 'Succeeded', or 'Failed' states.
These three properties determine how long, measured in hours, background processes will be retained by STEP for export, import, and web publishing processes:
AutoDeleteBackgroundProcesses.AgeInHours.Exporter = 168
AutoDeleteBackgroundProcesses.AgeInHours.Importer = 168
AutoDeleteBackgroundProcesses.AgeInHours.WebPublisher = 168
By default, all ended background processes are set to auto-delete after 168 hours (one week). To make changes to that default, these properties can be edited to direct STEP to retain background processes for less or more time by changing the number value.
Using these properties, the retention period for background processes can be individually adjusted for exports, imports, and web publishing tasks.
Aspects of the auto-delete functionality related to when ended background processes are exposed to the auto-deletion process can be configured to meet the requirements of the specific user.

Using this property, users can dictate the frequency at which STEP runs a check to assess which ended background processes are newly subject to auto-deletion. The value must be an integer and, if no property is set, defaults to one [1].
AutoDeleteBackgroundProcesses.OperatingHours
This property can be used to set the interval(s) during a 24-hour period in which the auto-delete function should be run against ended background processes. This property is often set for users who want the auto-delete functionality to only run during business hours. Using the 24-hour clock, the value for this property should be set in this format: "[XX]-[YY]", with [XX] being the starting hour and [YY] the ending hour. Multiple intervals can be configured using the same format, separating the hour pairs with a semi-colon instead of a dash, e.g., 10-16;22-02. If this property is not set, the auto-delete functionality is set to the default, which is to run at all hours.
If the time zone during which the auto-delete functionality runs should be different than the default time zone set on the app server, then users can configure the appropriate time zone using this property. Using the 24-hour clock, the value for this property should be set in this format: "GMT[+/-][XXYY]", with [XX] being the hour and [YY] being the minutes following (+) or preceding (-) Greenwich Mean Time (GMT), e.g., GMT+0200. For example, if the time zone to be configured using this property is Eastern Standard Time (EST), then the value for this property should be GMT-0400. For Pacific Standard Time (PST), the value would be GMT-0700. If this property is not set, the auto-delete functionality is set to the default, which is to run according to the time zone set on the app sever.
Important: It is important to note that this property should not be set unless the AutoDeleteBackgroundProcesses.OperatingHours property has also been set.
With these properties in place in the sharedconfig.properties file, background processes that have ended in the 'Aborted', 'CompletedWithErrors', 'Succeeded', or 'Failed' states that are older than the number of hours specified in the AutoDeleteBackgroundProcesses.AgeInHours properties will be automatically deleted from STEP. It should be noted that, in this context, deletion means removal not just from the application server but also the file server.
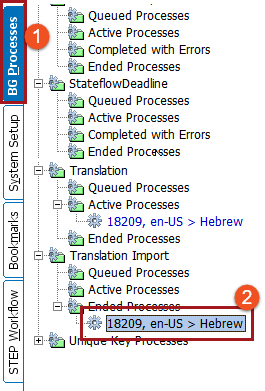
Background processes may also be deleted manually. To delete a background process, click the BG Processes tab and then select the background process to be deleted.
From the Toolbar, click the Maintain dropdown, and then select Delete.
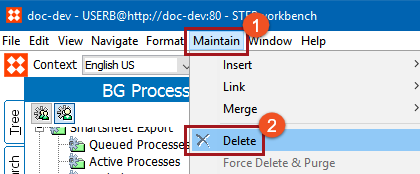
The background process is now removed from STEP.
2018, Stibo Systems