Listed below are all of the functions accessible via STEP's menu bar. Though many tasks central to using STEP can be accomplished with a right-click on an object and then selecting the desired option from a dropdown, some of the less frequently used functions are only accessible via the menu bar.
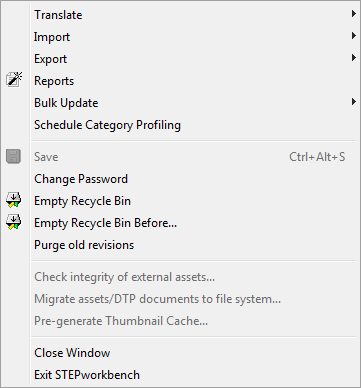
Allows the ability to translate Products / Assets / Classifications in the Workbench and to import translations.
Allows the ability to load data / images and documents / eCl@ss Classifications, GPC, ETIM, or to export data / images and documents. The user can also schedule imports and exports from their menu selections.
Launches the Standard Reports and any custom data reports.
Allows the user to launch or schedule a Bulk Update.
Launches the Schedule Category Profiling dialog.
This allows the user to save any changes that are made within the Workbench.
During any session, any user may change their own password.
Contents of the Recycle Bin are permanently deleted when this function is selected. Can also be accessed by right-clicking on the Recycle Bin icon in the [Tree] tab.
Contents before a specified date are deleted from here.
This is a global purge of revisions contained within a specified workspace. A further description of this functionality is available in the Managing Revisions in STEP section of the System Setup / Superuser documentation
This option is enabled on systems set up to store images in file system and not in the STEP database. If a Classification is selected the user can click this menu item to see if all images in the selected classification have been successfully migrated from the database to the file system.
This option is enabled on systems set up to store images in file system and not in the STEP database. If a Classification is selected, the user can click this menu item to migrate images stored in the database to the file system location.
This option closes the active window.
This will exit the STEP Content Manager completely by exiting all active windows.
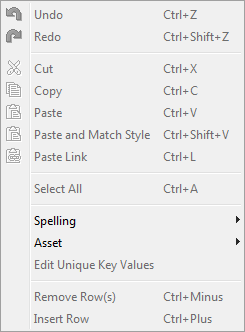
Undoes the last action of the user. Note: it does NOT undo character by character changes in text editors.
Once an action is undone by selecting 'Undo', a user can then select 'Redo' to repeat the action.
Standard 'cut' operation.
Standard 'copy' operation. Note that if a folder is copied, the subfolders will NOT be copied.
Standard 'paste' operation.
Allows the copied object to be linked into another object (e.g. linking an attribute into a second attribute group). Creates another instance (not a copy) of the same object, just in a different location.
Standard 'select all' operation.
Automatic spell check is enabled / disabled here and manual spell check can be accessed here.
Create local content of asset, delete local content of asset, update asset system properties, and edit asset can be accessed here.
Edit the key values of the currently selected object.
Removes a selected row, e.g. an attribute linked to a product. Keyboard Shortcut = Ctrl + '-'.
Adds an additional row, e.g. an attribute linked to a product. Keyboard Shortcut = Ctrl + '+'.
The View Menu's purpose is to change the way a user views the STEP system. In this menu, users may change the workspace, context, and mode, add a filter, change the primary hierarchy, and other options to customize the view to their needs.
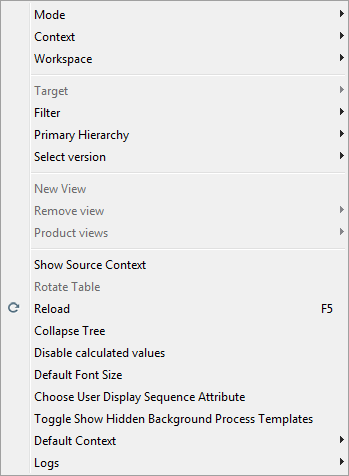
Context shows all available contexts. It is possible to change context and view objects as they appear in different contexts.
Workspace shows all available workspaces. It is possible to the change workspace and view objects as they appear in different workspaces.
Note: In the Workbench toolbar next to the context selector, a toggle icon (![]() ) is available. It makes it possible to switch between Main and Approved workspaces.
) is available. It makes it possible to switch between Main and Approved workspaces.
Depending on the view chosen, this function changes from target to source. E.g., when in the Translation view, this allows the user to select the source language.
A view that filters out empty attribute values, non-mandatory attributes, uneditable attributes, and/or illegal attributes.
A product may be located in several different hierarchies. When searching for products, a user may wish to locate the product in a particular hierarchy. For example, a product manager may always want to view the product in its position in the main classification (All Products). However, a web administrator may wish to view the product in its location in the alternate web classification. This option sets the default as to which hierarchy the product will be displayed in when it is selected from the search’s 'hit list'.
Allows the user to set the default publication / version used for proofing.
Allows the user to create / customize a new view to hide / show attributes.
Removes an unwanted / unneeded view.
Shows the products that are selected.
Attribute names may be translated. This option allows a user to view attribute values in a foreign language but still view attribute names in the source language.
This will flip the selected table so that the columns become rows and vice versa. This is most often used in a multi-product editor. Keyboard Shortcut = F11.
Retrieves updated information from the database including other users’ changes.
Collapses the folders in the Tree navigator.
Disables the calculation of calculated attributes. This will make the STEP interface load faster.
Note: If Disable calculated attributes is checked, calculated attributes can be rendered one by one by clicking the Calculate button on the Product editor 
Allows the user to change GUI font.
Allows the user to select a user specific Display Sequence Attribute, different from the global set up in [System Setup], Users & Groups, in the System Settings tab, under Product Information Manager Default Settings.
Sets the default context used when logging in.
Displays Workspace and System Setup logs.
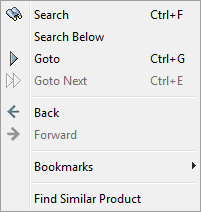
Searches for all different types of objects within the system (products, attributes, values, assets, etc.). Also contains the ability to search a) within a selected hierarchy, b) via attribute values, and c) via custom queries.
Performs a search within a selected hierarchy.
A quick way to jump to a particular object in the database based on the name, ID, or Unique Key value. If there are multiple hits, it will jump to the first one it finds.
When there are multiple hits from the 'Goto' function, the user can opt to select Goto Next to continue on to the next hit.
Jumps the user backwards or forwards to previously selected objects. Works the same as the Back / Forward button in a web browser.
Allows the setting of bookmarks specific to individual users – just as in a web browser. For example, a user can 'bookmark' a specific search query.
Populates a search based on the attributes of the selected product. When selected, a window will appear prompting the user to check off common attributes to search for.
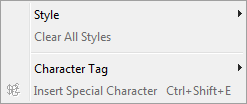
Users can apply style formatting to selected strings of text such as bold, italic, or custom style tags.
Removes all styling that is applied to a selected string of text such as bold and italic.
Inserts custom tags e.g. <BigStar/> into a text string.
This is an embedded character map. It shows the most recently used characters and offers a complete Unicode character range.
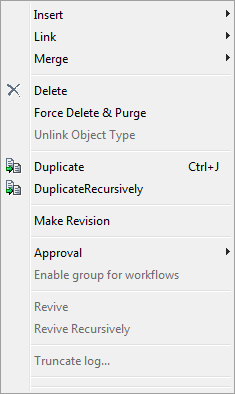
Insert an object based on either the currently selected tree or elsewhere.
Allows users to link attributes to products, assets, products to classifications, etc.
Depending on the selected object, the user can merge attributes, LOVs, and LOV values.
Standard 'delete' function. Warns the user if the selected folder contains subfolders. All deleted objects are moved to the Recycle Bin (where they can be revived or totally removed from the system).
If an object is selected in the workbench, and Force Delete and Purge is clicked, the object will be deleted and purged from recycle bin.
A System Setup option. Allows a superuser to unlink a selected object type from its parent.
Standard 'duplicate' operation. Essentially a copy and paste in one click.
If a hierarchy needs to be duplicated, the user can select the top node in the hierarchy and click Duplicate Recursively. The hierarchy will be duplicated.
Allows a user to force a revision on a product and provides a comment for explanation.

Approves an object from the Main workspace to the Approved workspace and changes the red X ( ) to either a green checkmark (
 ) or a yellow one (
 ).
).
See the Approval of Objects section of the STEP User Guide / Getting Started documentation for more information
Approve selected parts of the unapproved changes on selected object.
Generates report that shows what would happen if the object is approved.
Deletes the object from the Approved workspace.
Launches a workflow process that will approve the currently selected object and all of its children.
Takes selected object and moves it into the chosen workspace.
Updates the object across all workspaces, including references and values for classifications, products and images & documents.
Updates the current workspace from another workspace. It is possible to update the entire workspace or only a part of the workspace. Objects that do not exist in the current workspace will be transferred to the current workspace.
Updating objects across workspaces. This means that if an object exists in different workspaces, values and references can be updated across these workspaces.
Revives a deleted object.
Revives a deleted object recursively.
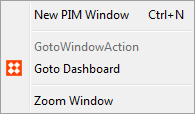
Allows the user to launch another session.
Brings the user to the dashboard.
Maximizes the selected window.
Brings the user to the online help documentation.
Displays the workbench introductory window.
2017, Stibo Systems