Open topic with navigation
Configuring Matching Algorithms
Before configuring a matching algorithm, ensure that you have developed a thorough matching and linking strategy. Among the many choices available, you must determine which string comparison method to use and what criteria it should follow.
For more information, see the Match Criteria section of the Matching and Linking documentation here.
For additional information on configuring the accompanying matching algorithms and match codes, see the Matching and Linking Components (here) and Configuring Match Codes (here) documentation.
Configuration
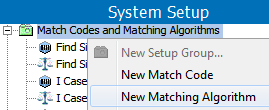
- In System Setup, right-click the node configured to house matching algorithms and select 'New Matching Algorithm'.
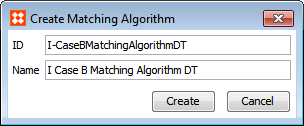
- In the 'Create Matching Algorithm' dialog, define an ID and name for the matching algorithm, and click Create.
- On the Matching Algorithm editor, navigate to the 'Matching Algorithm' tab and click the ellipsis button (…) in the 'Match Code' field. Choose the applicable match code, and then click Select.

Note: The 'Configuration Validation Status' area displays a green check mark if the matching algorithm has a valid configuration.
- In the 'Matching Context' and 'Matching Workspace' fields, specify in which context and workspace to run the matching algorithm. This does not have to be the same context and workspace combination as used for the corresponding match code.
- In the 'Duplicate Type' field, click the ellipsis button (…). In the selector that appears, select the applicable reference type. Next, do the same for the 'Non-Duplicate Type' field. The reference types selected must correspond with those mapped in the component model.
For more information, see the Component Model Configuration documentation here.
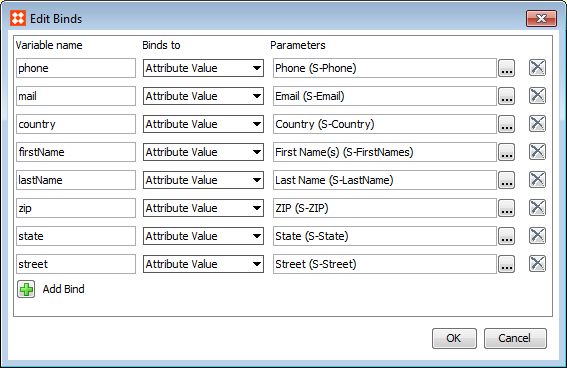
- Open the 'Global Binds' flipper and click the Edit link. In the 'Edit Binds' dialog, click the Add Binds button to create a new bind, and then use the 'Binds to' dropdown to select a bind (some are displayed within a bind group). Next, if required, under 'Parameters', click the ellipsis button (…)to specify an object to bind via the selector dialog that appears. Finally, under 'Variable Name', specify a variable name for the bind. Click OK when finished.
For more information on using binds with matching algorithms, see the Match Criteria documentation here.
- Open the 'Match Criteria' flipper, click the Add Criterion link to create a new criterion for the matching algorithm, then specify a name and match criterion in the dialog that appears. In the 'Criterion' field, click the ellipsis button (…) to open the JavaScript editor and create the matching criterion. Once complete, specify a weight for the criterion via the 'Weight' field.

For more information on match criteria, see the Match Criteria documentation here.
- Once the match criteria has been configured, open the 'Evaluator' flipper to test the criteria on selected data.
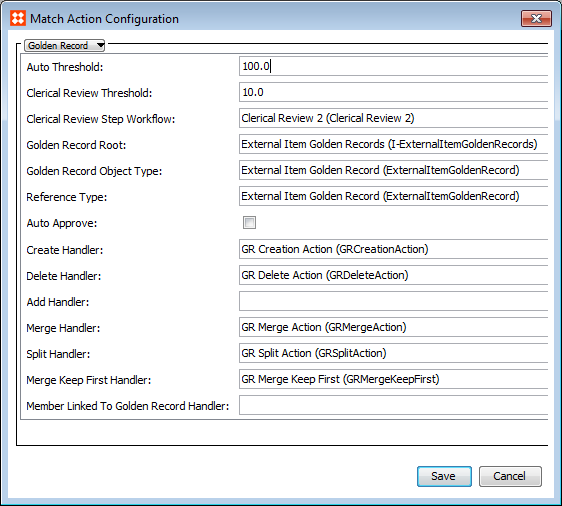
- Open the 'Match Action' flipper and click the Edit link. In the dialog that appears, specify a match action and click Save when finished.
- For Identify Duplicates, specify the threshold via the 'Create Threshold' field. For more information, see the Identify Duplicates Match Action documentation here.
- For a Golden Record setup, several other fields need to be populated. For more information, see the Configuring Golden Records documentation here.
- If configuring a golden record match action, open the 'Survivorship Rules' flipper and click the Edit link to open the configuration dialog. Click the Add Survivorship Rule link and select a rule. Rules can be re-ordered using the arrow buttons and deleted with the 'X' button. Survivorship rules are not used to identify duplicates.
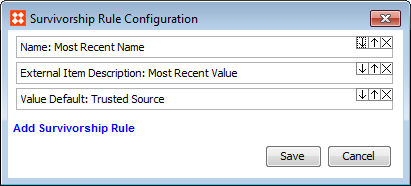
Note: If a survivorship rule is added but has not been configured, the Configuration Validation Status of the matching algorithm will display an 'X'.
For more information, see the Survivorship Rules documentation here.
2017, Stibo Systems