Category Profiles can be configured with strict profiling parameters via the Profile Configuration screen. From this view, users can select a preexisting (saved) profile configuration to use or create one specifically for the selected object / node. If you choose to create a local configuration for the selected object / node, additional configuration options are made available.
Note: If using a saved profile configuration, all relevant parameters will already be defined.
These configuration options allow users to:
- Use a business condition to specify which objects to profile (allows you to exclude discontinued products, for example)
- Include or exclude data from specified attribute groups when profiling the data
- Designate business conditions to test when a profile is run
- Split up the value of a specified attribute so that the individual words in the attribute's value are profiled as separate entries
- Define which Metrics to use when profiling the data
Note: The relevant profile(s) must be updated manually every time changes are made to any of the parameters.
Using Saved Profile Configurations
Some setup is required to make profile configurations available for use in multiple objects / nodes.
Note: It is possible to skip this setup if you intend to use a local profile configuration for each individual data profile.
Prerequisites
Before you can create and use Profile Configuration setup entities, a setup group must first be created to house the configurations. For more information, refer to the Creating Setup Groups in System Setup section of the System Setup documentation here.
Creating a Profile Configuration Setup Entity
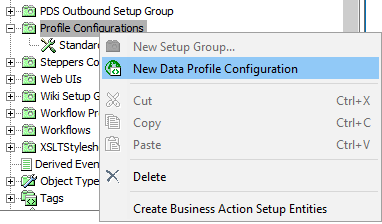
To create a new profile configuration for use in multiple different profiles, navigate to System Setup in workbench, right-click the Profile Configurations root node, and select New Data Profile Configuration.
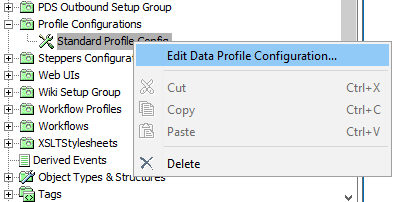
To edit the newly created profile configuration, right-click the node and select Edit Data Profile Configuration....
In the window that appears, make any desired changes to the configuration and then click Save.

For more information on the available configuration options, refer to the Editing a Profile Configuration section below.
Setup entity definitions can be exported as comments and submitted to an external source control system for comparison purposes. For details, refer to the Configuration Management documentation.
Setting a Default Configuration
If you have several different profile configurations in your system it may be necessary to set one as the default. This is useful whenever a configuration is not specified on a node / object, as this default configuration will automatically be chosen when a profile is run.
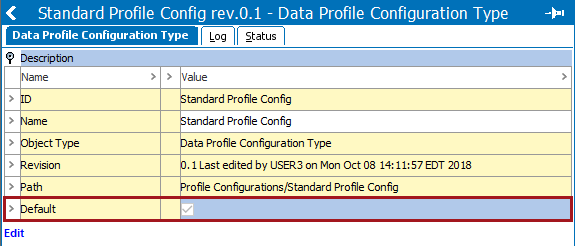
To set a configuration as the default, navigate the configuration node in System Setup, and on the Data Profile Configuration Type tab, check the box labeled Default.
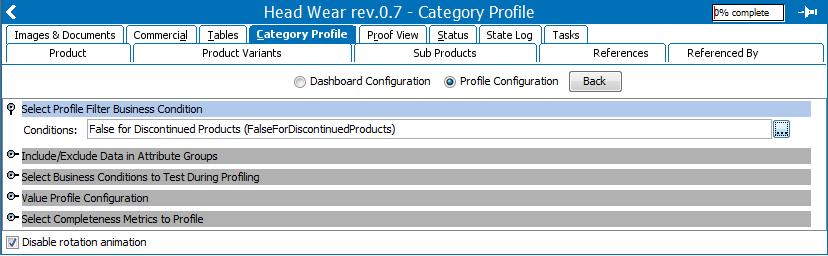
Accessing the Profile Configuration on an Object / Node
- In the Tree, select the relevant hierarchy or object.
- On the Category Profile tab, click the
 Tools icon in the upper right corner, and then select Profile Configuration.
Editing a Profile Configuration
Whether editing a saved profile configuration or editing a local profile configuration on an individual object / node, the configuration options detailed in this section apply to both.
When editing a local configuration on an object / node, however, one additional parameter called Select Configuration is available. This parameter allows you to select between a local configuration and any saved profile configurations from a dropdown menu.
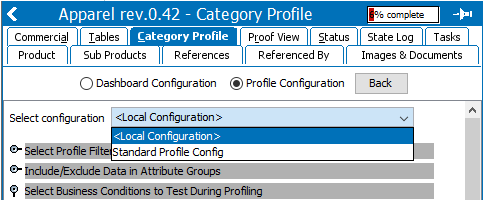
Selecting <Local Configuration> opens the rest of the Profile Configuration parameters for editing, allowing you to create a unique profile configuration for the currently selected object / node.
Instead, to apply a saved profile configuration to the selected object / node, select the desired configuration from the dropdown.
Note: Any examples detailed below assume you are editing a local configuration and have relevant dashboard widgets configured. The actual configuration steps of each parameter also apply to editing profile configuration setup entities (saved profile configurations).
Select Profile Filter Business Condition
The Select Profile Filter Business Condition parameter allows users to filter the data being profiled with the specified business rule. This can be particularly useful if only objects of a specific type should be profiled or objects with specific attribute values should be left out.
- In the Select Profile Filter Business Condition section, click the ellipsis button (
 ), then browse or search for the relevant business condition.
As an example, in the following screenshot a business condition that excludes discontinued products is selected:
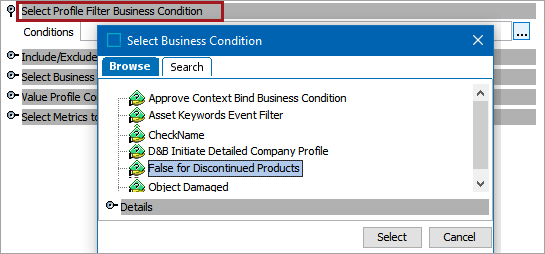
The selected condition specifies that if the attribute Discontinued is set to Yes, the object is excluded from the profiling. The selected business condition is pictured below:
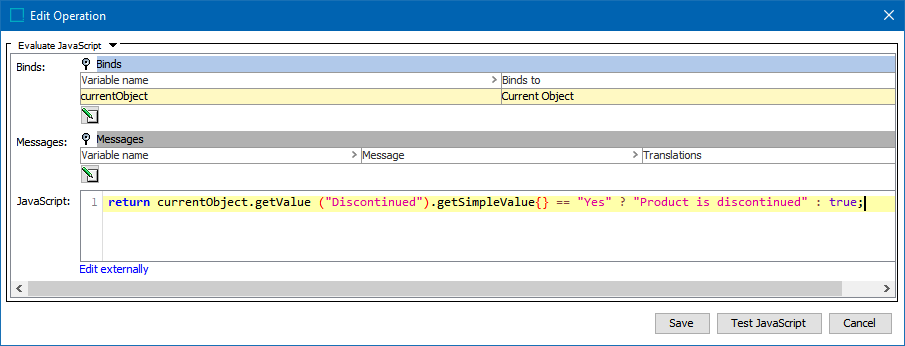
- Click Select to apply the business condition to the profile.
- If editing a profile configuration setup entity, click Save. If editing a local profile, click the Back button to return to the Category Profile Dashboard, then click the Update / Generate profile link. If an Object Count widget is configured on the dashboard it will display the number of objects that were filtered out by the condition. In the example below, twenty-three discontinued objects were excluded as these were deemed False during profiling:
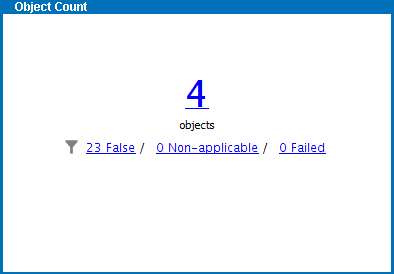
For more information on how to configure the Object Count widget, refer to the Category Profile Dashboard section of the Data Profiling documentation
Include / Exclude Data in Attribute Groups
The Include / Exclude Data in Attribute Groups parameter allows users to filter the data being profiled via attribute group.
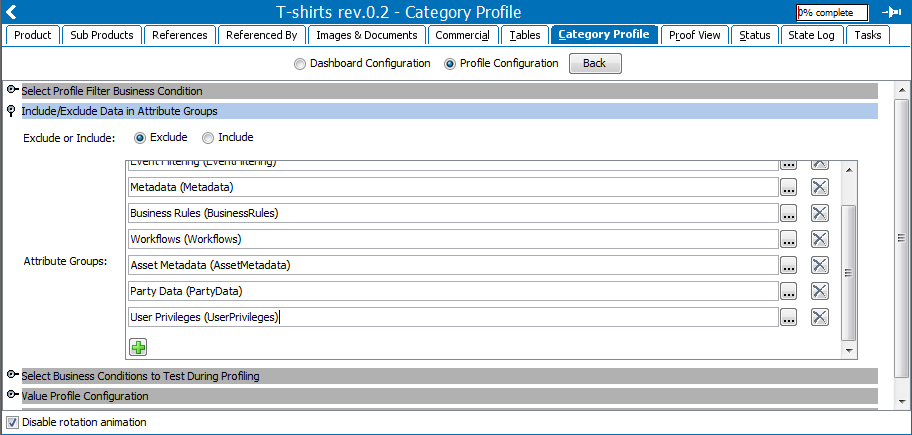
- Navigate to the Include / Exclude Data in Attribute Groups section and click either the Exclude or Include radio button. If Include is selected, the data profile will only pull data from the attribute groups specified by the user in the Attribute Groups field. If Exclude is selected, the data profile will pull data from all attribute groups except those specified in the Attribute Groups field. Typically, the choice between Include and Exclude will largely depend on which requires the shorter list.
Note: To include all attribute groups in the system, the user can select Exclude and leave the Attribute Groups field blank.
- Click the green plus sign to add a new attribute group selector field.
- Click the ellipsis button (), then browse or search for the relevant attribute group.
- Click Select. If no other attribute groups need to be specified, click the Back button when editing a local configuration or Save if editing a profile configurations setup entity.
Important: Profiling calculated attributes can significantly impact performance. When profiling larger datasets, it is good practice to exclude any calculated attributes that are not specifically needed in the profile result.
Select Business Conditions to Test During Profiling
The Select Business Conditions to Test During Profiling parameter allows users to test business conditions for all products, entities, classifications, and assets when profiling a selected hierarchy. The result of the tests can be displayed in Business Condition Status widgets on the dashboard.
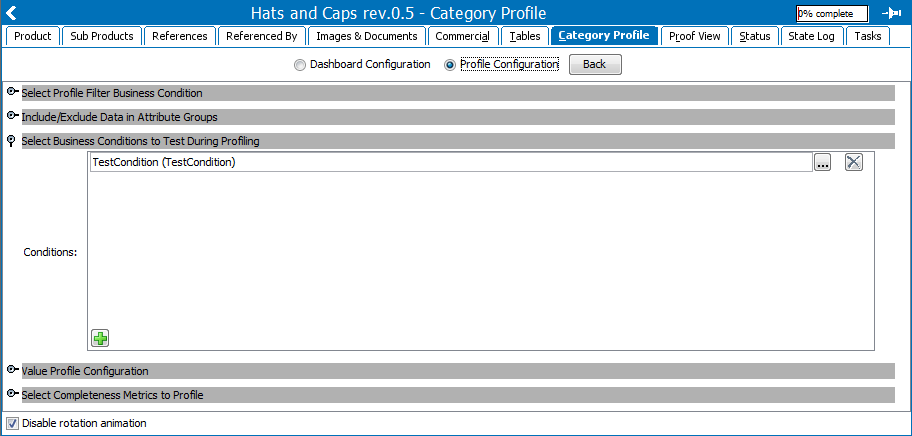
- Navigate to the Select Business Conditions to Test During Profiling section and click the green plus sign to add a new business condition to the selector field.
- Click the ellipsis button (), then browse or search for the relevant business condition.
- Click Select. If no other business conditions need to be specified, click the Back button when editing a local configuration or Save when editing a profile configurations setup entity. If the Business Condition Status widget is configured on the dashboard, it will display the results of the test.
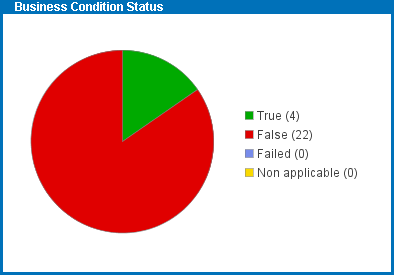
For more information on how to configure the Business Condition Status widget, refer to the Category Profile Dashboard section of the Data Profiling documentation
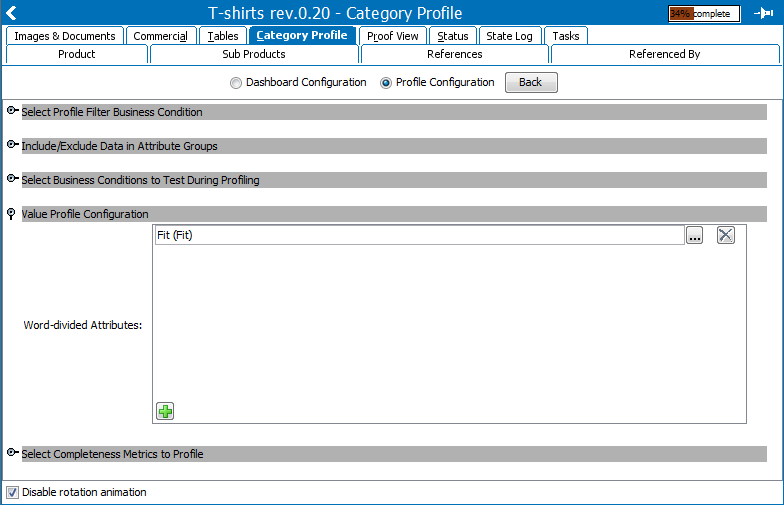
Value Profile Configuration
The Value Profile Configuration parameter allows users to profile the individual words of an attribute's value. As an example, an attribute 'Fit' with validation base type 'Text' lists all applicable shirt sizes for a product. These individual sizes can be profiled separately so that the attribute value 'M L XL' is profiled as three different values, 'M', 'L', and 'XL.'
Attribute value as displayed on the product node:

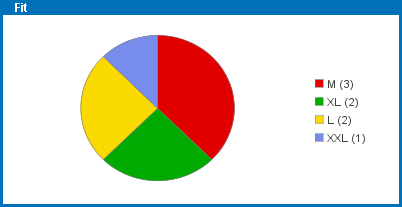
Profiled values as displayed in the Value Detail view:
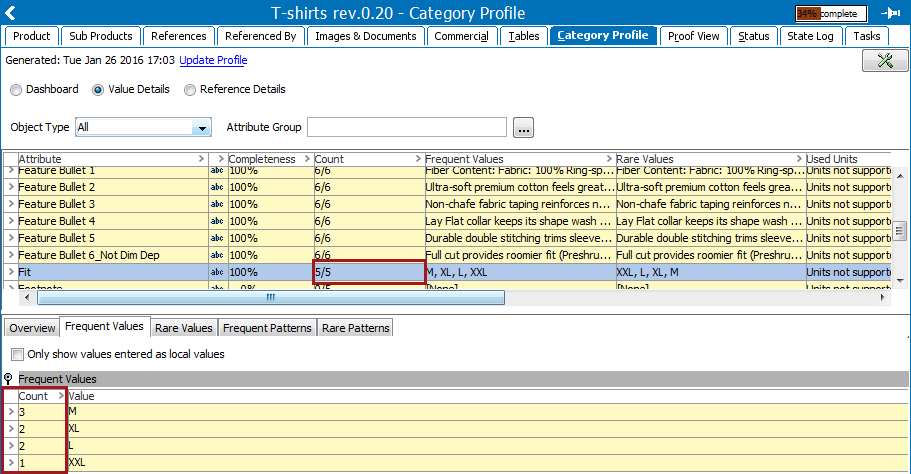
In addition to the Value Details view, this separation of values is also reflected on all applicable dashboard widgets. For more information on the Value Details view, refer to the Value Details section of the Category Profile documentation here.
Parameter Configuration Steps
Select the attributes whose values should be profiled separately.
- Navigate to the Value Profile Configuration section and click the green plus sign to add a new word-divided attribute to the selector field.
- Click the ellipsis button (), then browse or search for the relevant attribute.
- Click Select. If no other attributes need to be specified, click the Back button when editing a local configuration or Save when editing a profile configurations setup entity.
Select Metrics to Profile
The Select Metrics to Profile parameter allows users to specify which metrics to use when profiling the data.
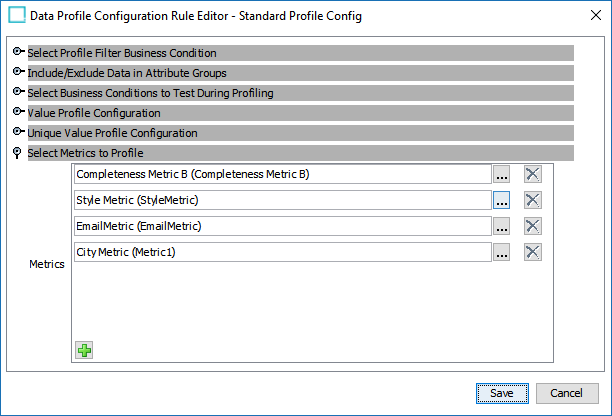
- Navigate to the Select Metrics to Profile section and click the green plus sign to add a new completeness metric to the selector field.
- Click the ellipsis button (), then browse or search for the relevant metric.
- Click Select. If no other metrics need to be specified, click the Back button when editing a local configuration or Save when editing a profile configurations setup entity.
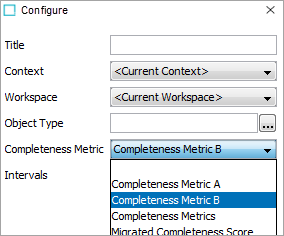
If using the Metric Result widget, ensure that this field includes whichever metric is configured on the widget. If they do not match, a 'no data available' message will appear in place of the data on the widget.
Important: Even if the metric specified by the widget is the same as the system default, it will still display the 'no data available' message. To use this widget, the proper metric must be specified in the Profile Configuration.
For more information refer to the Metrics section of the System Setup documentation here.