The Data Elements section of a decision table defines input data for the match criteria. The data element is responsible for retrieving data, and making it easy to compare. This often involves the reduction of data to a kind of canonical form, like lowercasing letters in a text, removing spaces from phone numbers, or expanding abbreviations.
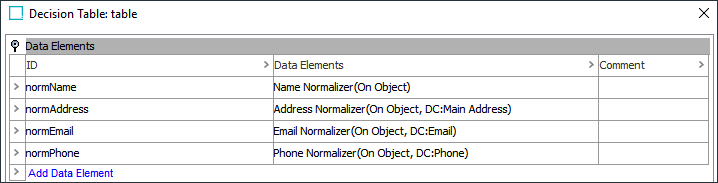
Most data elements take data from source objects, then normalize it in some form, before providing the data to matchers and match code generators.
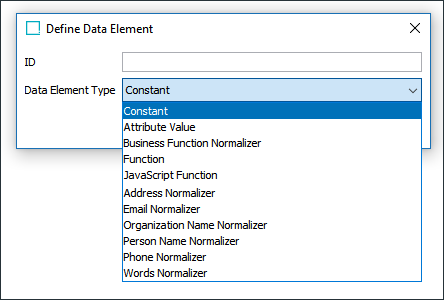
The following data element types are available:
- Standard Data Elements
- Constant
- Attribute Value
- Business Function Normalizer
- Function
- JavaScript Function
- Party Data Normalizers
- Address Normalizer
- Email Normalizer
- Organization Name Normalizer
- Person Name Normalizer
- Phone Normalizer
- Words Normalizer
Data elements can be chained so that the output of one data element can be used as input to another data element.
Configuration
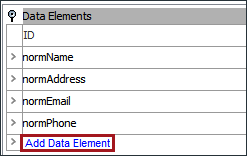
- To add data to the table, click the 'Add Data' element link.
- In the 'Define Data Element' popup dialog, enter an ID for the data element and use the Data Type dropdown(s) to define the data type, then click the Add Data button.

Important: No two data elements, matchers, or match code generators should have the same ID.
- The new data element will be present in the table, but is still not configured. Click the ellipsis button (
 ) to populate the data element. See the section corresponding to your chosen data element under Standard Data Elements and Party Data Normalizers below for more information.
Standard Data Elements
Standard data elements include:
- Constants
- Attribute Value
- Business Function Normalizer
- STEP Functions
- JavaScript Functions
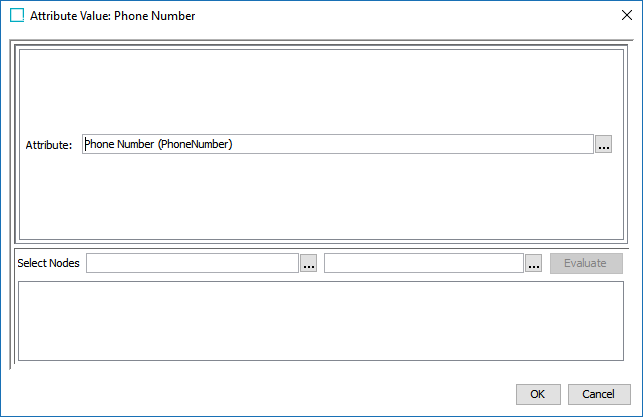
Attribute Value
The Attribute Value allows users to specify a single attribute and output its value. To specify an attribute, click the ellipsis button () and browse or search for the desire attribute. This data element does not normalize its output.
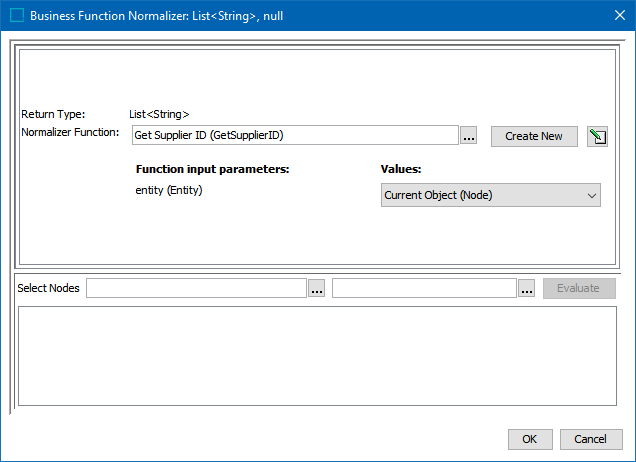
Business Function Normalizer
A Business Function Normalizer is the most versatile normalizer in the toolbox. Using a business function, it can take any number of values from the source records and produce a normalized data element. For more information, see the Business Functions topic of the Business Rules documentation here.
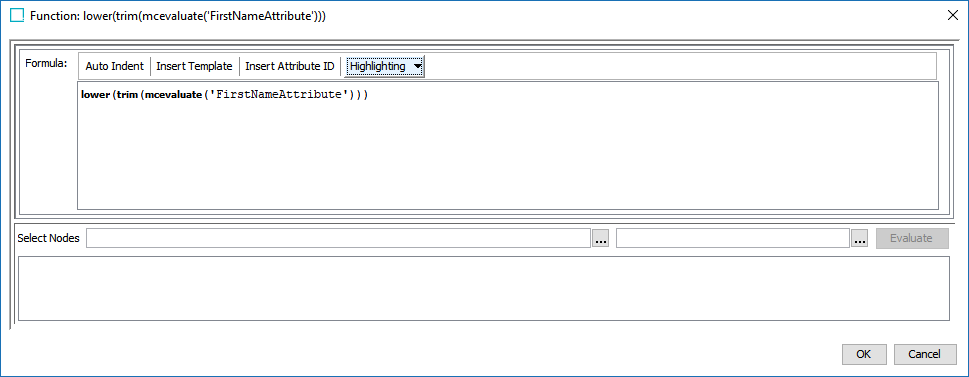
STEP Function
The element is called 'Function' on the dropdown list, and this option will normalize values via built-in STEP functions.
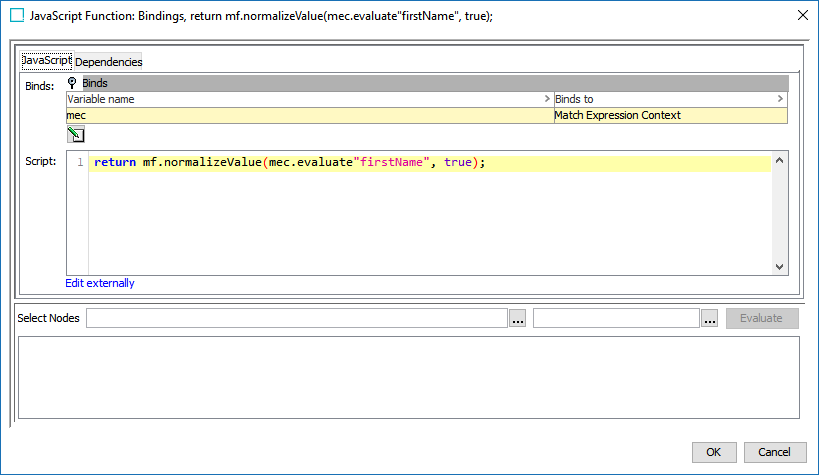
JavaScript Function
Normalized values produced via JavaScript functions.
Party Data Normalizers
These normalizer templates are intended for matching of party data:
- Address Normalizer
- Email Normalizer
- Organization Name Normalizer
- Person Name Normalizer
- Phone Normalizer
- Words Normalizer
Address Normalizer
The Address Normalizer produces a normalized set of addresses for use in the corresponding Address Matcher.
This data is provided by the input address element attributes mapped to the Address component model and include the following: Input City, Input Country, Input State, Input Street, Input Zip, Standardized City, Standardized Country, Standardized Country ISO Code, Standardized State, Standardized Street, Standardized Zip.
The output of the Address Normalizer is java.util.Set<com.stibo.partydatamatching.domain.address.Address>
Note: If the postal code mapped to the corresponding standardized component model parameter is valid for the objects being compared, the decision table will output normalized values for address attributes mapped to the standardized attribute fields on the component model.
For more information on the Address Component Model, see the Address Component Model section of the Data Integration documentation here.
- To normalize customer address data, click the ellipsis button () in the Data column to access the configuration.
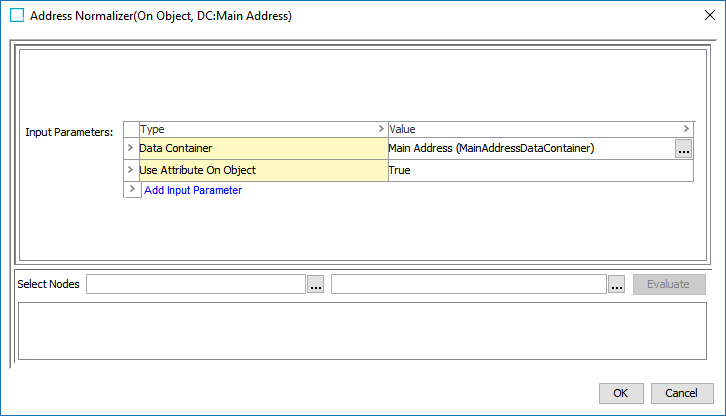
- For Input Parameters, click the Add Input Parameter link, and in the dialog, select the input type from the dropdown.
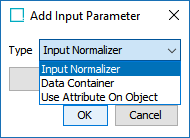
- Input Parameter: Select either a data container or the node object itself, which must hold the input attributes the Address Normalizer use, as defined by the component model. There is also the option of using an Input Normalizer, typically a business function written in JavaScript.
- Data Container: When you select 'Data Container,' click the ellipsis button () and browse or search for a data container type. The selected data container type will have its address data normalized when used in a matcher.
- Use Attribute on Object: When you select 'Use Attribute On Object,' click the dropdown and select 'True.' This input parameter will normalize address data that has been mapped to the address component model. This input parameter will be configured by default.
- Click OK once the selection is made.
Email Normalizer
An email normalizer can normalize email data for use in the corresponding email matcher.
- To normalize email data, click the ellipsis button () in the Data column to access the configuration.
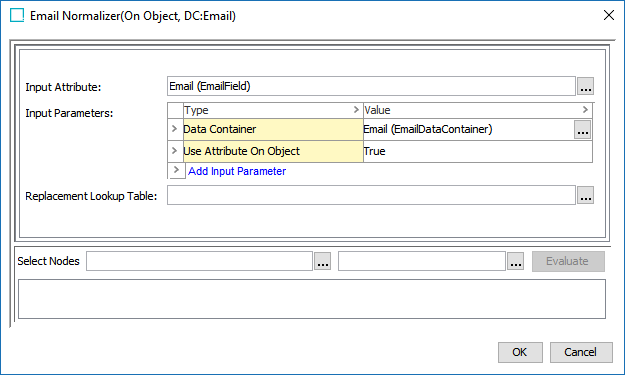
- For the Input Attribute parameter, click the ellipsis button () and browse or search for an email attribute to normalize.
- For Input Parameters, click the Add Input Parameter link, and in the Add Input Parameter popup dialog, select the input type from the dropdown.
- Input Normalizer: Enter the ID of another Email Normalizer to use its output. Typically, this normalizer is written in JavaScript.
- Data Container: When you select 'Data Container,' click the ellipsis button () and browse or search for a data container. The selected data container will have its email data normalized when used in a matcher.
- Use Attribute on Object: When you select 'Use Attribute On Object,' click the dropdown and select 'True.' This input parameter will normalize the email attribute mapped to the Input Attribute field. This input parameter will be configured by default.
- For the Replacement Lookup Table parameter, click the ellipsis button () and select a lookup table. Typically, this is used to remove invalid email values.
- Click OK when finished.
Organization Name Normalizer
An Organization Name Normalizer can normalize organization name data for use in the corresponding Organization Name Matcher.
- To normalize organization name data, click the ellipsis button () in the Data column to access the configuration.
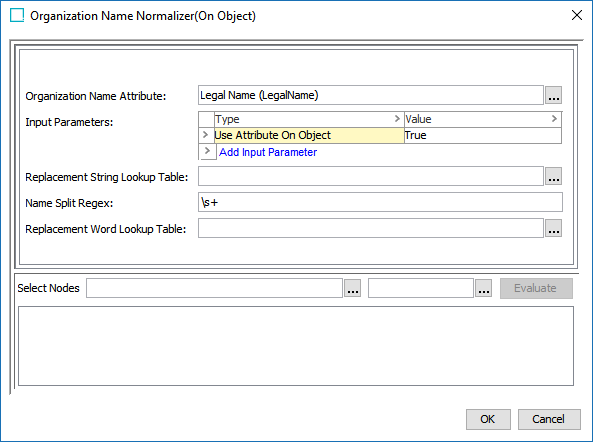
- For the Organization Name Attribute parameter, click the ellipsis button () and browse or search for an organization name attribute to normalize.
- For Input Parameters, click the Add Input Parameter link, and in the Add Input Parameter popup dialog, select the input type from the dropdown.
- Input Normalizer: Enter the ID of another Organization Name Normalizer to use its output. Typically, this normalizer is written in JavaScript.
- Data Container: When you select 'Data Container,' click the ellipsis button () and browse or search for a data container. The selected data container will have its organization name data normalized when used in a matcher.
- Use Attribute on Object: When you select 'Use Attribute On Object,' click the dropdown and select 'True.' This input parameter will normalize the organization name attribute mapped to the Organization Name Attribute field. This input parameter will be configured by default.
- For the Replacement String Lookup Table parameter, click the ellipsis button () and select a lookup table. This is used to account for inconsistencies in organization names by defining semantically equivalent strings (especially the usage of apostrophes and quotations). For example, normalizing ''s' to be 's' would change the organization name ACME's into ACMEs. Normalizing 'n' to be and would change the organization name ACME'n'SON to ACME and SON.
- For the Name Split Regex parameter, enter the RegEx used to split the value of the Organization Name Attribute into words.
- For the Replacement Word Lookup Table parameter, click the ellipsis button () and select a lookup table. Typically, this is used to account for the inconsistent use of common words in organization names. For example, '&' can be replaced by 'and.'
- Click OK when finished.
Person Name Normalizer
A Person Name Normalizer can normalize customer name data for use in the corresponding Person Name Matcher.
- To normalize customer name data, click the ellipsis button () in the Data column to access the configuration.
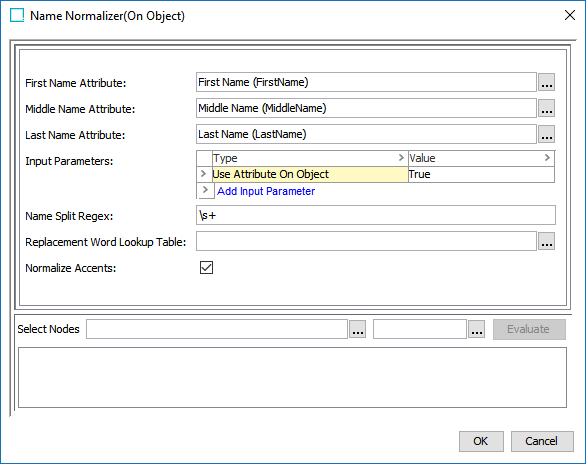
- For the First Name Attribute parameter, click the ellipsis button () and browse or search for a first name attribute to normalize. Repeat this step for the Middle Name Attribute and Last Name Attribute parameters.
- For Input Parameters, click the Add Input Parameter link, and in the Add Input Parameter popup dialog, select the input type from the dropdown.
- Input Normalizer: Enter the ID of another Person Name Normalizer to use its output. Typically, this normalizer is written in JavaScript.
- Data Container: When you select 'Data Container,' click the ellipsis button () and browse or search for a data container. The selected data container will have its name data normalized when used in a matcher.
- Use Attribute on Object: When you select 'Use Attribute On Object,' click the dropdown and select 'True.' This input parameter will normalize the name attributes mapped to the First Name Attribute, Middle Name Attribute, and Last Name Attribute fields, and output them as one value. This input parameter will be configured by default.
- For the Name Split Regex parameter, enter the RegEx used to split the First Name, Middle Name, and Last Name values into words.
- For the Replacement Word Lookup Table parameter, click the ellipsis button () and select a lookup table. Typically, this is used to remove unwanted words from names. For example, 'Mr.,' 'Dr.,' or 'Von.'
- Check the Normalizer Accents checkbox if accented characters should be normalized.
- Click OK when finished.
Phone Normalizer
A Phone Normalizer can normalize phone data for use in the corresponding Phone Matcher.
- To normalize customer phone data, click the ellipsis button () in the Data column to access the configuration.
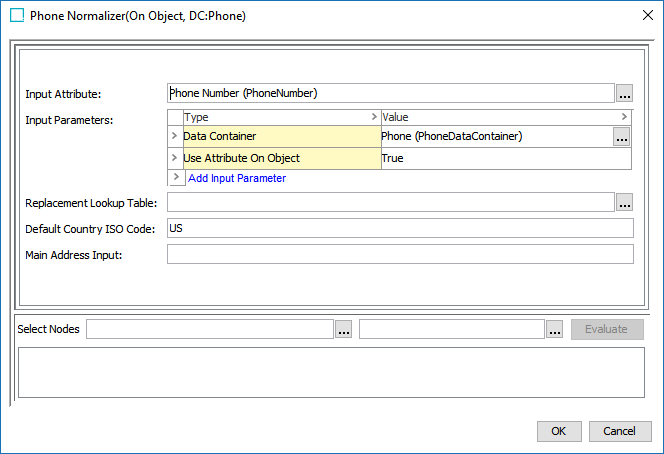
- For the Input Attribute parameter, click the ellipsis button () and browse or search for a phone attribute to normalize.
- For Input Parameters, click the Add Input Parameter link, and in the Add Input Parameter popup dialog, select the input type from the dropdown.
- Input Normalizer: Enter the ID of another Phone Normalizer to use its output. Typically, this normalizer is written in JavaScript.
- Data Container: When you select 'Data Container,' click the ellipsis button () and browse or search for a data container. The selected data container will have its phone data normalized when used in a matcher.
- Use Attribute on Object: When you select 'Use Attribute On Object,' click the dropdown and select 'True.' This input parameter will normalize the phone attribute mapped to the Input Attribute field. This input parameter will be configured by default.
- For the Replacement Lookup Table parameter, click the ellipsis button () and select a lookup table. Typically, this is used to remove invalid phone values.
- For the Default Country ISO Code parameter, enter a two-letter ISO code string.
- For the Main Address Input parameter, enter the ID of an Address Normalizer. The Country ISO Code value of the normalizer output is used in place of the Default ISO Code, if one exists.
Note: To use this parameter, write a JavaScript address normalizer that outputs a Country ISO code.
- Click OK when finished.
Words Normalizer
A Words Normalizer can normalize attribute data for use in the corresponding Words Matcher. Multiple attributes can be mapped to the same normalizer. When the corresponding Words Matcher is applied, all mapped attributes will be evaluated.
- To add a words normalizer, click the ellipsis button () in the Data column to access the configuration.
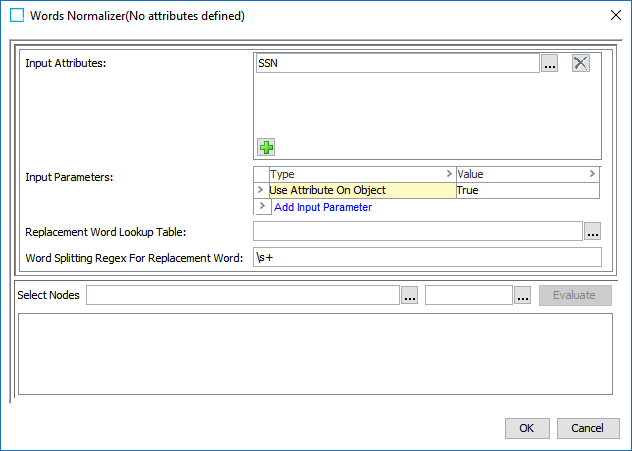
- For the Input Attribute parameter, click the plus sign (
 ) to create a new entry, then click the ellipsis button () and browse or search for attributes whose values should be normalized.
 - For Input Parameters, click the Add Input Parameter link, and in the Add Input Parameter popup dialog, select the input type from the dropdown.
- Input Normalizer: Enter the ID of another Words Normalizer to use its output. Typically, this normalizer is written in JavaScript.
- Data Container: When you select 'Data Container,' click the ellipsis button () and browse or search for a data container.
- Use Attribute on Object: When you select 'Use Attribute On Object,' click the dropdown and select 'True.' This input parameter will normalize the attribute mapped to the Input Attribute field. This input parameter will be configured by default.
- For the Replacement Word Lookup Table parameter, click the ellipsis button () and select a lookup table. Typically, this is used to remove invalid values.
- For the Word Splitting Regex For Replacement Word parameter, enter the RegEx used to split the attribute values into individual words.
- Click OK when finished.
Customer Data JavaScript Normalizers
For especially complicated solutions, it is possible to expand the capabilities of a customer data normalizer via JavaScript. These JavaScript normalizers can be written to input the normalized values of basic customer data normalizer(s) and manipulate the data in ways the standard normalizer could not. In other words, a JavaScript normalizer inputs a set of strings / values from a basic customer data normalizer and outputs a new set of strings / values.
Note: The JavaScript normalizer should output a completely new set of strings / values, and should not overwrite existing strings / values.
These normalizers can also be built completely from scratch rather than enhancing an existing customer data normalizer.
In many situations the more complex JavaScript normalizer would be cited by a corresponding matcher, rather than the basic customer data normalizer.
A typical customer data JavaScript normalizer complies with the following steps:
- Uses the evaluate function on a Match Expression Context to retrieve the output of a desired normalizer.
- Uses an iterator to access the set of values / strings.
- Uses a builder pattern to create new values / strings from the iterated data.
- Inserts the new values / strings into something that can be iterated, such as a set, and returns that set.