The Asset Importer provides a wide array of configuration options, allowing users to address both simple and complex requirements.
Prerequisites
The Asset Importer functionality requires a new Setup Group called 'Asset Import Configurations,' which will hold all import configurations at a central place in the STEP system. A child setup group for storing the actual import configuration will need to be created as well and should be named 'Asset Import Configuration Type.' This allows for storing all asset import configurations in one location in STEP.
Before importer configurations can be created, it may be required to create a setup group for the configurations if they don't already exist, and to set up user privileges for viewing and maintaining the configurations. Additionally, 'Asset Import Compatibility Mode' must be set to 'Advanced' on the Users and Groups node.
For more information on this and other initial setup steps, see the Asset Importer Initial Setup section
Important: It is highly recommended to enable the asset caching functionality to optimize future export performance. For more information, see the Event Processors section of the System Setup / Super User Guide documentation here.
Creating a New Asset Importer
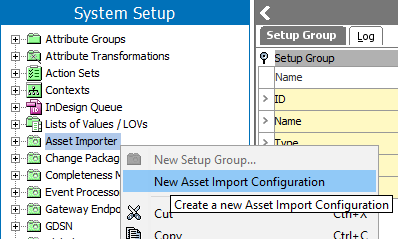
If a new Asset Import configuration needs to be created, it can be done directly in System Setup by right-clicking on the 'Asset Import Configuration' setup group and selecting 'New Asset Import Configuration.'
- Navigate to the System Setup tab.
- Right-click the appropriate setup group root node from System Setup.
- Select 'New Asset Import Configuration.'
See the Identify Configuration topic in this documentation for more information here.
Creating Asset Importer Configurations
Once the necessary setup tasks have been completed, Asset Importer configurations allow users to select previously set up configurations to keep consistent imports. Asset Importer configuration can be modified at any time.
To maintain an Asset Importer configuration:
- Go to System Setup.
- Navigate to the relevant configuration.
- Select the 'Asset Importer Configuration Type' tab.
The full configuration can be viewed and edited from this tab.
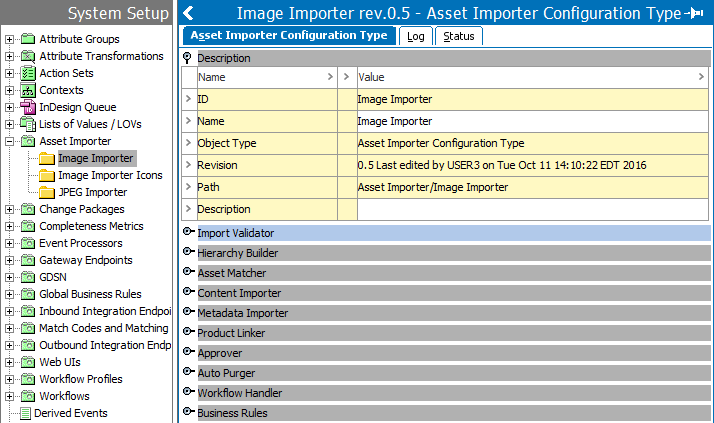
When creating an asset importer, the wizard displays all available configuration options. See the following topics in this documentation for how to configure the flippers when maintaining an Asset Importer:
- Import Validator here
- Hierarchy Builder here
- Asset Matcher here
- Content Importer here
- Metadata Importer here
- Product Linker here
- Approver here
- Auto Purger here
- Workflow Handler here
- Business Rules here
Configuring IIEP and Web UI
It is also necessary to set up an IIEP and/or Web UI in order to use Asset Importer.
For more information on Asset Importer in Web UI, see the Asset Importer in Web UI section of the documentation here.
For more information on configuring an IIEP for Asset Importer, see the Asset Importer Inbound Integration Endpoint Configuration section of the documentation here.