To create a new list in STEP, users create a list entity and then to add records to the new list, a user uploads and imports a file of records for the list entity. The Create List action button can create a list entity and import a file with records in a single operation. Additionally, users can create only the list entity and then later upload and import the records when the records file is available.
Important: Records are stored in isolation, which means the functionality is limited for list records. List records cannot be searched for and cannot be displayed as regular entities in either Workbench or Web UI. For more information, see the Configuring List Processing in Workbench topic in this documentation here.
Creating a list is the process of either:
-
Importing formatted data as a list object type where the data is created as list entity object types for processing.
-
Creating an empty list entity (without importing a data file) where the 'Create List' action button dialog only requires the ID and Name to be populated.
The importing procedure is managed by a background process (BGP) and the BGP statuses allow the users to follow the progress of the import process, including waiting and running states. Errors and warnings can occur during import of records from a file and the importing BGP can therefore complete in any of the following states for the following reasons. For more information, see the Background Processes and Queues topic in the System Setup / Super User Guide documentation here.
Prerequisites
This topic assumes that users have already created the required workbench configurations, Web UI screens, actions, and object types required for list processing. For more information on the required setup for processing lists, see the List Processing topic here.
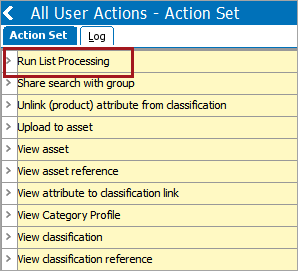
To create list processing, users must be part of a user group with the 'Run List Processing' user action. For information on adding user actions, see the Maintaining Action topic in the System Setup / Super User Guide documentation here.
Create a List Entity by Importing a File
Use the following steps to import a list and create list entity object.
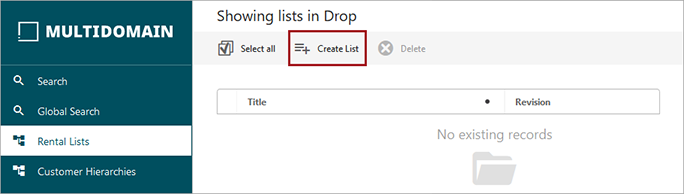
- On the Web UI screen, from a valid parent node of a list object type, select the 'Create List' option.
- On the Create List dialog, provide the following information:
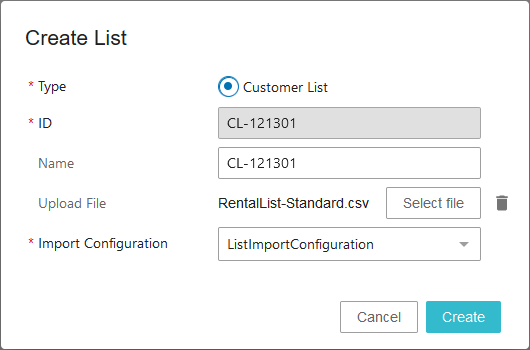
- For the Type parameter, select the desired object type. All valid list object types as set in the component model are shown. If more than five list object types exist, the parameter is displayed as a dropdown.
- For the ID and Name parameters, add data to identify and reference the list.
- For the Upload File parameter, optionally select data files for importing.
- For the Import Configuration parameter, when uploading a file, select a pre-configured import configuration that can be used to the data model of the entity records in the list. Users can import lists in any of the file formats supported by the STEP importer. For more information, see the Import Manager topic in the Data Exchange documentation here.
Important: An import configuration contains many elements and parameters that can be configured. On the following import configuration wizard, only these elements are relevant for list entities:
-
Map Data: ID, Name, Attribute, Entity Reference, Reference Meta-Data, Object Type, Variable, Multivalued Variable and Data Containers.
-
Identify Destination: Default Parent, an instance of a list must be selected to be able to select Default Object Type, Default Object Type.
-
Advanced Setting: Match Units By.
- Click the Create button to show the 'Upload' dialog for the duration of the list upload process.
- When upload is complete, the dedicated List Processing Screen displays relevant information about the newly created list.
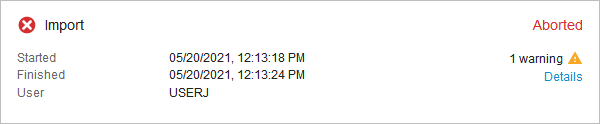
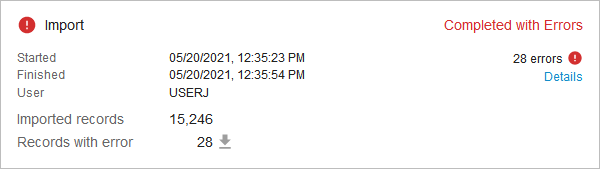
- If a file was uploaded, two process cards are displayed: one for the completed upload process and one for the ongoing import process. Both include start and stop timestamps and the user ID.
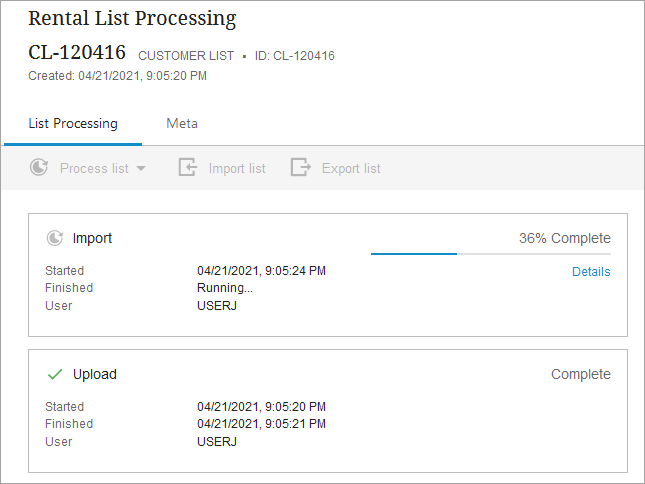
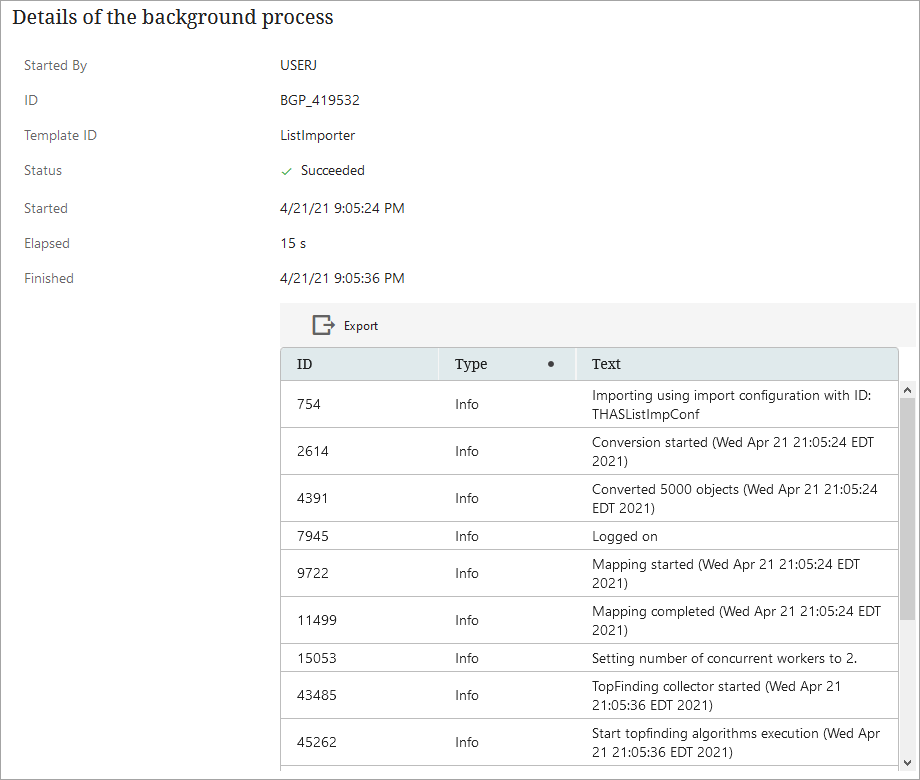
- Click the 'Details' link (shown in the image above) to review import BGP details, even while the import is in progress, including any errors and warnings.
- Continue by processing the list as defined in the Processing Lists topic here.
Create Empty List Entities
Creating a list without importing a file creates an empty list entity, allowing the user to import their list data later.
- On the Web UI screen, from a valid parent node of a list processing object type, click the 'Create List' button.
- On the Create List dialog:
- Add a Name
- Do not select an Upload File or Import Configuration.
- Click the Create button.
![]()
The empty customer list displays in the configured Web UI screen. Add data to the list object as described in the following 'Import a File Saved Locally' section.
Import a File Saved Locally
When the list object has already been created, a file of records saved on your own network can be added to the list.
- Open the list object.
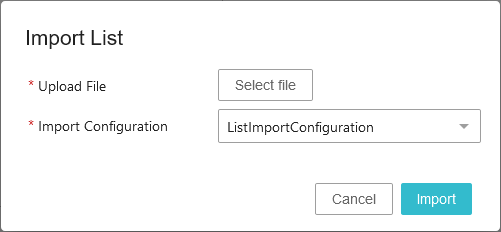
- Select the 'Import list' button to display the 'Import List' dialog.
![]()
- Select a local import file and a compatible import configuration.
-
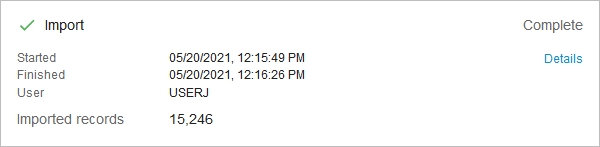
Click the Import button to import the list and run the process operations.
- Continue by processing the list as defined in the Processing Lists topic here.
Import BGP Statuses
An import BGP will have one of the following statuses:
- Complete - all records were imported without any errors or warnings.
- Complete with Errors - entire records could not be imported based on information the import file. This could be due to invalid object type.
Records were imported, but error-prone values from attributes, references, or data containers were not imported. Details of both warnings and errors can be reviewed in the importing BGP log. Records with errors can be downloaded in a file for review.
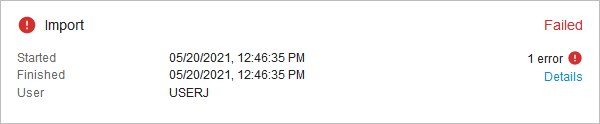
- Failed - the importing BGP failed to complete the importing process due to severe errors occurring above the records processing level. When the Import status is failed, no data is imported.
- Aborted - a user chose to abort the importing BGP in workbench by deleting the BGP while it was active. When the import is aborted, no data is imported.