Asset Importer in Web UI
Web UI can utilize Asset Importer for uploading asset content in a number of ways:
- The Upload Asset Action
- The Replace Asset Content button (via the Asset Representation components)
- The Asset Importer Widget
For more information about the Asset Importer Widget, see the Asset Importer Widget section of the Web User Interfaces documentation here.
For the FAB-DIS format, to change an imported asset's object type, see the Prerequisites section of the FAB-DIS Import Format (here) topic in the Data Exchange documentation.
Upload Asset Action
When uploading assets via the Upload Asset action, an asset importer configuration must be selected. The configuration will apply its rules against the imported asset and make any necessary changes (or reject it if it fails to meet minimum requirements).
- Navigate to the relevant Classification folder in Web UI and click the 'Insert asset' button (the Upload Asset action).
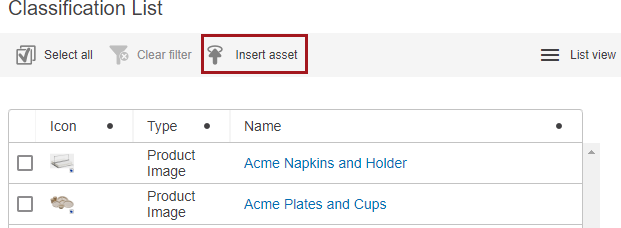
Note: The node this action is performed on does not matter unless the 'Use selected classification for manual imports' option is enabled in the Hierarchy Builder configuration.
- In the 'Upload and insert image(s)' dialog, select the desired importer configuration from the dropdown menu.

The Upload button is activated only upon choosing the asset for importing.
Note: An asset importer configuration can be specified in the component's configuration, meaning it will not need to be selected upon import.

- Next, click Choose File and select a file to import.
- Click Open once the selection is made. Multiple files can be added by repeating this step. Additionally, these files can be removed by clicking the red 'X' icon.
- Click Upload to initiate the import. A dialog will appear, providing a link to the background process.

Important: Ensure that the Asset Importer configuration allows for the selection of classification folders when importing assets manually, otherwise the import will ignore which node this action was performed on and follow the Hierarchy Builder configuration instead. For more information, see the Hierarchy Builder section of the Asset Import documentation here.
Configuring the Asset Import Action in Web UI
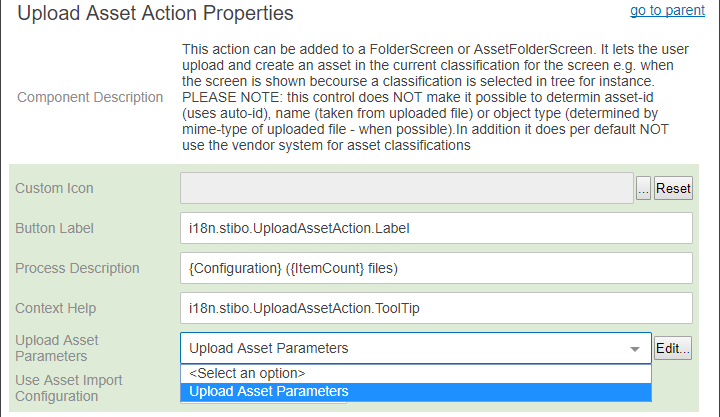
Upload Asset Parameters
- <Select an option> (default): No predefined asset import configuration will be used for the import, the end-user will be presented with a dialog to choose one of the available asset import configurations
- Use asset import configuration (NEW): Allows the Web UI designer to specify an asset import configuration to use for the Upload Asset Action.
Note: If an existing Web UI configuration uses the Upload Asset Parameter and the asset importer is enabled, the Upload Asset Parameter should reset to the default option in the dropdown menu.
If no asset import configuration is selected (the default '<Select an option> is displayed), the end user will be asked to choose one of the existing asset import configurations during the import as well with the desired file(s) for import.
Asset Import Post File Selection
This section describes the file selection and confirmation regardless how files and folders have been selected via Web UI via Asset Import Action.
File selection check
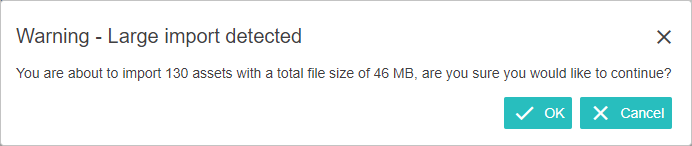
A preliminary check based on the files and folder selection executed on the client side will be performed to inform of specific scenarios:
- If the threshold of 100 files or the total import size exceeds more than 100MB, a warning will be displayed informing the user about the magnitude of the import, asking for confirmation to continue the import process
-
If a ZIP file is included in the file selection, allow the user to select if its contents should be imported as separate assets or if the ZIP file should be handled as one asset file to be imported

Unzip contents as individual assets:
- Unchecked (default) will import the ZIP file as one asset into STEP
- Checked will extract all of the contents of each ZIP file into a temporary folder on the file server and import each of the containing files separately as asset into STEP
Replace Asset Content
Replace Asset Content behaves similar to the asset import as described in other sections, with the main exception that it does not make sense to execute certain parts of the asset import configuration since the operation will be executed on an existing asset in STEP. Therefore, the Hierarchy Builder and Asset Matcher steps should be neglected during the replace asset content procedure.
Configuring the Replace Asset Content in Web UI
When configured on an Asset Representation or Referenced Asset Representation component, the Replace Asset Content button (![]() ) will appear on the asset thumbnail. When clicked, this button allows users to replace the content of a given asset. An asset import configuration must be specified so that its rules can be applied against the new content.
) will appear on the asset thumbnail. When clicked, this button allows users to replace the content of a given asset. An asset import configuration must be specified so that its rules can be applied against the new content.
For more information on enabling replacement of asset content in the Web UI using the Asset Representation component (for display of assets on the asset object), see the Asset Representation section of the Web User Interfaces documentation here.
For more information on enabling replacement of asset content in the Web UI using the Referenced Asset Representation component (for display of assets on an object that references the asset object), see the Referenced Asset Representation section of the Web User Interfaces documentation here.