Open topic with navigation
Generating Proof Views
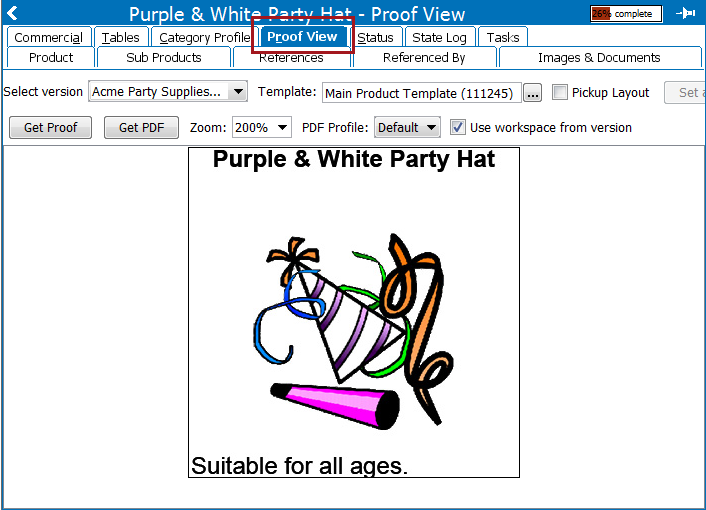
Proof views can be generated for a single page or single spread in the STEP Workbench using the Proof View tab on product and entity objects. Proof views display a close representation of how a product or entity will look when mounted onto a page.
Note: An InDesign server must be connected to your STEP system to enable proof view functionality, as it is the InDesign server that generates proofs. For more information on the deployment of an InDesign server, contact your Stibo Systems account manager.
Proof views are also available for products in the Web UI, but this topic only explains how to access proof views in the workbench. See the Proof View topic in the Web User Interfaces documentation here for more information.
Choosing a Proof View Start Page
A proof view can either be started on page 1, for a right-hand page, or page 2, for a left-hand page. To choose the starting page number, the Proof View Start Page Number setting in System Settings (located under System Setup > Users and Groups > DTP Settings) must be set to either 1 or 2. By default, proof views begin on page 2. However, a selection of '1' is useful, for example, when producing documents for PDF output, such as data sheets, which may not be produced in a 2-page spread format and should start page numbering at 1. For more information, see the DTP Settings topic in the System Settings documentation here.
Generating Proof View
To generate a proof view in the workbench:
- In the Tree, navigate to the product or entity object that you would like to preview, then click on the Proof View tab.
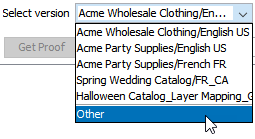
- In the Select version dropdown, choose the publication version that you would like to use to preview the product or entity. By choosing the version, you are also selecting the publication and using its associated publication template as the backdrop of the proof view.
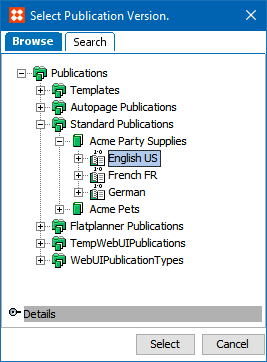
- If the version you are looking for is not on the initial dropdown list, click Other to open the Select Publication Version dialog.
- Browse to or search for the publication version that you would like to use, then click Select.
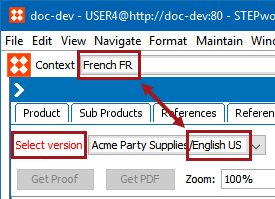
Note: If the context of the selected publication version does not match the context in which you are currently viewing the workbench, the words 'Select version' will appear in red to provide you with a visual indicator that the language displayed in the proof view will be different than that of the language displayed in the workbench.
- To select the product template that you would like to use to view the product or entity, click the ellipsis button (
 ) to the right of the Template field. If a default product template has already been assigned to the product, it will display in this field.
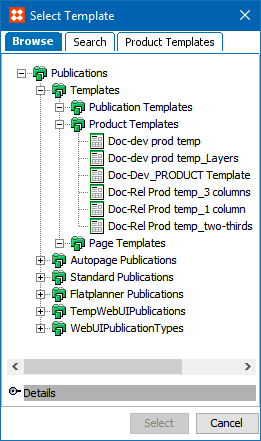
- In the Select Template dialog that displays, there are three tabs. By default, the dialog opens on the Product Templates tab.
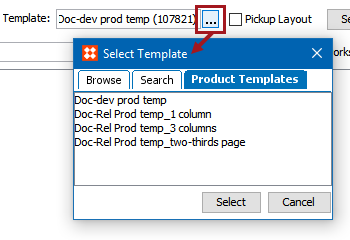
- Product Templates: The product templates linked to the publication you chose from the 'Select version' dialog. Only one can be chosen.
- Browse: Displays the publication hierarchy. Only product templates are available for selection.
- Search: Displays a field where product templates can be located through typeahead search.
- Once you have selected a product template, you can make it the default product template for your product or entity by clicking Set as default.

- To confirm that the default template selection is successful, click on the Product tab for products, or the Entity object name tab for entities, and check that the template displays in the Default InDesign template field.

Note: If there is already a default product template assigned to the product or entity, clicking Set as default on the Proof View tab will overwrite the previously chosen template.
- If you do not want to select a product template, and instead would like to pick up a layout from a publication in which the product or entity was previously mounted, check the Pickup Layout box.
- When Pickup Layout is checked, the Template field is replaced with a Pickup field.

- Click the ellipsis button () to the right of the Pickup field to launch the Pickup page layout for dialog.
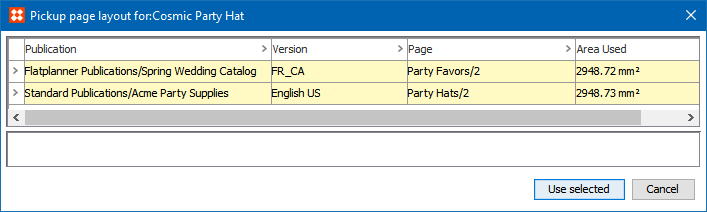
- Select the publication from which you would like to pick up the layout. The bottom of the dialog displays a preview of the actual page as it appears in the selected publication, with your product or entity's layout highlighted, and the rest of the page in gray.
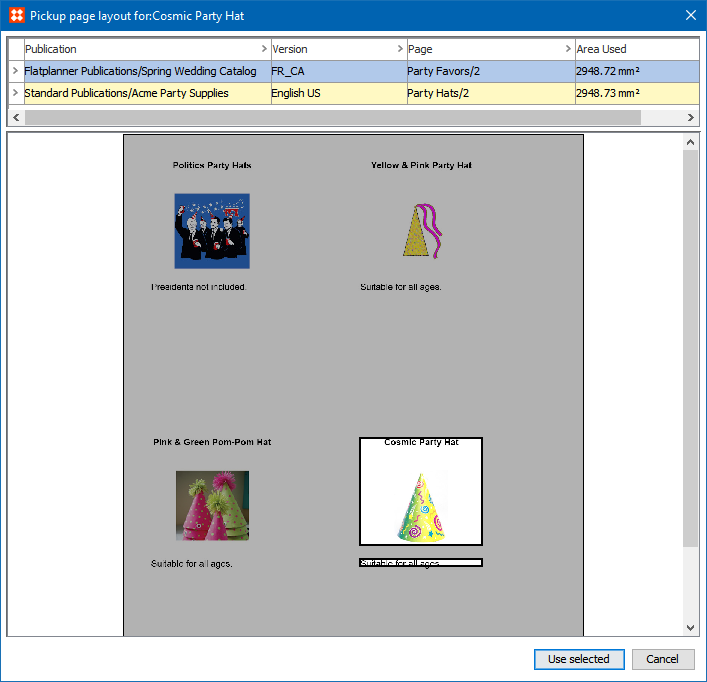
- Click Use selected to select the layout and close the dialog.
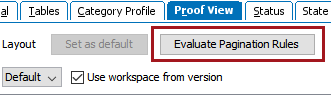
- Click Evaluate Pagination Rules to evaluate pagination rules that will affect the layout. This feature is most commonly used for product objects linked to AutoPage publications. When a pagination rule exists in the publication that you are using to view the proof, you can use this option to ensure that the pagination rule is displaying the product or entity correctly.
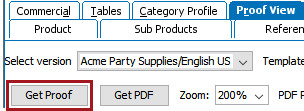
- Click Get Proof to fetch the proof view from the InDesign server.
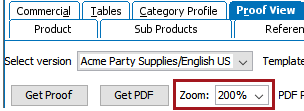
- Click Zoom to zoom in or out of the proof. Zoom ranges from 25% to 400%. Alternatively, you can zoom in and out by using the scroll wheel on your mouse.
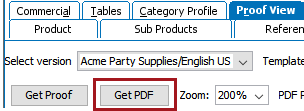
- Click Get PDF to have STEP automatically generate a PDF of the proof view. This is considered a foreground task of the InDesign server, as a background process is not kicked off. The PDF will automatically display in the default PDF application once generated.
- In the PDF Profile dropdown, the default selection is Default.
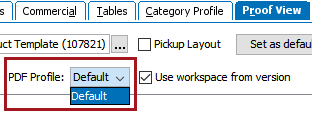
Note: PDF profiles are system dependent. Therefore, the PDF profile is set to Default if no special PDF profiles have been configured for the system. For more information on creating new PDF Profiles for your system, see the Setting up PDF Profiles (Presets) for the InDesign Server topic here.
- Check Use workspace from version to view the proof using the workspace from the publication version, which will be either Main or Approved. This option exists because proof views automatically display using the workspace that you are currently using in the workbench, not the workspace attached to the publication version.
Considerations for Proof Views
- For users who only use 'drag-and-drop' functionality to build InDesign pages, a 'dummy' publication template may be linked to a publication in STEP instead of the actual 'mounting page.' This 'dummy' template (which may be a blank page with no graphical elements) can be used solely to generate proof views in the workbench, while actual pages are built in the InDesign client by dragging and dropping products onto the more fully developed mounting page.
- The same fonts used in your publication and product templates must be installed on your InDesign server in order for the pages to render accurately. If the fonts are not available, then a generic font (such as Minion Pro) will be used for the rendering.
- If your system does not return proof views, one or more of the following issues could be the cause:
- You may not be connected to an InDesign server
- Your InDesign server may be offline, or one or more renderers on your InDesign server may be offline
- The InDesign templates stored on your STEP server were created with a higher version of InDesign than that of your InDesign server. For example, if you are using templates that were created using a CC 2019 version of InDesign but your InDesign server is running on CC 2017, then proof views will not be fetched because the server cannot open the templates.
See the InDesign Queues topic here for more information on monitoring and troubleshooting the InDesign server.
2019, Stibo Systems – Confidential