Open topic with navigation
Configuring an Asynchronous Translation Service
This section covers setting up a new Asynchronous Translation Service. All steps in this section are applicable to the File Exchange, Across, SDL, and Lionbridge services except in the Server Connection Details, which have been broken out by service.
Prerequisites
- For the Across Translation Server software only, before performing the Configuration below in STEP, create a 'STEP' document template on the Across server using the 'Tagged XML v2' option. This template enables Across to read STEPXML files. For more information, contact Across support.
- For any asynchronous service option other than File Service Exchange, prior to configuration, clicking the Server URL dropdown parameter displays the required property name. Provide a selection for the dropdown parameter via the sharedconfig.properties file on the STEP application server using the appropriate case-sensitive property:
- Async.Kernel.Config.Across.ServerURL
- Async.Kernel.Config.LionBridge.ServerURL
- Async.Kernel.Config.SDL.ServerURL
The following is an example of a complete property entry for two Across systems:
Async.Kernel.Config.Across.ServerURL=1=http://across.scloud.com/crossAPI/crossAPI.wsdl,2=http://across.scloud2.com/crossAPI/crossAPI.wsdl
Configuration
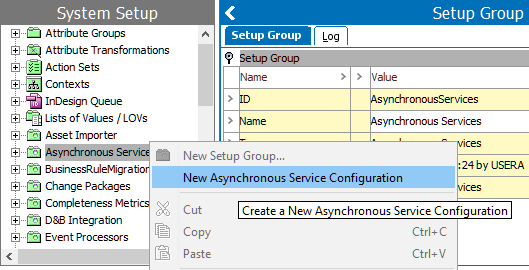
- In System Setup, right-click the Asynchronous Services root node and select New Asynchronous Service Configuration.
- In the Asynchronous Service Configuration Wizard, complete the parameters on the Service step based on the required service:
- For a local File Exchange Service translation server, enter your own values for the parameters as shown in the example below.
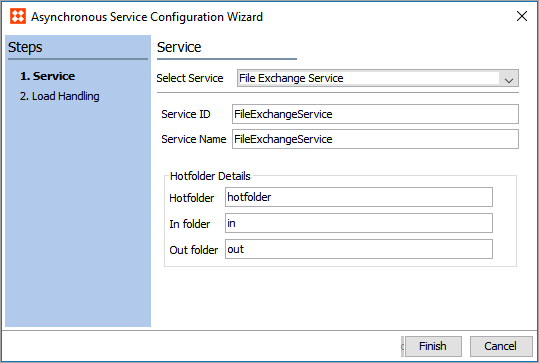
- Select Service - Select File Exchange Service
- Service ID - Enter a service ID
- Service Name - Enter a service name
- Hotfolder - Enter a name for the folder that will hold the In folder and the Out folder
- In folder - Enter the name for the folder that will hold the files that have been translated
- Out folder - Enter the name for the folder that will hold the files that are to be translated
Note: The names used in the File Service Exchange configuration above are examples; users can create names of their choosing. Each translation option included in this topic may have various differences in naming rules.
- For a local Across translation server, enter your own values for the parameters as shown in the example below.
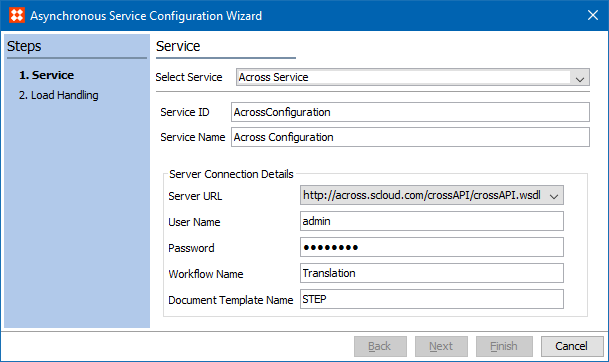
- Select Service - Select Across Service
- Service ID - Enter the service ID
- Service Name - Enter the service name for your Across server
- Server URL - Select the Across server URL from the dropdown
- User Name - Enter the user name to communicate with Across
- Password - Enter the password for Across
- Workflow Name - Enter the name of the workflow in Across that will be used for the configuration. In this example the name of the Across workflow is 'Translation.'
- Document Template Name - Enter the name of the Across document template you created in the Prerequisites section. In the image above, the Across document template is named 'STEP.'
- For SDL translation service, most of the information in the Server Connection Details of the Service step is provided by SDL. Enter your own values for parameters as illustrated in the image below.
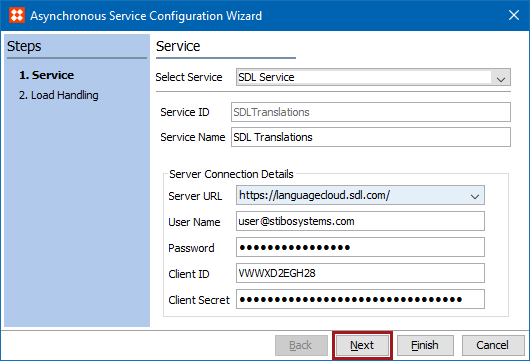
- Select Service - Select the SDL Service for SDL translations
- Service ID - Enter a service ID
- Service Name - Enter the service name for your SDL service
- Server URL - Select the server URL for SDL from the dropdown
- User Name - Enter the user name that will be used to communicate with SDL
- Password - Enter the password provided by SDL
- Client ID - Enter the client ID assigned to your application from SDL
- Client Secret - Enter the client secret assigned to your application from SDL
- For Lionbridge translation service, most of the information in the Server Connection Details of the Service step is provided by Lionbridge. Enter your own values for parameters as demonstrated in the image below.
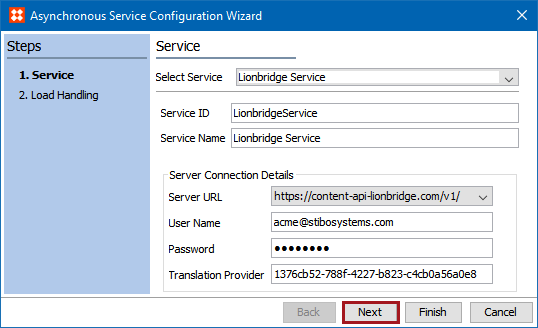
- Select Service - Select the Lionbridge Service for Lionbridge translations
- Service ID - Enter a service ID
- Service Name - Enter the service name for your Lionbridge service
- Server URL - Select the server URL for Lionbridge from the dropdown
- User Name - Enter the user name that will be used to communicate with Lionbridge
- Password - Enter the password provided by Lionbridge
- Translation Provider - Enter the translation provider key provided by Lionbridge
- Click Next to move on to the Load Handling step.
- For Load Handling, provide the following data:
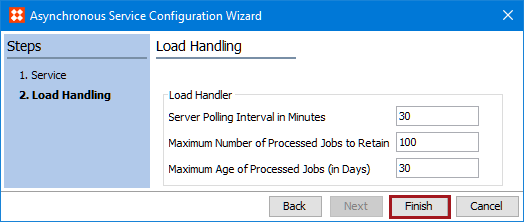
- Server Polling Interval in Minutes - The length of time, in minutes, the asynchronous service will poll the asynchronous translation service.
- Maximum Number of Processed Jobs to Retain - The maximum number of processed translation jobs to retain.
- Maximum Age of Processed Jobs (in Days) - The maximum number of days to retain a processed translation job.
Note: The processed jobs are retained until either the maximum number of processed jobs or the maximum age of processed jobs limit has been met, whichever comes first.
- Click Finish to close the wizard.
- Continue with the setup as defined in Setting Up a Translation Configuration topic here.
2019, Stibo Systems – Confidential