Screens can display in Web UI based on the Mappings values. When a new screen is created, typically a mapping also needs to be set up. The mappings are shown as 'screen ID (condition)' for the Mappings parameter and are evaluated one-by-one in the order shown. When the first mapping condition is met, the evaluation stops, and the screen configured for that condition is displayed. If no mappings match, then the default target screen is the Homepage.
When navigating through Web UI, the first condition / screen mapping that applies takes precedence over any other valid mappings applicable to the selected object. If you encounter the incorrect screen when navigating Web UI, check the condition / screen combinations and rearrange the mappings as needed.
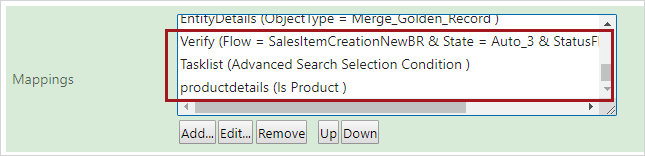
For example, you are using Advanced Search. After doing a search, you click on an object link in the results list. This object is a product and is currently flagged as critical in state Auto_3 of the SalesItemCreationNewBF workflow.
Although the object is a product and you are making a selection within a set of Advanced Search results, you will navigate to the Verify screen. This is because that is the first condition met from within the mappings list. While three mappings are applicable for this one object, the first mapping takes precedence over the other two.
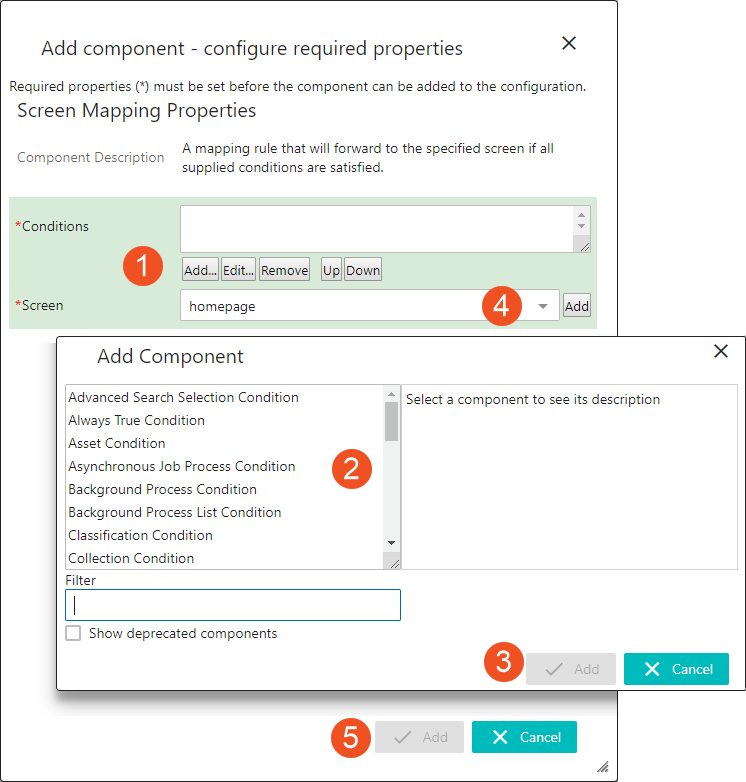
Mappings are created by configuring a combination of one or more conditions and the screen that should display when the condition(s) are met.
For example, if a specific screen should display when clicking on an attribute group folder from a Tree Panel, then an Object Type condition would need to be configured using the Basic Object Type Attribute Group (stibo.grouping attribute).
The order of the defined mappings is important because mappings are evaluated from the top. The first mapping that matches the condition of the current selection will be used.
The mapping order should be evaluated based on your system and all efforts should be made to avoid mapping conflicts (e.g., multiple mappings that use the same condition but different screens).
Mappings are primarily defined on the required MAIN Screen. The mapping concept also applies to workflows, where a specific screen can be displayed when an object in a specific state in a workflow is selected.
Steps for configuring Mappings are below.
2019, Stibo Systems – Confidential