The following operations allow you to modify attribute values.
Copies the values from the first selected attribute to the other, in the current workspace, based on the parameter settings. For dimension dependent attributes, the copy is performed across all dimensions or applicable combinations of dimensions.
Verifying Attributes for Merge
This operation can also be started from System Setup by selecting an attribute, then right-click and select Merge Attribute Values. For details about verifying the attributes before performing this operation, see the Merging Attribute Values section of the System Setup / Super User Guide here.
To merge attribute values for only some objects, go to the Search tab, and create Search Results of the objects to merge. Then either click the Collections button to save the results as a collection (which can be used for repeated updates), or click the Bulk Update button and click Next to display the Operations page and the following Merge Attribute Values parameters.
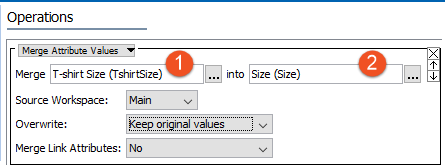
Merge Attribute Values Operation
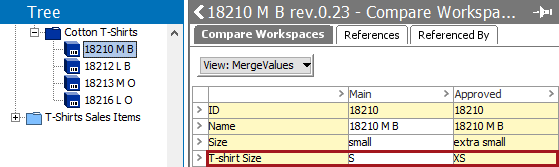
Consider the following example data, and assume we will choose to Overwrite existing values (as described below). Selecting the Source Workspace = Main will result in writing the T-shirt Size value of S, while selecting Source Workspace = Approved will write the XS value.
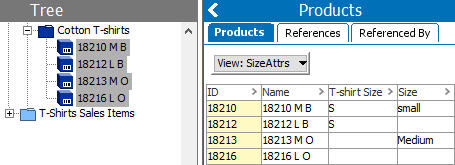
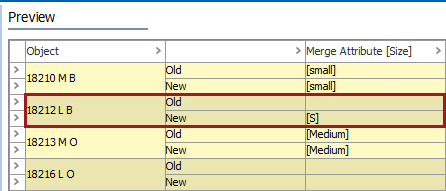
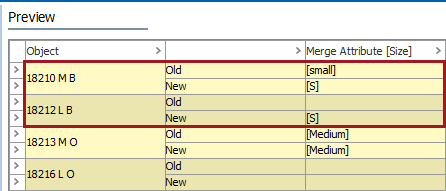
Consider the following data and the effects of the options as shown in the Preview images below. 'T-shirt Size' is the source attribute and 'Size' is the target attribute:
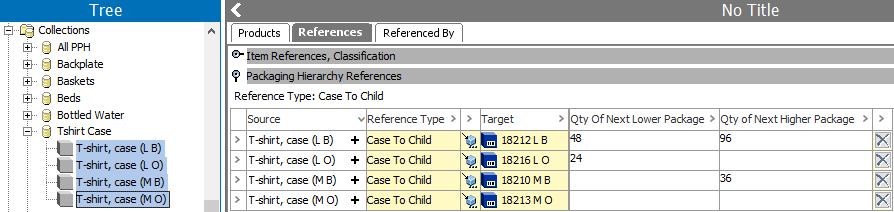
For example, consider the following values for the attributes 'Qty of Next Lower Package' and 'Qty of Next Higher Package' on the Case to Child reference.
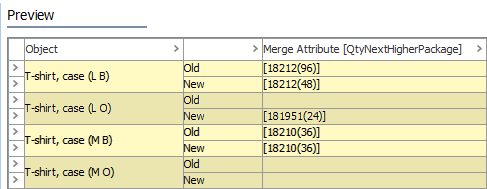
Setting the operation parameters as 'Qty of Next Lower Package' for the source, 'Qty of Next Higher Package' for the target, using the Overwrite existing values, and setting Merge Link Attribute = Yes results in this preview of resulting values:
For more information about attributes on references, see the Product Attribute Link Type section of the System Setup / Super User Guide documentation here.
Note: The Merge Attribute Values operation does not delete any attributes, it can only update values. If desired, manually delete the source attribute once you confirm the merged data.
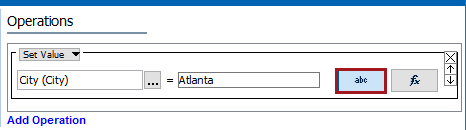
Sets the value of the selected attribute based on a value entered manually or via a function.
Manual Values
Note: The selected attribute dictates the label on the manual button. In the image below, the selected attribute requires a text value and so the label is 'abc.' If the selected attribute is numeric, '123' is displayed, and so on for each validation base type.
Function Values
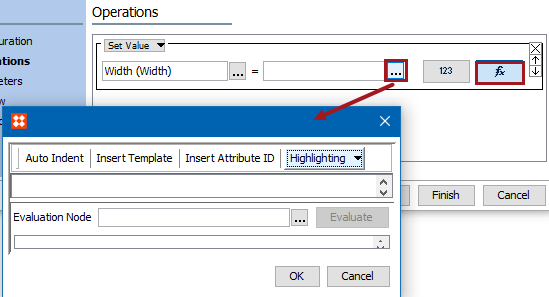
See the Using Function Editor topic within the Attributes documentation
2018, Stibo Systems