You are here: Workflows > Advanced Workflow Topics > Remove Objects from Workflows

Remove Objects from Workflows

There are many reasons why an object may need to be removed from a workflow. A few of the reasons for removing an object from a workflow are:

  1. It has finished going through the workflow
  2. The object needs to be amended before being put back into the workflow
  3. The object is no longer relevant for the workflow

No matter the reason for removing an object from a workflow, objects can be removed, i.e., taken out of workflows, in several different ways.

Remove Single Object

If a user wants to remove a single object from a workflow, and they have the 'Remove Items from STEP Workflow' privilege, this can be accomplished via the Remove from STEP Workflow context menu option on the object.

To do so, right-click on an object, or product, and select Remove from STEP Workflow.

Remove All Objects from a Workflow

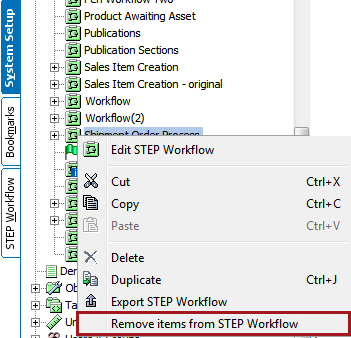
If a user needs to remove all objects from a workflow, and they have the 'Remove Items from STEP Workflow' privilege, this is possible via the workflow context menu option Remove items from STEP Workflow.

Navigate to System Setup, right-click on the workflow that needs all items removed, and select Remove items from STEP Workflow.

Remove Objects from a State Using Bulk Updates

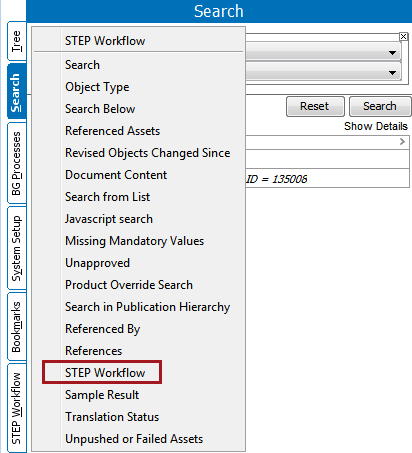
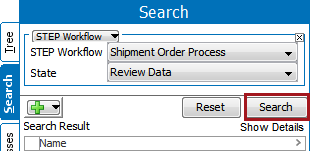
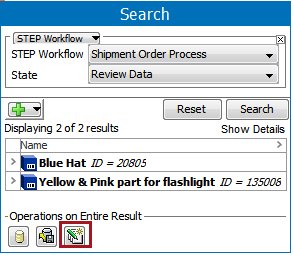
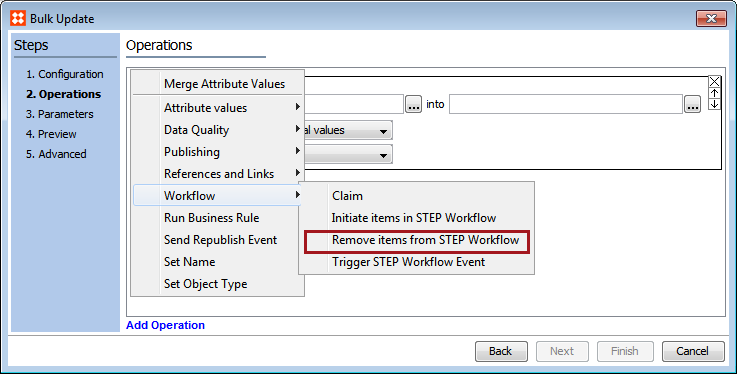
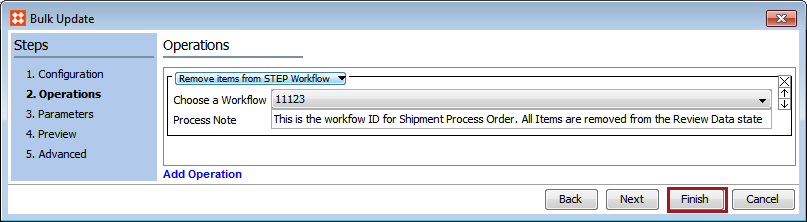
Should a user want to remove all objects from one state in a workflow, they can do so using Bulk Updates if they have the ability to search the STEP Workflow tab, and they have the 'Perform Bulk Update' privilege.

  1. First navigate to the main Search tab, and once on the tab, from the dropdown Search menu select STEP Workflow.

  1. Next, from the two drop down menu, selects the desired workflow and then specifies which state all objects are to be removed from. Press Search when finished.

  1. Once the search result displays, click on the Bulk Updates button at the bottom of the results list.

  1. The Bulk Updates window will display. Click next and on the second step, Operations, from the drop down menu at the top select Workflow > Remove items from STEP Workflow.

  1. Select the desired workflow, enter a 'Process Note' if desired, and select Finish. This will remove all objects from the state.

Removing Objects from the Final State

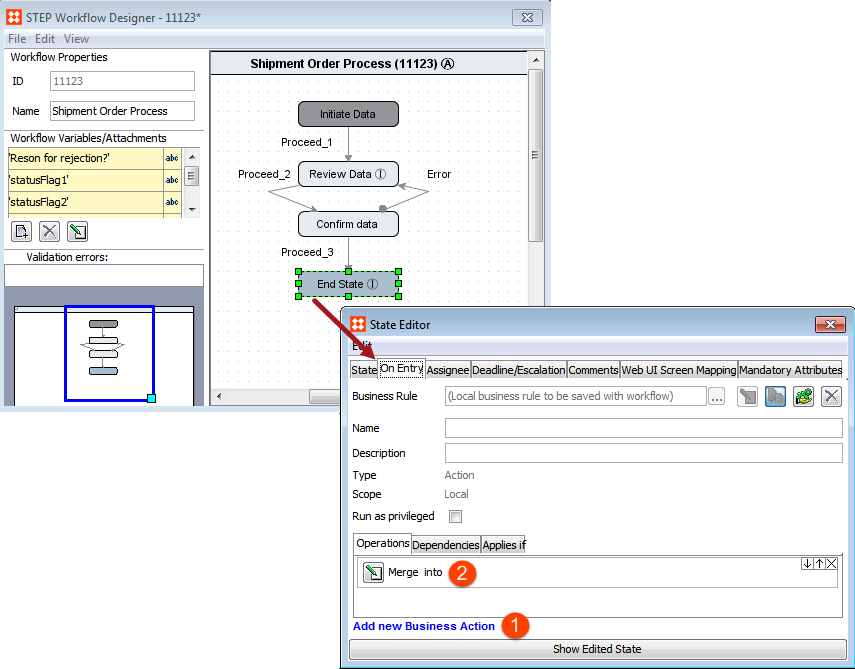
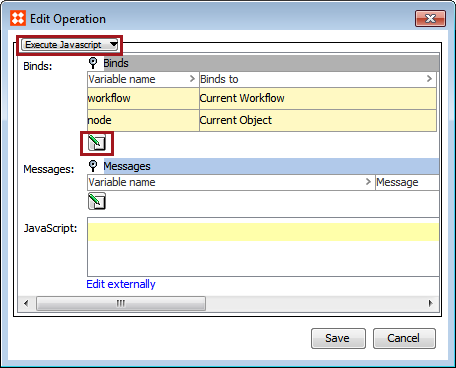
As objects per default stay in the workflow's final states until explicitly removed, it is highly recommended to automatically take the objects out of the workflow when reaching a final state on the outer level. If below script is entered in a business action configured 'On Entry' to the final state, once objects enter the state, they will be removed from the workflow and the supplied process note posted to the State Log if one was entered.

node.getWorkflowInstance(workflow).delete("Object automatically removed from Workflow");
  1. To add the above script to a business action, navigate to System Setup, open the desired workflow's STEP Workflow Designer, and right-click on the outer level Final State.
  2. In the dialogue that appears, select the On Entry tab > Add new Business Action > Merge into.

  1. Select 'Execute JavaScript' from the dropdown menu, and click on the Edit Binds button, to add any necessary binds. Note that the two binds being added for this particular workflow are: Workflow to Current Workflow and Node to Current Object.

  1. Next add the following script in the JavaScript window. Notice how the variable name for the Current Workflow Bind is used. Users should make sure to replace with their variable name in the script.

2017, Stibo Systems