Open topic with navigation
You are here: STEP'n'design > Configuring the STEP Preferences Menu
Configuring the STEP Preferences Menu
The STEP Preferences menu in STEP'n'design contains settings that control much of the behavior of the STEP palettes within InDesign as well as how tables are mounted, where hi-res images are mounted from, the location of product templates when mounting pages through 'drag and drop' operations, and more.
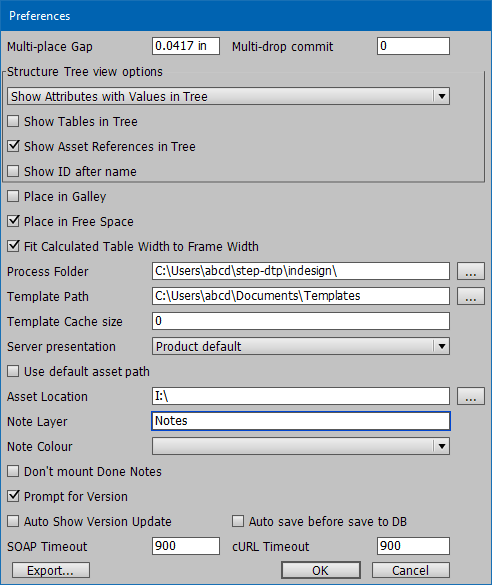
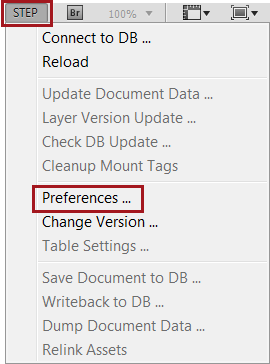
The Preferences menu is accessed by navigating to STEP > Preferences ... from the InDesign application bar across the top of the InDesign interface.
The following list describes the settings contained within the Preferences menu:
- Multi-place Gap: The distance added here is the distance that STEP’n’design will add between objects when mounting multiple objects in the same drag and drop operation.
- Multi drop commit: The number added here is the frequency of mount that should take place before a commit is made, when mounting multiple objects in the same drag and drop operation.
This option is only intended for use with an InDesign script that enables the mounting of many products at one time. It otherwise serves no purpose to standard users and should always be left as zero (0).
- Structure Tree view options: Controls the visibility of attributes when viewing objects in the STEP Structure View panel. Options are Show all Attributes in Tree, Show Attributes with Values in Tree, and Don't show Attributes in Tree. Showing attributes makes them available for page mounting and for converting sample documents into product templates.
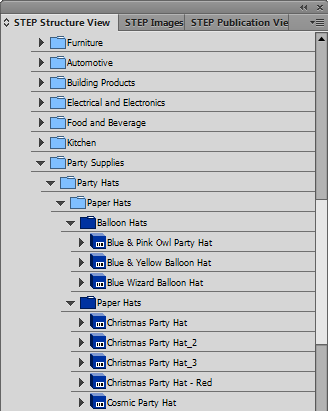
- The following screenshot shows a sample STEP Structure View with Show all Attributes in Tree selected:
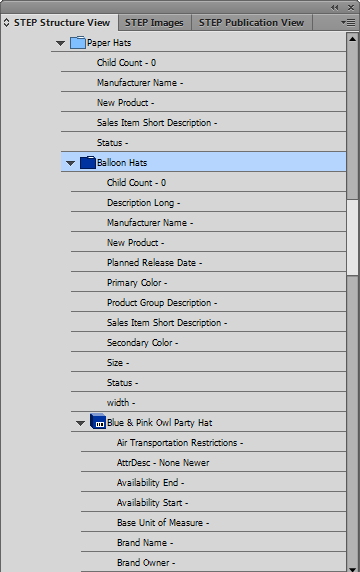
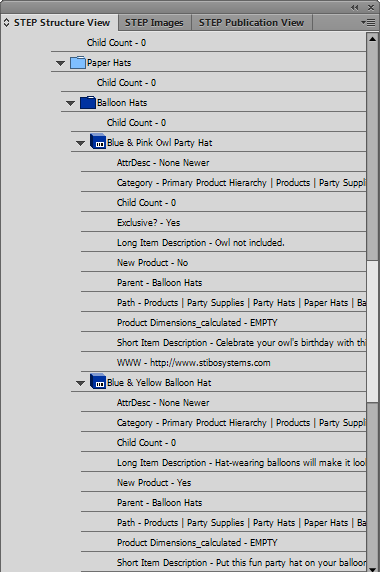
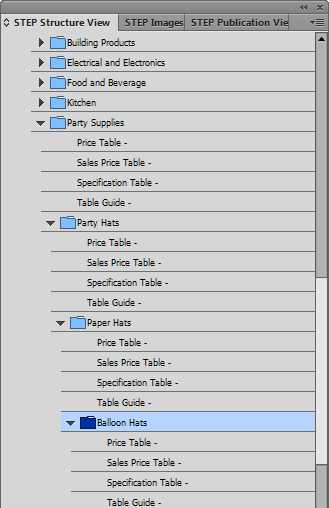
- This screenshot shows a sample STEP Structure View with Show Attributes with Values in Tree selected. This option reduces the number of attributes displayed in the tree, making it easier to locate the relevant attributes for mounting.
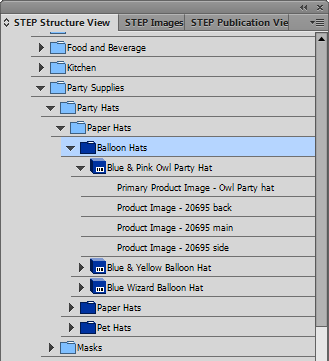
- This screenshot shows a sample STEP Structure View with Don't show Attributes in Tree selected.
- Show Tables in Tree: Check this box to display the tables that are linked to products and classifications in the STEP Structure View panel, thus making them available for page mounting and for converting sample documents into product templates.
- Show Asset References in Tree: Check this box to display the STEP asset references linked to Products and Classifications in the STEP Structure View panel, thus making them available for page mounting and converting sample documents into product templates.
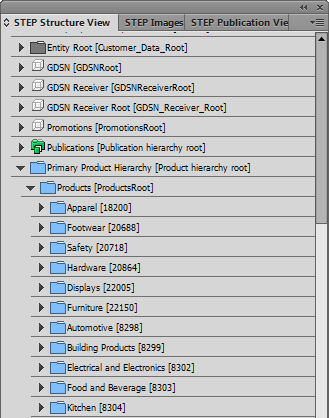
- Show ID after name: Check this box to display both object IDs and Names in the different STEP palettes. The following screenshot shows an example using the STEP Structure View palette.
- Place in Galley: Selecting this check box indicates that mounting using a product template (and not using STEP Flatplanner) should be performed into a text galley. For more information, see the Mounting Products section of the STEP'n'design documentation here.
- Place in Free Space: Check this box to make STEP’n’design place your element in the first available free space on the page when you drag and drop it onto the publication template or mounting page. If not selected, the object will be placed in the specific location where you drop it.
- Fit Calculated Table Width to Frame Width: Check this box to adjust the width of calculated table columns (starting with the widest column) until the width is identical to the width of the frame if a table width is not defined in STEP.
- Process Folder: This is the path in the directory structure in which STEP'n'design stores information. This folder may contain a number of items: inSTEPLogOptions.xml to control logging and sub-folders for logs (default destination for logging), tmp (where any temporary files are stored), comms (where communications trace information is stored for diagnostic), and scripts (JavaScript event handler[s], when applicable). The system will use the default path (C:\Users\[User_Name]\step-dtp\indesign\) if not set by the user.
- Template Path: This is the path to the folder / directory where your product templates are stored.
- Template Cache size: Increases performance when working with templates saved in STEP. Size is defined in MB and a setting of 2 to 5 MB is normally suitable for most users.
- Server Presentation: Defines which product template should be used for mounting objects. Choose None to use the product template specified in the STEP Structure View panel. Choose Product default to use the default product template assigned to the object in STEP. Choose Publication rules to use the product template(s) specified by the Object Layout pagination rules specified in STEP.
- Use Default Asset Path: If checked, a default Asset Push path will be used to mount images. A default asset path is typically configured by Stibo. Do not check if an Asset Location is specified in the Asset Location field.
- Asset Location: If a system has been set up to use Asset Push, then a path to the location of the hi-res images is specified here. This field should be left empty if your system has not been set up to use Asset Push. See the Linking to an Asset Location topic here for more information.
- Note Layer: (Only relevant for Flatplanner) Type the name of the layer in which the Notes from the Flatplanner should be shown.
- Note Colour: (Only relevant for Flatplanner) Select a background shading color for Flatplanner Notes when mounted on the InDesign page.
- Don't mount Done Notes: (Only relevant for Flatplanner) Check this box to prevent any Flatplanner Notes marked 'Done' from mounting on the InDesign page.
- Prompt for Version: Check this box to have STEP'n'design prompt you to select a publication version every time you mount an object onto a page.
- Auto Show Version Update: Check this box to automatically show the Change Version dialog box whenever your version has been redefined in STEP (e.g., if the workspace on a version has been changed from Main to Approved).
- Auto Save before save to DB: Check this box to automatically save your documents (templates and actual pages) locally before saving them to STEP. Since documents must be saved locally anyway before they can be saved to STEP, checking this box will eliminate the clicks needed to save the documents manually.
- SOAP Timeout: Enter a configurable timeout for SOAP (Simple Object Access Protocol) operations in order to improve performance on slow systems. Default is 900 seconds (15 minutes).
- cURL Timeout: Enter a configurable timeout for cURL operations in order to improve performance on slow systems. Default is 900 seconds (15 minutes).
- Export: Click this button to save your STEP'n'design preferences into a text file. This file can be used by Stibo support personnel to help troubleshoot issues.
2017, Stibo Systems