With the assessment data successfully added, users can begin adding criteria to the assessment.
Each assessment is comprised of one or more criteria. Each criterion created by the sustainability officer should help determine whether the assessment is within acceptable parameters for the Sustainability data card associated with the criterion. Users can only add criteria to an assessment if the assessment is in the ‘Maintenance’ workflow state. If the assessment is not in the ‘Assessment Management’ workflow, it can be initiated into the workflow by clicking the ‘Start assessment maintenance’ button at the bottom of the assessment. For more information on this button, review the ‘Start assessment maintenance’ button section of the Maintenance of the Sustainability Data Management Solution topic. To add criteria to an assessment, follow the steps listed below:
-
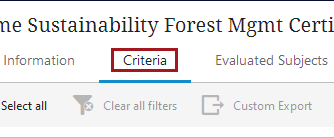
On the assessment to which criteria must be added, click the ‘Criteria’ tab.
-
On the ‘Criteria’ tab, the criteria added to the assessment are displayed in a tabular format. To add criteria, click the ‘Add criteria’ button in the toolbar.

-
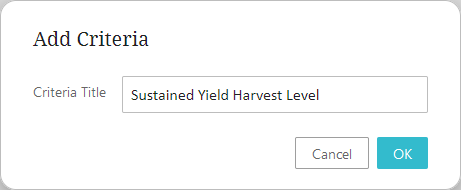
In the ‘Add Criteria’ dialog that displays, add a title for the criterion that is descriptive of what the criterion is measuring. For instance, a metric that determines how much of a managed forest is harvested per harvest interval might be called ‘Sustained Yield Harvest Level’. Click ‘OK’ to create the criterion.
-
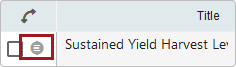
The added criterion displays in the table. The newly created criterion is automatically entered into the ‘Criteria Management’ workflow and will be in ‘Inactive’ status until it progresses through the workflow and is finally validated by the Sustainability Officer Group.
Additionally, the ‘Last Status change’ timestamp is set for the criteria, and the ‘Last Criteria Update’ timestamp is set for the assessment to which the criteria is linked.
To enrich the criterion, click the details button to the left of the checkmark in the first column. This displays the details of the criterion in the bottom half of the UI.
-
In the bottom half of the horizontal split panel, ten fields can be edited or enriched by the user to further define the criteria. The editable fields are listed and described below:
-
Name – Displays the name value assigned to the criterion in the previous step but can be edited if necessary.
-
Required – Select whether the criterion is mandatory for the assessment (‘Required’) or ‘Optional’. If designated as mandatory, the assessment must consider the criteria for the assessment to pass. Optional criteria are evaluated but only displayed as part of the sufficiency panel.
-
Compliance Type – Determines which validation type the algorithm will use to evaluate the criterion for an assessment to pass or fail. Listed below are the validation types that can be selected:
-
Age (XX months) – When selected, the criterion cannot pass unless the value given for the criterion is less than the value set for the ‘Compliance Value’.
-
Assessment – Selected when the criterion cannot pass unless a nested assessment is passed. When ‘Assessment’ is chosen, a mandatory ‘Required Assessment’ parameter displays from which users can select which assessment (or assessments) must be in a pass state for the criteria to pass.
-
External – Selected when the criterion's pass/ fail status is determined by an external validator. When ‘External’ is chosen, a mandatory ‘Code’ parameter displays. In this field, enter the code as directed by the connection with the assessor-affiliated organization. Assessments designated as ‘External’ are identified based on the ID provided from the assessor, and the results are fetched from the individual provider and published. With a valid ID maintained between the Sustainability Data Management solution and the assessor who sponsors the assessment, the evaluation pulls the data from the assessor and stores it on the data card.
-
Inherited Assessment - Selected when the criterion will automatically inherit the status of a different criterion in a linked assessment. This option is built for use cases in which the status of a Location Data Card-linked assessment determines the status of the Product Data Card-linked assessment that is, in turn, linked to the criterion being configured. When selected, the 'Required Assessment' parameter (described below) displays, and selection of an assessment is required to enable the inheritance capability.
-
List of Value – Selected when the value assigned to the criterion should be one of two or more values included in a list of values (LOV). When ‘List of Value’ is chosen, ‘Pass Fail,' ‘Sample LOV’ (or its replacement LOV), or any other configured LOVs must be selected for the ‘Actual Value Type’ parameter.
-
Max – When selected, the value given to the criterion that allows the criterion to pass can be no greater than the value assigned to the ‘Compliance Value’ parameter. ‘Integer’ and ‘Double’ are valid selections.
-
Min – When selected, the value given to the criterion can be no less than the value assigned to the ‘Compliance Value’ parameter. ‘Integer’ and ‘Double’ are valid selections for ‘Actual Value Type’ when ‘Min’ is selected.
-
Not Empty – Select this option when no specific value is required for the criterion to be validated against. When ‘Not Empty’ is selected, the user must select a value type that the solution will validate to ensure the field is not empty. When this option is selected, the ‘Actual Value Type’ parameter becomes mandatory. The valid ‘Actual Value Type’ selections for this are ‘Integer,’ ‘Text,’ and ‘Pass Fail.’
-
Number Range - When selected, the actual value on Product Data Type attributes will be evaluated against the range of values given to the criteria.
-
-
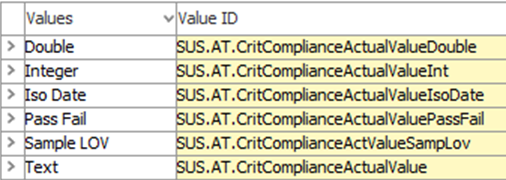
Actual Value Type – Enter the type of data that must be entered for the criterion. For instance, for the compliance type ‘Age (XX months)’, set the ‘Actual Value Type’ to ‘Integer’; this will ensure the value submitted for the criterion is a number that can be evaluated by the validation algorithm. Listed below are the ‘Actual Value Type’ options that can be selected:
-
Double (also referenced in STEP as the ‘Number’ validation base type) – Allows any numeric characters, including numbers expressed with decimals. Does not allow for fractions.
-
Integer – Allows only whole numbers (no decimals or fractions).
-
Iso Date – Allows only dates in the YYYY-MM-DD format.
-
Pass Fail – If ‘List of Value’ is chosen for the ‘Compliance Type’ parameter, ‘Pass Fail’ allows only the ‘Pass’ or ‘Fail’ values. If ‘Pass Fail’ is selected, add the ‘LOV ID’ of the value that indicates compliance in the ‘Compliance Value’ field.
-
Sample LOV – If ‘List of Value’ is chosen for the ‘Compliance Type’ parameter, the 'Sample LOV’ option enables users to select the default LOV, which is ‘Yes’ and ‘No’, or to select a customized LOV containing values desired by the customer. If ‘Sample LOV’ is selected, add the ‘LOV ID’ of the value that indicates compliance in the ‘Compliance Value’ field. Additionally, other LOVs can be created and configured to display in the 'Actual Value Type' dropdown.
Note: To add additional LOVs to the 'Actual Value Type' dropdown, an LOV ID of an LOV-validated attribute valid for the 'Criteria' product reference type must be added to the ‘Crit Flex Header’ LOV (SUS.LOV.CritFlexHeader) LOV.
-
Text – Allows any text value.
Note: The ‘Actual Value Type’ parameter will only display when specific compliance types are selected in the ‘Compliance Type’ parameter. Those compliance types are: Age (XX months), List of Value, Max, Min, and Not Empty.
-
-
Compliance Value – Enter the value that must be met for the criterion to pass. Note, this parameter will only display when specific compliance types are selected in the ‘Compliance Type’ parameter.
-
Code – Add a value to this field that matches the criteria with data provided by external authorities. Becomes mandatory when the ‘Compliance Type’ is set to ‘External’.
-
Description – Add text that describes the criterion.
-
Usage – Add text that describes how the criterion is applied.
-
Theme / Topic – Add any additional text not covered by the previous two parameters to describe the criterion.
-
Required Assessment – Displays when the ‘Compliance Type’ parameter is set to ‘Assessment’ or 'Inherited Assessment.' In this field, click the ‘+’ button to enter a Node Picker dialog.
-
For 'Assessment' - Select one or more assessments that must be in a passed state for the criterion to pass.
-
For 'Inherited Assessment' - Select the assessment whose status will be automatically inherited by the assessment to which this criterion is linked. In the primary use case for this option, select the assessment linked to the relevant Location Data Card. When that assessment passes or fails, the assessment (linked to the Product Data Card) to which this criterion is linked, will also pass or fail.
-
-
Assessment Claim Visual - Reference an asset that will display when the criterion is compliant. To add the asset, click the '+' button to display a menu. Click 'Insert asset(s)' to link an asset already present in STEP to the criterion. Click 'Upload and insert asset(s)' to both upload an asset from the user's machine and link that asset to the criterion.
-