This topic describes how to work with frames and pages in Flatplanner page templates, including how to add, remove, reorder, and resize frames, as well as how to zoom in and out of pages and copy and paste pages.
Note: Designer actions taken on page templates are not automatically saved. Click the save icon  frequently to ensure that changes are not lost.
Add Frames
The following instructions explain how to add frames on an individual basis and how to add multiple frames at once.
Add an Individual Frame
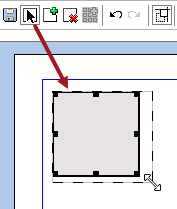
- Select the Add Frame tool in the toolbar
 .
. - Drag an outline of the frame with the cursor while holding down the left mouse button. The X, Y, W, and H coordinates automatically calculate as you draw the frame.
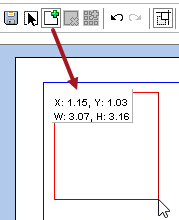
- Release the mouse button to create the frame.
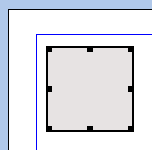
- If the frame is at the desired size, click the Select tool in the toolbar
 , then click outside of the frame to remove the black drag handles from the frame.
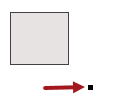
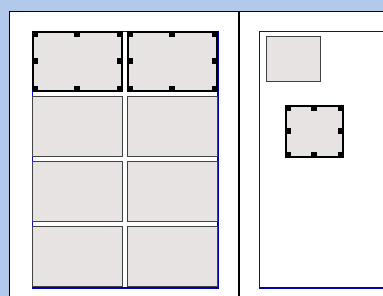
Note: If you do not click the Select tool before clicking out of the frame, the Add Frame tool will still be activated, and the system will think you want to create a new frame. If this happens, a tiny frame that looks like a black square will display when you click outside of the frame. You will either have to click Undo to remove it, or select it using the Select tool to resize it. Refer to the 'Select Frames' subsection below for information on how to select frames.
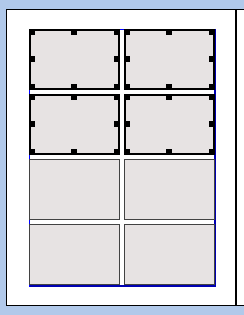
Add Multiple Frames in a Grid
- To quickly create many frames in a grid, first click on a page. The selected page will be surrounded with a thick black border.
- Click Insert frames on a Grid in the toolbar
 . The Insert grid of frames dialog displays.
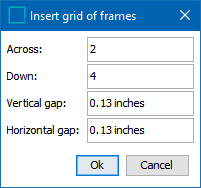
- In the Across field, enter the number of rows of frames to insert.
- In the Down field, enter the number of columns of frames to insert.
- In the Vertical Gap field, enter the amount of distance that should appear between the rows of frames.
- In the Horizontal Gap field, enter the distance between the columns of frames.
Note: The STEP interface will only accept numbers with up to two decimal points. If a value such as 0.125 is entered, the system will round it up to .13. However, the gap will display correctly on the mounted page.
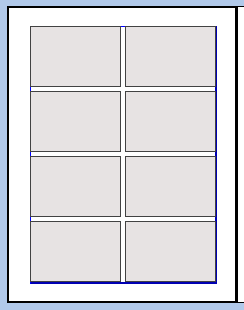
- Click OK to insert the frame grid on the selected page.
Select Frames
Two methods can be used to select frames: either click them with your mouse, or drag a bounding box around them while holding down the left button on your mouse.
Mouse Click Method
- To select a frame, click the Select tool in the toolbar, then click on a frame. A black border with drag handles (used for resizing) will display on the frame.
- To select multiple frames, click the frames while holding down the Ctrl or Shift key.
Mouse Drag Method
- With the Select tool enabled, left-click outside of a frame on your page, then hold down the mouse button to 'draw' a red box around the frames that you want to select. The red box does not have to technically be around the frames; it will select any frames that it touches.
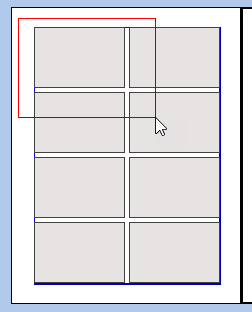
- Release the mouse button. The frames will be selected.
Resize Frames
- Click the Select tool in the toolbar , then select the frame.
- Hold down the left bottom on your mouse, then drag the handles on the frame border until the frame is at the desired size.
- Release the mouse button to finish resizing the frame.
- Alternatively, enter a new value for one or more selected frames in the Width and Height fields in the toolbar. Refer to the 'Change Frame Properties' subsection below for more information.
Delete Frames
To delete a frame, perform one of the following actions:
- Select a frame or frames with the Select tool, then click the Delete frame button
 in the toolbar.
 - Select one or more frames, then press the Delete key on your keyboard.
- Right-click on a frame, then select Delete frame from the menu.
Move Frames
To move a frame, choose the Select tool in the toolbar, then click on the frame and hold down your left mouse button while dragging the frame to its new position. Release the mouse button to drop the frame.
You can also set the X and Y position of one or more selected frames by entering a new value in the X Position field and Y Position field.
Enable Snap Positioning
When moving frames on the page using drag and drop, it can be useful to enable Snap Positioning. This makes the moved frame snap to a position when you release the mouse button. This way you can easily place frames in the same X and Y positions on the page.
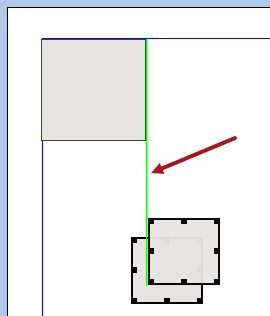
The snap positions are :
- Margin borders: Upper and right hand side border
- Frame borders: All borders
Note: Only the upper frame border and the left hand frame border of the frame that is being moved snaps.
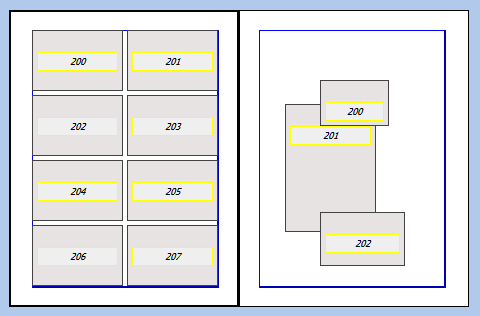
Change the Layering Order of Overlapping Frames
Frames are placed on the page in a specific order relative to each other. Adding a new frame places that frame on top of other frames. This is only noticeable if frames overlap each other.
(An additional method is available for changing the order of overlapping frames by using the Frame Properties dialog; refer to the next subsection of this topic for more information.)
Note: Moving a frame from one page to another brings the frame layer to a front position.
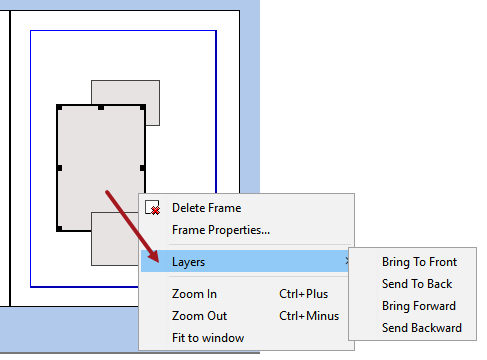
- To change the order of overlapping frames, right-click the frame, then select Layers.
- Four options are available on the Layers menu, though some will be grayed out if they do not apply to the currently selected frame; e.g., 'Bring to Front' will be grayed out if the frame is already in the front.
In the below screenshot, all four options are activated since the frame is simultaneously in front of and behind another frame. (All four options are also activated if the frame overlaps no other frames at all, so it might be useful to change the order ahead of time if you already know that the frame should be in front or behind other frames.)
- Bring to Front: Brings the selected frame to the front.
- Send To Back: Sends the selected frame to the back.
- Bring Forward: Brings the selected frame one level forward.
- Send Backward: Sends the selected frame one level backward.
- To undo or redo the last frame layering change, follow any of these methods:
- Select a page, right-click, and select Undo or Redo.
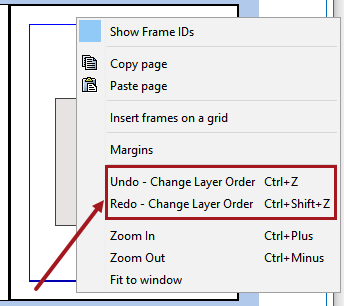
- Press Ctrl+Z to undo or Ctrl+Shift+Z to redo
- Click the Undo
 or Redo
  buttons in the Designer toolbar.
Change Frame Properties
To view and maintain dimensional and positioning details of a frame:
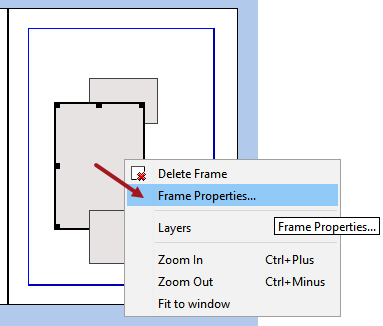
- Select the frame, then right-click and select Frame Properties.
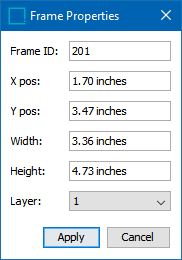
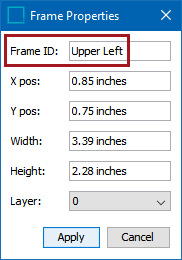
- In the Frame Properties dialog that displays, the following options are available. All options are editable.
- Frame ID: Displays the ID of the selected frame.
- X Position: Displays the horizontal position of the selected frame.
- Y Position: Displays the vertical position of the selected frame.
- Width: Displays the width of the selected frame.
- Height: Displays the height of the selected frame.
- Layer: Displays the order of the frame order relative to other frames on the page. '0' means the frame is in the back, '1' means the frame is in the middle, and '2' means the frame is in the front.
View Frame IDs
Each frame on a page has an ID, which is primarily used to identify which products and product templates are linked to each frame for the purpose of importing and exporting Flatplanner publications using Publication Excel files. Frame IDs inherit to the corresponding frames on planned pages, and can be overridden at the page level. For more information, refer to the Exporting and Importing Flatplanner Publications section.
Show or Hide Frame IDs
- To show the ID of the frames on a page or spread (both left and right pages), right-click a page and select Show Frame IDs.
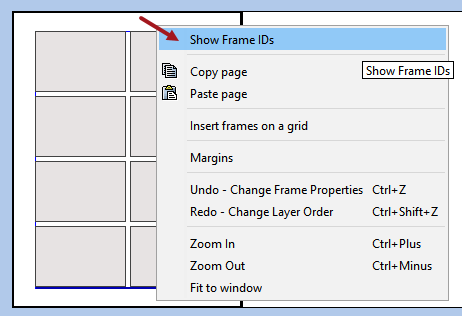
- The frame IDs are shown for all frames on both pages in the spread. The IDs display in small boxes in the frames.
- To hide the frames, right-click a page, then deselect Show Frame IDs.
Change Frame IDs
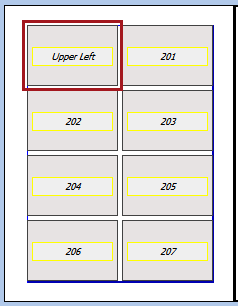
By default, frame IDs start numbering on each page at 200. These IDs can be changed to make identification of the frames easier. For this example, the ID of the frame in the upper left corner of the left page (shown in the previous screenshot) will be changed from '200' to 'Upper Left.'
- To change the ID of a frame, right-click the frame and select Frame Properties.
- In the 'Frame Properties' dialog, type a new ID for the frame in the Frame ID field, then click Apply.
- The ID of the frame is changed.
Zoom In, Zoom Out, and Fit to Window
Several different methods are available for zooming in and out on pages: right-click menu options, key combinations, and the mouse scroll wheel. When working on Flatplans themselves (planned pages), a zoom slider bar is also available, but is not available when working with page templates. To instantly make a page large enough to fit the entire width of the workbench window, use the 'Fit to Window' option.
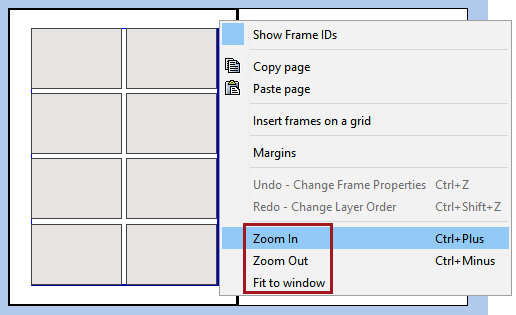
Right-click Menu Options for Zoom
- To zoom in, right-click the page and select Zoom In.
- To zoom out, right-click the page and select Zoom Out.
Key Combinations for Zoom
- To zoom in, select a page, then press Ctrl+Plus.
- To zoom out, select a page, then press Ctrl+Minus.
Mouse Scroll Wheel for Zoom
- To zoom in, select a page, then scroll your mouse wheel downward.
- To zoom out, select a page, then scroll your mouse wheel upward.
Zoom Slider Bar
Drag the blue slider on the zoom bar to zoom in or zoom out on pages. Only available for Flatplans.

Fit to Window
To automatically zoom in on a page to fit the width of your workbench UI, right-click a page and click Fit to Window.
Change Page Margins
By default, page templates pick up the margins from the publication template spread they were created from. Subsequently, planned pages pick up the margins set on the page template, but can be overridden later at the page level. To change the margins of a page:
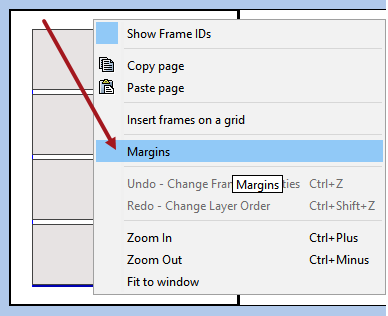
- Right-click the white area on the page and select Margins.
- In the Margins dialog box, enter the new dimensions for the margins that you want to change. If the padlock icon is set to the unlocked position
 , each field can be changed individually.
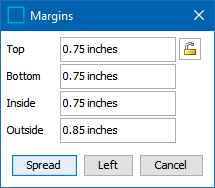
- If you want all margins in the spread or on the page to be the same, click the padlock icon to change it to the locked position
 . By default, all margins will be automatically changed to match the Top margin.
To change all margins to something other than the Top measurement, enter a different value in any field, then click into another field to make the changes.
- Click Spread to apply the changes to both pages, or click Left to only apply the changes to the left page. (The button will display Right if the right page is selected.)
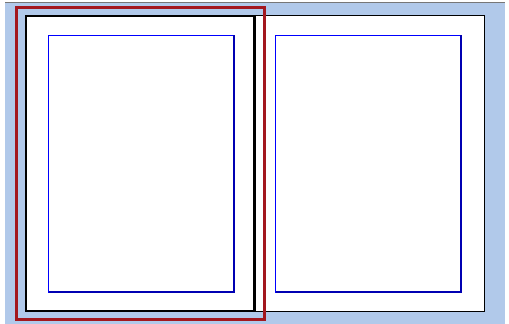
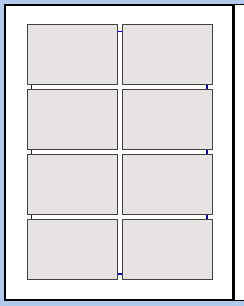
Note: Changing the margins will not change the size of the frames on the page. For example, if you previously created frames to align with 0.5 inch margins, then later changed the page margins to 1.0 inches, the frames will not shrink to fit inside of the new margins, as shown below:
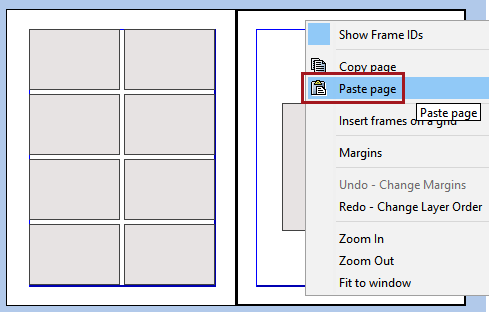
Copy and Paste Pages
It is possible to copy and paste a page onto another page, including frames. You can copy and paste pages within the same page template or spread, or from one page template or spread to another page template or spread. This simplifies the page creation process by allowing you to create frames on one page only, then duplicate the frames on other pages by copying and pasting the original page.
Note: This will only paste frames from one page to another; margins from the copied page will not be duplicated on the pasted page.
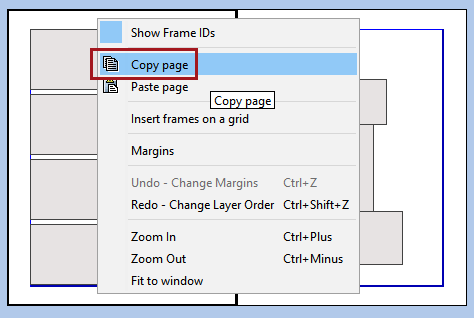
- Right-click the page you want to copy, then select Copy Page.
- Right-click the other page, then select Paste Page.
- A warning will display if you try to paste a left-hand page to a right-hand page and vice versa. Click Paste to continue.

- The copied page, including frames, is pasted.