Important: Syndigo: This functionality has been deprecated and is no longer supported and/or available for new installations. This documentation is retained as a reference only for customers already using the functionality and for whom it remains available in the current state. The functionality will be removed in the future so customers using this should make plans to transition away from their implementation of it.
Before you can display enhanced marketing data from Syndigo in Web UI, you must perform the following one-time setup steps. Details for each of these are provided below.
- Create a setup group type for the Syndigo integration.
- Link the Syndigo integration object types to setup group types.
- Create a Syndigo integration setup group.
For information on related components for use by data stewards, refer to the Data Enrichment Components topic in the Web User Interfaces documentation.
Prerequisites
Only users with the Maintain Setup Entity privilege can set up Syndigo integrations. For detailed information, refer to the Setup Actions and Error Descriptions section in the System Setup documentation here.
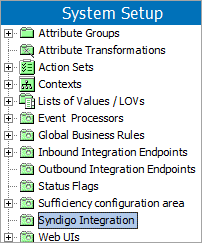
Review your System Setup tab to determine if a Syndigo integration node already exists. The name of the node on your system is not required to match the one in the image below.
Once the setup has been completed, the steps in this section are only needed if additional levels of organization are desired.
Create Setup Group Type for Syndigo Integrations
A Syndigo integration setup group type defines the structure and allowed locations of a Syndigo integration.
- Go to System Setup, expand Object Types & Structures, and select Setup Group type root.
- Right-click Setup Group type root, and the New Object Type option will display.
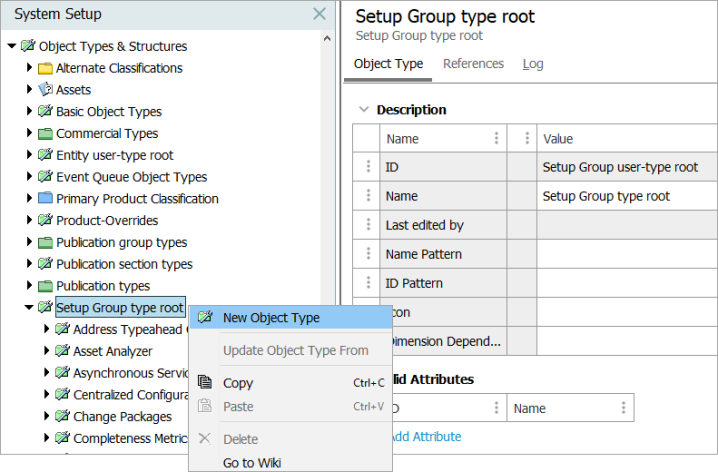
- Click New Object Type, and the Create Object Type dialog will display.

- Enter an ID.
- Enter a Name.
- Select any required Dimension Dependency.
- Click Create.
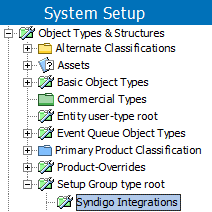
The Create Object Type dialog closes and the newly created group type for the Syndigo integrations will display beneath the Setup Group type root.
Link Syndigo Integrations Type to Setup Group Types
Linking determines the object types that can be displayed at each level of a hierarchy.
The Basic Object Type 'Syndigo Integration Type' is created by activating the 'syndigo' add-on component. For on-premises systems, instructions for installing components can be found in the 'SPOT Program' topic in the System Administration documentation found in 'Downloadable Documentation'. For Stibo Systems SaaS environments, contact Stibo Systems Support.
Important: By default, the Setup Group type root is listed as the parent. Optionally add the newly created setup group type as a parent of itself so that additional Syndigo integration group types can be added below the main level.
- Go to System Setup and expand Object Types & Structures and expand Basic Object Types.
- Select your Syndigo integrations object type to display the editor.
- Click the References tab.
- Open the Parents flipper.
- Click the Add Parent link, and the Select New Parent dialog will display.
- Browse or search to select the relevant setup group type.
- Click the Select button.
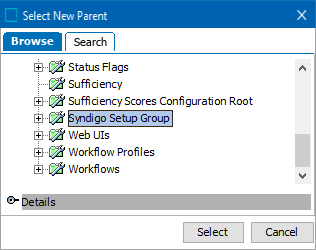
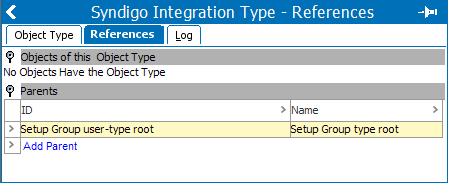
The dialog closes and the newly created setup group type (i.e., SyndigoSetupGroup) is listed as a parent along with the Setup group user-type root.

Create a Syndigo Integration Setup Group Root
Creating a setup group root allows your Syndigo integration setup group type to appear as a node in the System Setup hierarchy.
- Go to System Setup and select any object in the hierarchy.
- On the menu bar, select the Maintain menu, point to Insert and then click Setup Group Root to display the Create Setup Group Root dialog.
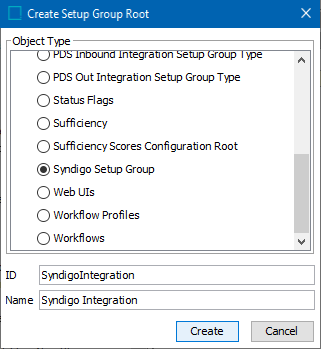
- Select your Syndigo integration object type.
- Enter an ID.
- Enter a Name.
- Click Create.
The setup group is created and appears as a node in the System Setup hierarchy.
The Syndigo Integration Type object is a setup entity.
Setup entity definitions can be exported as comments and submitted to an external source control system for comparison purposes. For details, refer to the Configuration Management documentation.