Conditions can perform validation in Web UI while the user enters data, and notify immediately when a condition is not fulfilled. For example, to ensure that the attribute 'Sell Pack Depth' should be greater than or equal to 10 cm, a condition is created to evaluate the value entered and added to the appropriate screens. When the value is less than 10 cm, a warning is displayed as the user exists the field.
Conditions can also be used to filter Lists of Values. This function makes it impossible to select a value that violates the condition.
Configuring a Condition
- Create a business condition in workbench.
- Log in to Web UI, and click the gear wheel icon (
 ) to enter design mode.
 - Add the condition on the appropriate level (further defined below):
- On the main screen level, the condition is checked on all screens in Web UI.
- On the individual screen level, the condition is only checked on the current screen.
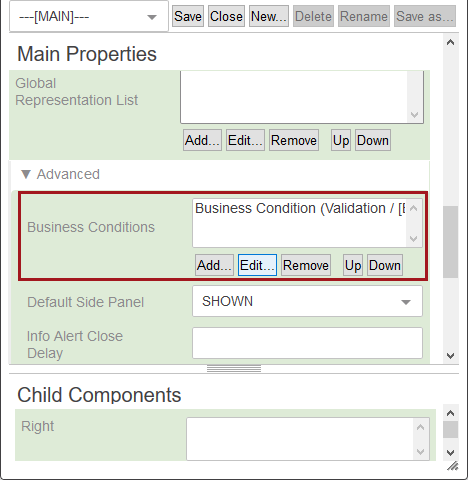
Main Screen Level
The following example shows the configuration of the Web UI screen called MAIN. This allows you to add, edit, remove, and reorder conditions for all screens. See the Business Condition Properties section below for details on adding or editing business conditions.
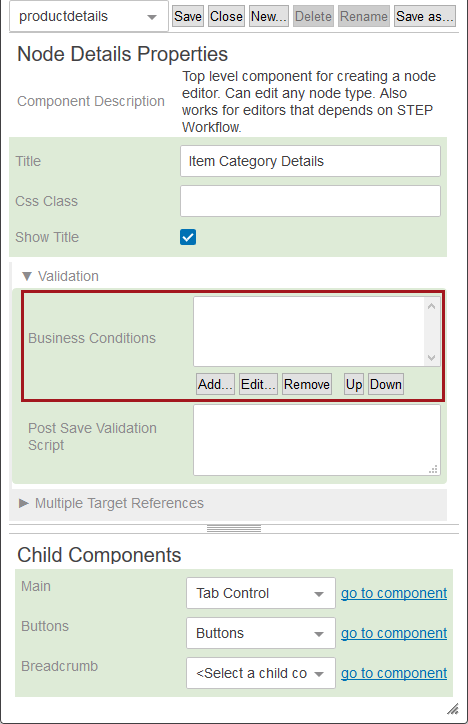
Individual Screen Level
The following example shows the configuration of a Web UI screen called ProductDetails. This allows you to add, edit, remove, and reorder conditions for this screen. See the Business Condition Properties section below for details on adding or editing business conditions.
Business Condition Properties
Click the Add or Edit button on the Business Conditions parameter to display the following configuration dialog.
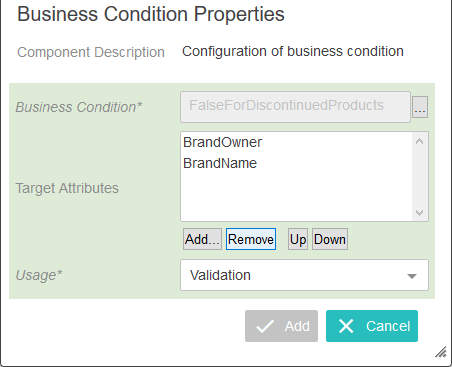
Set the following options:
- Business Condition: Click the ellipsis button (
 ) to display the Select Nodes dialog, which includes all business conditions available in STEP. Select the business condition to evaluate on the screen.
Note: JavaScript conditions that use the current object bind cannot be used in Web UI.
- Target Attributes: Add the attributes that should be marked as wrong if the condition is not met.
- Usage: Select the desired usage from the following options:
- LOVFilter filters illegal values out when the target attribute is a list of values attribute.
- Validation marks the target attribute as 'wrong' when the condition fails.