Rich Text Editor
Rich text editing allows users to enter and edit text within a web browser. Attribute value text-editing options include adding character formatting plus options for adding hyperlinks, footnotes, and inline references. Using a Rich Text Editor (RTE) when editing attribute values within a Node Editor eliminates the need for users to be familiar with any special coding and web markup languages such as XML. Another benefit is that users can see what the text will look like immediately within the editor window.
Rich text editing is available for attributes with Text, Text (exclude tags), Numeric Text, and Numeric Text (exclude tags) validation base types. The Rich Text Editor icon displays when RTE is enabled via the Enable Tag Conversion parameter within the Attribute Value properties and the Enable Tag Conversion parameter or Rich Text Editing parameter within the Attribute Value Group component properties.
Rich Text Editor Icon
Users can identify when an attribute value field is using RTE based on the icon in the right side of the field. Click the edit icon to display the 'Format text' dialog.

Once an attribute field has any formatting done to the text, it becomes locked (meaning that you cannot just click in the field to edit it). Clicking the RTE icon is the only way to make additional edits to the text.
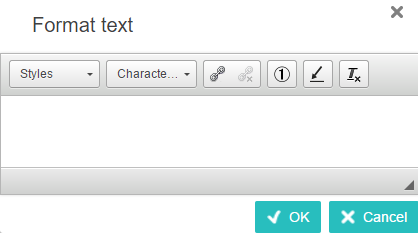
Format Text Options
The options shown in the 'Format text' dialog, and their descriptions, are listed below. The text format options are important since they will apply, if applicable, when fed into other systems (for example, when used as website text or within printed publications).
The headings below correspond with the hover text that displays when you mouse over each of the format dropdowns or icons at the top of the 'Format text' dialog.
Formatting Styles
To apply a style, you must first select the text to apply it to. Then make a selection via the Styles dropdown.
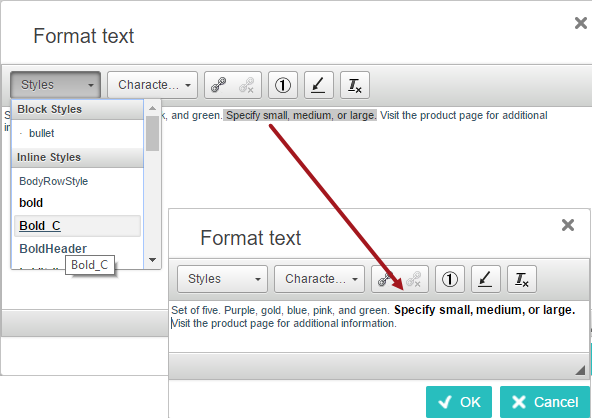
Note that a set of style tags may already exist within your STEP system. Additional styles can be created in the STEP Workbench and will then be available in the Styles dropdown list. For more information on style tags, see the Tags section of the System Setup / Super User Guide documentation
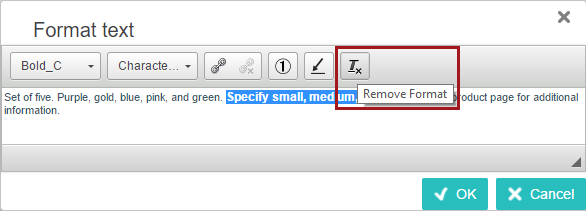
Remove Format
To delete a style and go back to the default text (no style), select the specific word or phrase that has a style applied to it, then click the 'Remove Format' icon. To remove character styles from the entire body of text, select it all before removing the formatting.
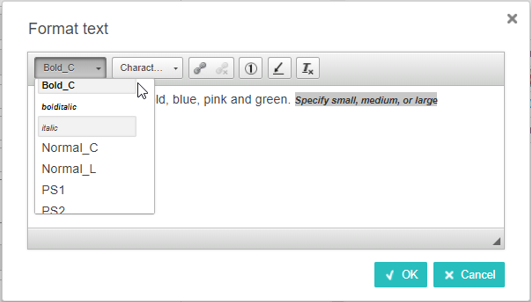
Note: An applied style can be removed by selecting the word or phrase and clicking on the style that has been applied (applied style will be highlighted style italic as shown in below screenshot).
Character tag
To insert a character tag, place your cursor within the text exactly in the spot where you want the character tag to display. Then, click the Character tag dropdown and make a selection. Character tags appear with a gray background within the 'Format text' dialog and within the attribute value field.
No special icon is required to delete a character tag. Just delete from the text using standard procedures (Delete or Backspace).

Note that some character tags may already exist. Additional character tags can be created in the STEP Workbench and will also be available in the Character tag dropdown list within Web UI. For more information on character tags, see the Tags section of the System Setup / Super User Guide documentation
Add/edit Hyperlink
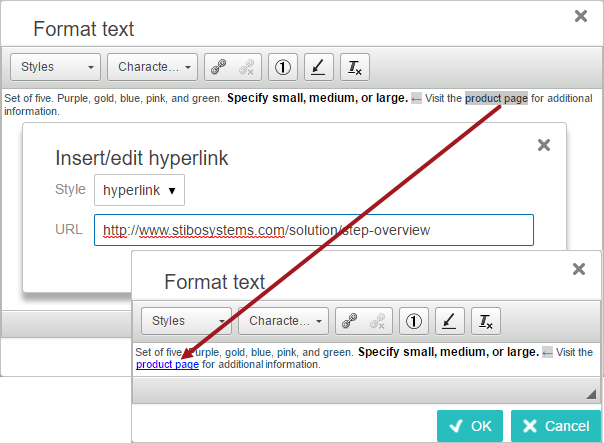
Hyperlinks are added to text similar to how styles are applied. Select the text you want to make into a hyperlink, type the URL in the 'Insert / edit hyperlink' dialog, and click OK.
To edit the hyperlink, place your cursor anywhere within the hyperlinked text, and click the 'Add/edit' hyperlink icon. Make any changes within the URL field and click OK.
If the hyperlink tag does not already exist, a hyperlink tag (or tags) can be created and formatting set up in the workbench and will be available in the Insert/edit hyperlink > Style dropdown list within Web UI. For more information on hyperlink tags, see the Tags section of the System Setup / Super User Guide documentation
End Hyperlink
The 'End Hyperlink' icon activates when you click anywhere within hyperlinked text. Click the icon to remove the applicable hyperlink.

Add/edit Footnote
To insert a footnote into the text, place your cursor where you want the footnote inserted and click the 'Add/edit Footnote' icon.
If the footnote tag does not already exist, one can be created in the workbench and will be available in the Insert/Edit Footnote > Style dropdown list within Web UI. For more information on how to add a footnote tag, see the Footnotes section of the System Setup / Super User Guide documentation
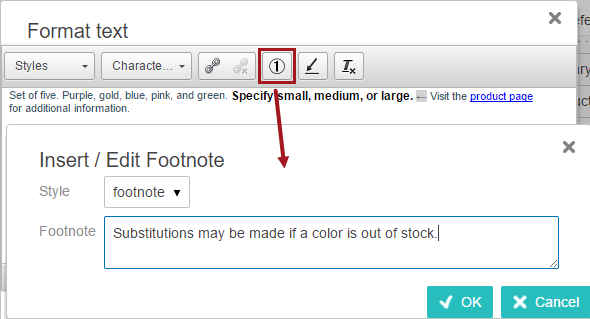
To edit a footnote, select the footnote icon that is within the text body, taking care to highlight only the icon. Click the 'Add/edit Footnote' icon, make any changes within the 'Insert/Edit Footnote' dialog that displays, and then click OK.
No special icon is required to delete a footnote. Just delete from the text using standard procedures (Delete or Backspace).
Add/edit Inline Reference
Using the RTE, inline references can be embedded in attribute values using Web UI. For an introduction to inline references, see the Inline References to Attribute Values section of the Getting Started / User Guide documentation
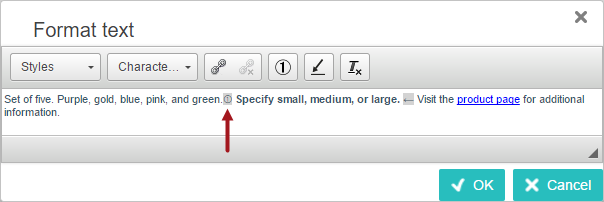
Place your cursor where you want the inline reference to go—or select the text you want to replace—and click the 'Add/edit Inline Reference' icon.
- For the Object field, click the Node Picker icon (
 ) to open the 'Select Node(s)' dialog. Search or browse for the relevant object that holds the attribute value to be referred to, and then click OK.
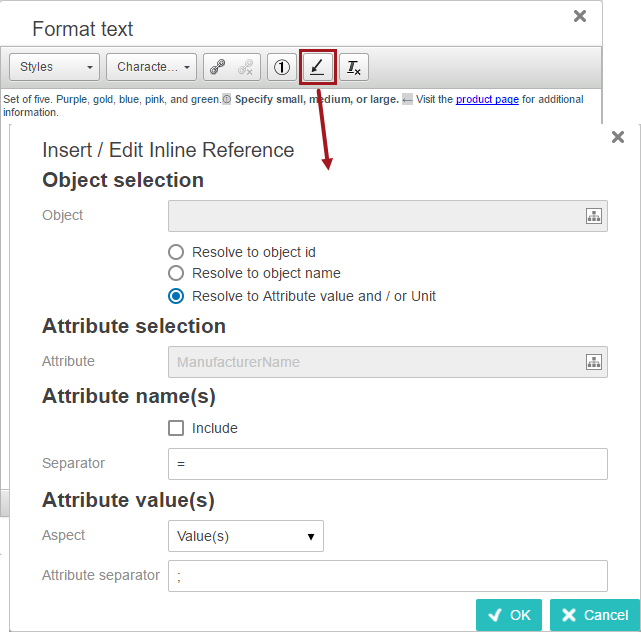
 - Choose 'Resolve to object ID,' 'Resolve to object name,' or 'Resolve to Attribute value and / or Unit' by clicking the corresponding radio button.
Note: When 'Resolve to Attribute value and / or Unit' is selected, then the other selections within the 'Insert / Edit Inline References' dialog activate and the remaining steps outlined below become valid. If selecting an alternate radio button, then click OK and your steps are complete.
- For the Attribute selection > Attribute field, click the Node Picker icon to open the 'Select Node(s)' dialog to search and browse for the relevant attribute (or attribute group) for the inline reference, and then click OK. (Only one attribute or attribute group may be selected.)
- For Attribute name(s), check the 'Include' check box if the name of the attribute(s) should be included in the inline reference. If including the name, then go on to Step 5. If not, skip to Step 6.
- In the Separator field, type a Separator to be used between the name and value of the attribute. An equals sign (=) is the default.
- Under Attribute Value(s), use the Aspect dropdown to select the relevant value to include for the attribute. You can select between Value(s) and Unit(s), Value(s), and Unit(s).
- The Attribute Separator field is only available if a multi-valued attribute has been selected. If applicable, in the Attribute Separator field, type a separator to specify how values should be separated. A semicolon (;) is the default separator.
- Click OK.
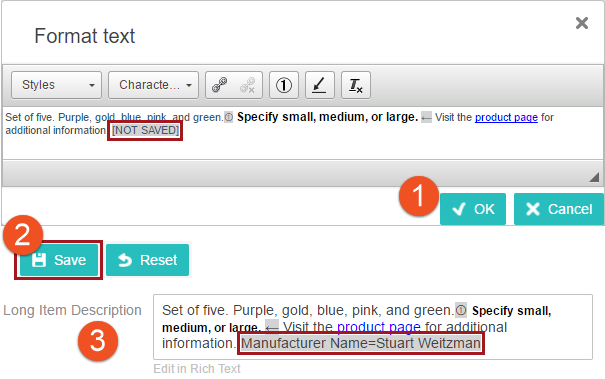
- Once you click OK, the 'Format text' editor will show the inline reference as '[NOT SAVED].' You will need to click OK on the text editor and then save the data before it will display in the value field. The attribute must be valid for the object type, otherwise the inline reference disappears from the value field upon save.
Editing an Inline Reference
Editing an inline reference works the same way as editing a footnote. Select the inline reference text within the editor, taking care to highlight only the applicable text. Click the 'Add/edit Inline Reference' icon, make any changes within the 'Insert/Edit Inline Reference' dialog, and then click OK.

Next, click OK on the text editor dialog, and then click Save (or Save & Approve) on the screen that you are one.
For more information about the attribute components in Web UI, see the Attribute Value Component topic
Important: After all changes have been made within the text editor, you must click OK to save all of the changes. Clicking 'Cancel' or navigating away from the page means that the changes made in the RTE will not be saved or displayed.
Note: When multivalued attribute value is called via Inline Reference in Attribute Value component or Attribute Value Group Component, then multivalued attribute values are displayed with a multi-separator tag with rendering as it works in workbench.

If you experience issues while using the Rich Text Editor in Internet Explorer, use an alternate browser such as Chrome, Firefox, or Safari.