OIEP - Configuration Flipper
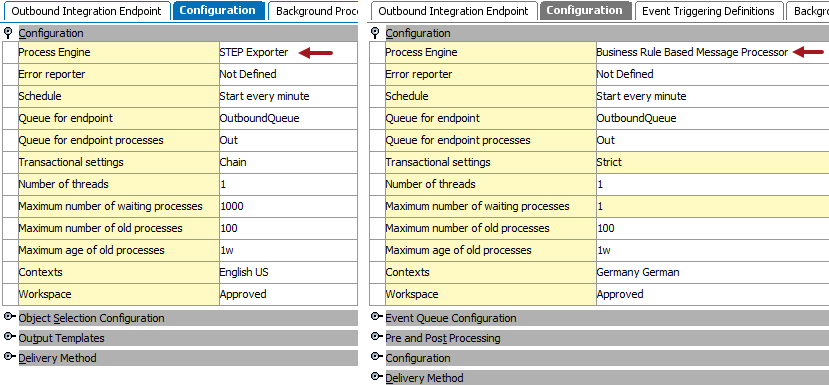
The following flippers are available when the STEP Exporter processor or the Business Rule Based Message processor is selected for an OIEP. For both processors, the Configuration flipper includes the same parameters for both Event-Based and Select Objects endpoints. Each parameter is described below.
Note: When a GDSN processor or Business Rule Based Message Processor is selected for the Process Engine parameter, different or additional flippers are displayed.
Process Engine
STEP Exporter is the only processing engine option on a standard STEP system. If you need a customized processing engine, contact your Stibo Systems account manager or partner manager.
The processing engine is originally selected in the wizard when configuring the endpoint. For more information, see OIEP - Event-Based - Configure Endpoint documentation (here) or OIEP - Select Objects - Configure Endpoint documentation (here).
Error Reporter
The 'Error reporter' parameter is not included in the wizard, but it can be configured to send an error report email if a background process fails. The email contains information about the failed endpoint, including the background process, failed file, failing process step, cause of the error, and a copy of the file that triggered the error. A standard STEP system (without custom extension) includes only the 'Send Error Report' option.
For information on configuring email from STEP, see the Email from STEP topic in the Resource Materials of online help here.
By default, error reports are sent when either errors or warnings are encountered. To disable error reports when only warnings are reported, update the sharedconfig.properties file on the app server to include the following property:
Integration.Endpoint.SendEmailErrorReportOnWarning=false
Configure the Error Report Email
- On the relevant OIEP > Configuration tab > Configuration flipper > click into the Error Report parameter to display the ellipsis button (
 ).
). - Click the ellipsis button () to display the Select Error Reporter dialog.
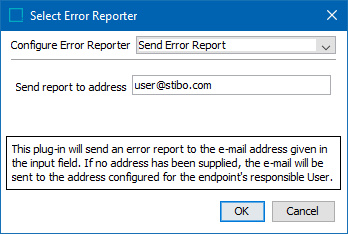
- In Configure Error Reporter field, select Send Error Report.
- In Send report to address field, enter one or more email addresses for the error report recipient(s). Use a semicolon-separated list to add more than one email address.
Note: If the error report is larger than the default maximum, 10 MB, the report will not be attached to the auto-generated email sent to the configured email address(es). If the default maximum is not suitable, admin users can set a property in the sharedconfig.properties file and adjust the maximum file size. The property users can add and configure to adjust this maximum is Integration.Endpoint.ErrorFileSizeLimit=[X], with '[X]' being the numeric characters indicating the allowable attachment file size, in MB, for the error report. Error reports larger than this configured maximum will not be attached to the email.
Note: If no email address is entered, the error report will be sent to the email address of the user who created the integration endpoint. If no email is defined for this user, or if no mail server is defined in the configuration, the error report will be written to the failed Background Process Execution Log.
Schedule
The schedule parameter is not included in the wizard, but it can be configured to repeatedly run the OIEP. For Select Objects OIEPs, the background processes runs as scheduled, regardless of changes to the data. For Event-Based OIEPs, the background process runs as scheduled but only when events are available for processing.
Important: Consider the time zone of the application server compared to that of the workbench (the client) where the schedule is created or viewed. When scheduling a job, the local time zone is displayed in the workbench, but the time zone of the server is used to run the background process. Although displayed, the time zone of the client is not included in the instruction to the server to run the job. This can cause confusion about when the job will run since the scheduled time is not automatically converted to accommodate potential differences in time zones.
- On the relevant OIEP > Configuration tab > Configuration flipper > click into the Schedule parameter to display the ellipsis button ().
- Click the ellipsis button (), and then select one of the following options:
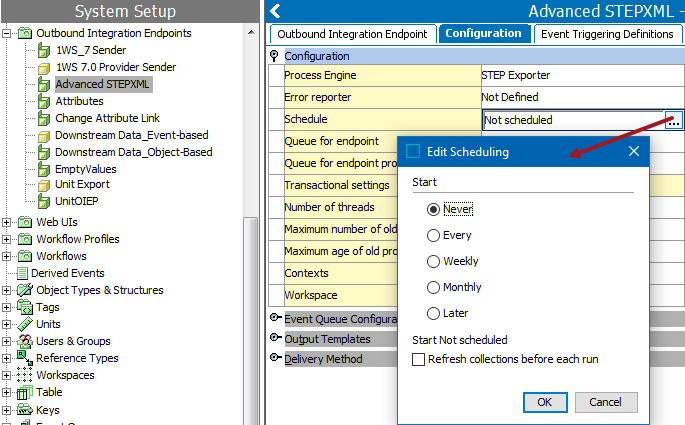
- Never - invoke the endpoint manually, no additional parameters are required, and no schedule is applied. This is the default setting and should be used while testing your endpoint.
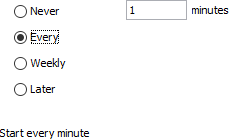
- Every - automatically run the endpoint repeatedly, every selected number of minutes. One (1) minute is the shortest interval allowed and is closest to real time. Enter the number of minutes in the text box. The selection is summarized at the bottom of the dialog.
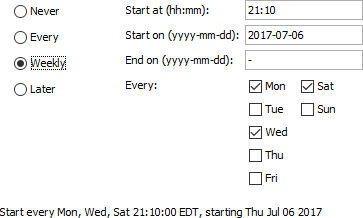
- Weekly - automatically run the endpoint repeatedly, based on the selected time, start and end dates, and days of the week. Use this option if a daily schedule is needed. The 'Start at' parameter determines the time of day that the endpoint will run. The 'Start on' parameter determines the date the endpoint will first run, while the 'End on' parameter determines the date of the endpoint's final run. The 'Every' checkboxes determine the days of the week when the endpoint will run. The selections are summarized at the bottom of the dialog.
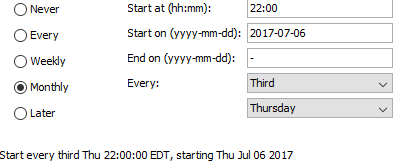
- Monthly - automatically run the endpoint repeatedly, once a month, based on the selected time, start and end dates, week of the month, and day of the week. The 'Start at' parameter determines the time of day that the endpoint will run. The 'Start on' parameter determines the date the endpoint will first run, while the 'End on' parameter determines the date of the endpoint's final run. The 'Every' dropdown parameter selections for the week of the month and the day of the week determine when the endpoint will run. The selections are summarized at the bottom of the dialog.
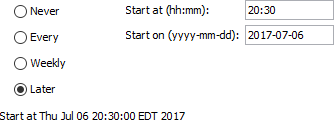
- Later - automatically run the endpoint only once, at the time and date specified. The selections are summarized at the bottom of the dialog.
- Select Refresh collections before each run if the outbound integration endpoint contains collections that should be automatically refreshed before each run.
Queue for Endpoint
'Queue for endpoint' is the name for the queue that is used by the OIEP Background Process to poll the endpoint. The background process handles the actual export. The first time you activate the endpoint, a queue with the specified name is created if it does not already exist. Typically, high-priority integrations and integrations with long-running processes should have their own queue for endpoint processes.
If in doubt about how to populate this parameter, create a new queue for the OIEP, for example, including the OIEP ID in the name.
Queue for Endpoint Processes
STEP allows you to define multiple queues. 'Queue for endpoint processes' is the name for the queue that is used by the background processes started by the endpoint to handle the actual export. The queue is automatically created on the system if it does not already exist. High priority integrations or integrations with long-running processes should typically have their own queue, for example, including the ID in the queue name.
Transactional Settings
'Transactional Settings' can be used for 'Select Objects' OIEPs, but the 'Strict' mode is required for 'Event-Based' OIEPs. For detail, see the Integration Endpoint Transactional Settings topic here.
Number of Threads
Although 'Number of threads' is available on the Configuration tab for both static and event-based OIEPs, the setting only affects event-based processes. The default thread setting is one (1), in which case the endpoint produces a single message at a time, with all events in the batch processed serially. Increasing the thread number results in each batch size being divided by the thread number so that the contents of a batch can be processed in parallel. For more information, see Event-Based OIEP Multithreading Support topic here.
Maximum Number of Waiting Processes
'Maximum number of waiting processes' specifies the maximum number background processes an endpoint can start to handle messages.
By default, the maximum number of waiting processes is set to 1000 for 'Transactional Settings' of Chain or None. When the 'Transactional Settings' parameter is Strict, this value must be 1. Changing an endpoint to have a 'Transactional Settings' of Strict updates this parameter to 1.
Maximum Number of Old Processes
'Maximum number of old processes' specifies the maximum number of ended processes the system retains. This auto-cleanup option deletes succeeded and ended processes started by the OIEP when the limitation is exceeded. The oldest processes are deleted first.
By default, the maximum number of old processes is set to 1000.
Maximum Age of Old Processes
'Maximum age of old processes' specifies the maximum age of succeeded and ended processes. Use the following case-sensitive notation: y = years, M = months, w = weeks, d = days, h=hours, m = minutes, and s = seconds.
By default, the maximum age of old processes is set to one year.
Contexts
When exporting data in the STEPXML format or when using a custom cross-context enabled format, one file can contain data from multiple contexts. For other formats, the standard context splitter post-processor should be used. Using this option, separate files are generated for the selected contexts. For more information, see the OIEP - Post-Processor - Context Splitter documentation here.
By default, the context is set to the one which is currently being used while creating the OIEP.
Changing Selected Contexts
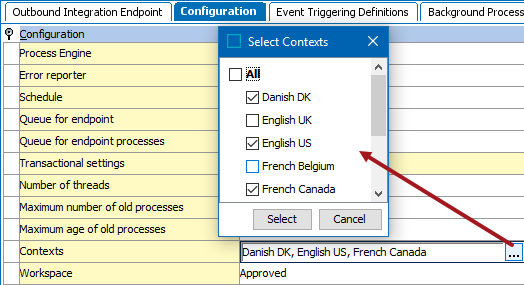
- Click the Contexts field to display an ellipsis button ().
- Click the ellipsis button () to display the ‘Select Contexts’ dialog.
- Choose the desired contexts and click the Select button to save.
Workspace
Workspace defines which data is used for the export. Common setup is to use the Approved workspace, except when you need to generate events for objects before they are approved, for example, during import or from a workflow.
By default, the Approved workspace is selected.