Decision Tables
The Decision Table match criterion is a flexible and robust method of defining a matching algorithm. Like the other available criteria, a decision table can compare two objects and indicate to what degree they are similar. The algorithm is defined using various comparisons between these two objects and a set of rules governing the outcome.
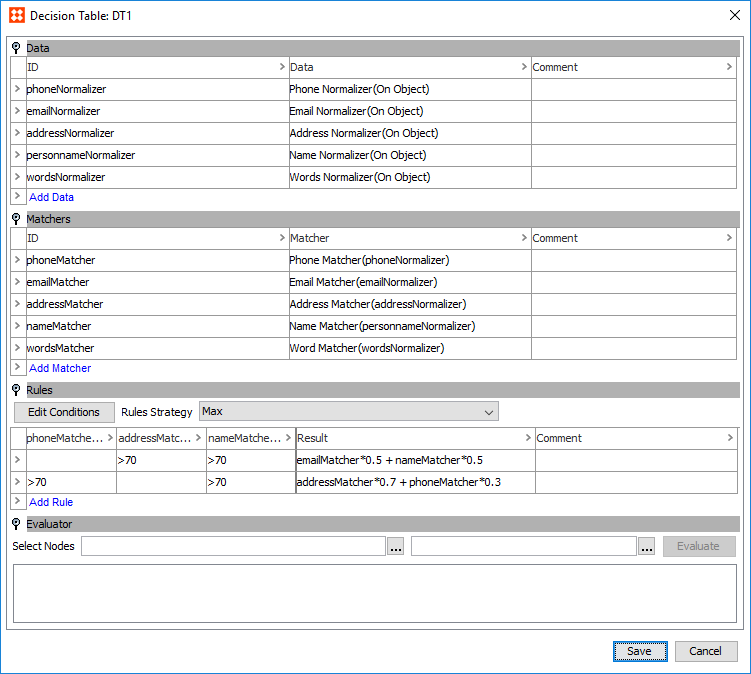
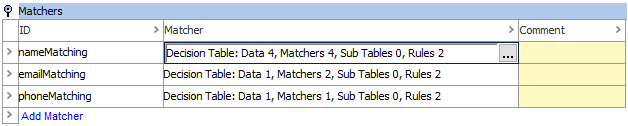
In the example table below, separate comparisons are being handled simultaneously via a single decision table.

In the above case, the names, phone numbers, and addresses of customers are compared using the same table. The rows in this table represent different 'rules', and based on the 'Max' Rules Strategy, are evaluated simultaneously. In this example, the first rule states that if both 'nameMatcher' and 'addressMatcher' return true (meaning, in this case, that they are each at least greater than a 70% match) their individual match scores should be plugged into the corresponding result string (found under the Result column). According to the logic of this result string, the resulting score is calculated by combing 50% of the 'nameMatcher' score with 50% of the 'emailMatcher' score. If, for example, the decision table concluded that the names of two customers were an 80% match and their addresses were a 90% match, the resulting score would be '85' out of a possible total of '100' (80*0.5 + 90*0.5). In other words, these two customers are an 85% match.
If 'nameMatcher' returns true but 'addressMatcher' does not, the decision table would consider the rule invalid and move on to the next rule, and continue to do so until all rules had been evaluated. If no matches are found after running through all of the rules in the table it will result in a '0'.
Decision Table Configuration
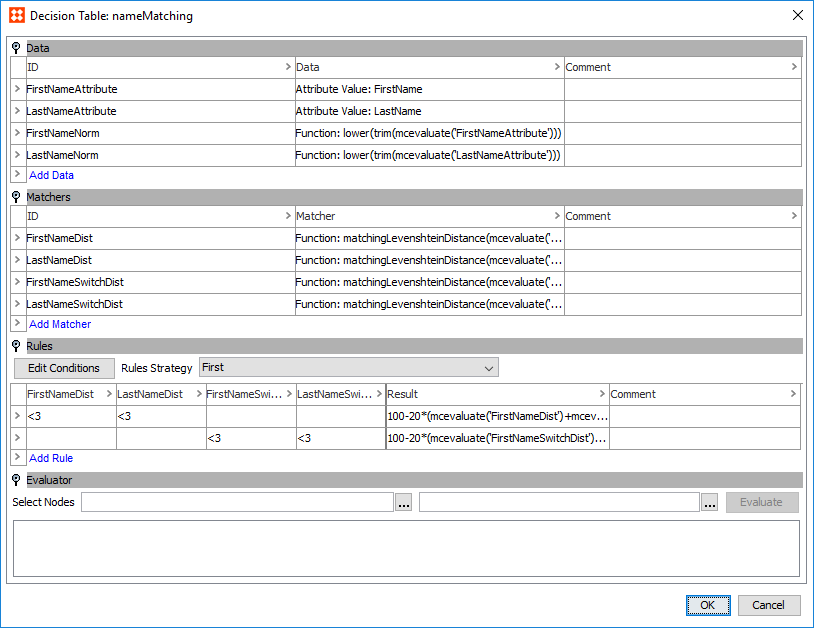
A decision table is separated into four sections: Data, Matchers, Rules, and Evaluator:
- Data: This section contains the data that the decision table matchers evaluate. The data can be represented by a constant expression, or it can be normalized. Additional party data matching-specific normalizers are available but require a license.
- Matchers: This section stores the matching logic that the decision table applies when evaluating the data. The matching logic can be defined via a STEP function or JavaScript function. If required for more complex configurations, sub decision tables can also be configured. Additional party data matching-specific matchers are available, but require a license.
- Rules: This section lists rules the decision table uses to determine whether two objects are a match. The matching logic defined in the 'Matchers' section is applied to this table in the form of conditions. These conditions ultimately determine the validity of each rule's result.
- Evaluator: This section is used to test the decision table against two objects.
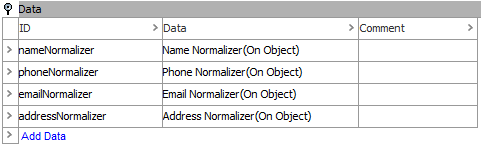
Data
The Data section of a Decision Table stores all data relevant to the algorithm, and lists the data as either normalized values or as constants expressions. The data added to this table is cited by the matching logic under the Matchers flipper.
- To add data to the table, click the Add Data link.
- In the 'Define Data' popup dialog, enter an ID for the data and use the Data Type dropdown(s) to define the data type, then click Add Data.

Important: No two normalizers or constants should have the same ID.
- Populate the Data column of the table:
- For constants, enter a constant expression.
- For normalizers, click the ellipsis button (
 ) to access the configuration. Configuration steps vary depending on the type of normalizer selected. For more information on these normalizers, see the Decision Table Normalizers section of the documentation here.
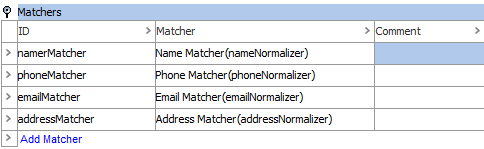
Matchers
Matchers drive the decision table's matching logic by applying different weights, condition thresholds, and other metrics to data provided by the Data section. Sub tables can be configured in this section for especially complex setups.
- To add a matcher to the table, click the Add Matcher link.
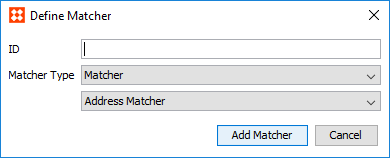
- In the Define Matcher popup dialog, enter an ID for the matcher and use the Matcher Type dropdown(s) to define the match type, then click Add Matcher.
Important: No two matchers should have the same ID.
- Populate the Matcher column of the table:
- For matchers, click the ellipsis button () to access the configuration. Configuration steps vary depending on the type of matcher selected. For more information on these matchers, see the Decision Table Matchers section of the documentation here.
- For sub tables, click the ellipsis button () to access the configuration.
Sub Tables are optional decision tables used for breaking a complex algorithm down into smaller, more manageable parts. A decision table within a decision table, essentially. Proper use of sub tables can greatly improve the clarity of complex matching algorithms, making them much easier to understand and maintain.
A matching algorithm for a customer record can, for example, be split into sub tables for name, address, and phone number, leaving the details of matching these aspects in the sub tables.
To access a sub decision table, click the ellipsis button () in the Matcher column of the desired table.
Rules
Once all of the required matchers have been configured, a set of rules must be established for the decision table to follow. These rules dictate the final outcome of any matches the decision table evaluates.
Each matcher is represented as a condition column on the Rules table, and each row corresponds to a separate rule. Other columns include 'Result,' which determines the resulting score of the matched objects, and 'Comment.' For each condition column, the condition threshold is displayed next to the name of the matcher that was mapped there (provided that matcher has a condition threshold defined).
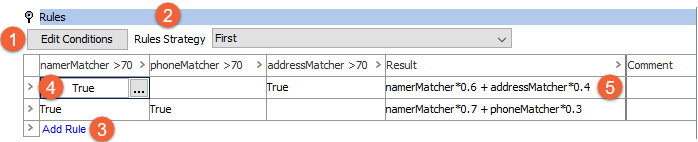
In the above example, the '>70' value displayed in the top row of the three conditions has been provided by the corresponding matcher configurations, each of which states that if it exceeds a condition threshold of '70' it will return 'True.' In some cases, such as when using a more function-based decision table, the threshold will not be established in the matcher configuration and must instead be defined in the table cell in place of 'True.' For more information, see the Decision Table Matchers section of the documentation here.
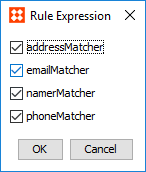
- Edit Conditions: Matchers can be added / removed from the Rules table by clicking the Edit Conditions button, and selecting the desired matchers from the 'Rule Expression' popup dialog.
- Rules Strategy: The Rules Strategy determines how the rules are applied when generating a match result. Two options are available from the dropdown: 'First' and 'Max.' Selecting 'First' tells the decision table to look at the rules from top to bottom and base the results on the first rule in which all conditions return 'True.' Alternatively, selecting 'Max' tells the decision table to evaluate all conditions that return 'True' and combine their maximum results.
- Add Rule: Click the Add Rule link in order to add a row to the table.
- Rule Condition: If a particular condition should be included in a rule, click the ellipsis button () and add a comparator via the 'Edit Value' popup dialog.
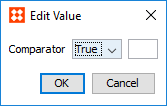
Alternatively, the comparator can be entered directly into the cell.
If the condition threshold is defined in the matcher configuration, select 'True.' If it is not, manually enter the condition threshold.
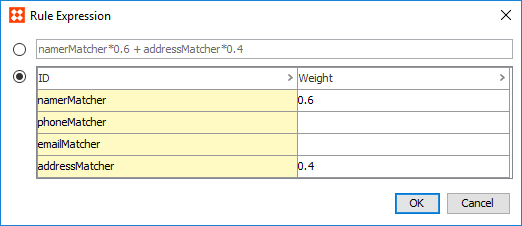
- Rule Result: Each decision table rule requires an expression that drives the logic of the resulting score. In most cases, this is as simple as assigning weights to all conditions relevant to the rule. To create an expression, enter the expression directly into the cell.
Alternatively, click the ellipsis button () to access the 'Rule Expression' dialog and click the table radio button. Enter the desired weights for the relevant conditions and click OK. This will automatically generate the relevant expression.
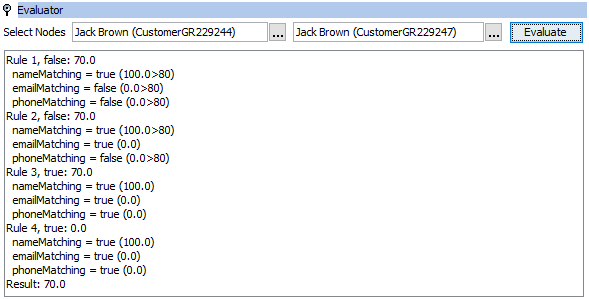
Evaluator
The evaluator is a tool for diagnosing unexpected results that may be encountered. In the evaluator, select two objects that you want to compare. It reports the results and provides detailed information about how the result was obtained. If additional details are required, the evaluators of the sub components can be used.